It was a Tuesday night, the kind where the fridge is a revolving door of mystery and the only thing on my mind was the one thing I could not resist: pretzels. I had just pulled a bag of salty, chewy pretzels from the pantry, and the moment the scent hit my nose, I knew I was about to create something unforgettable. I grabbed the peanut butter from the cupboard, the honey that had been sitting there like a golden secret, and a handful of powdered sugar, and I decided to mash them together, to marry sweet and salty into one bite‑size marvel. The kitchen was a circus of sizzling pans and the occasional clink of a spoon, but I was already humming a tune about how this would become my signature snack. The air was thick with anticipation, the sound of a whisk dancing, and the faint hum of the oven preheating to the perfect temperature. I could almost taste the first bite, the crunch of pretzel, the velvety peanut butter melting into a sweet, buttery glaze.
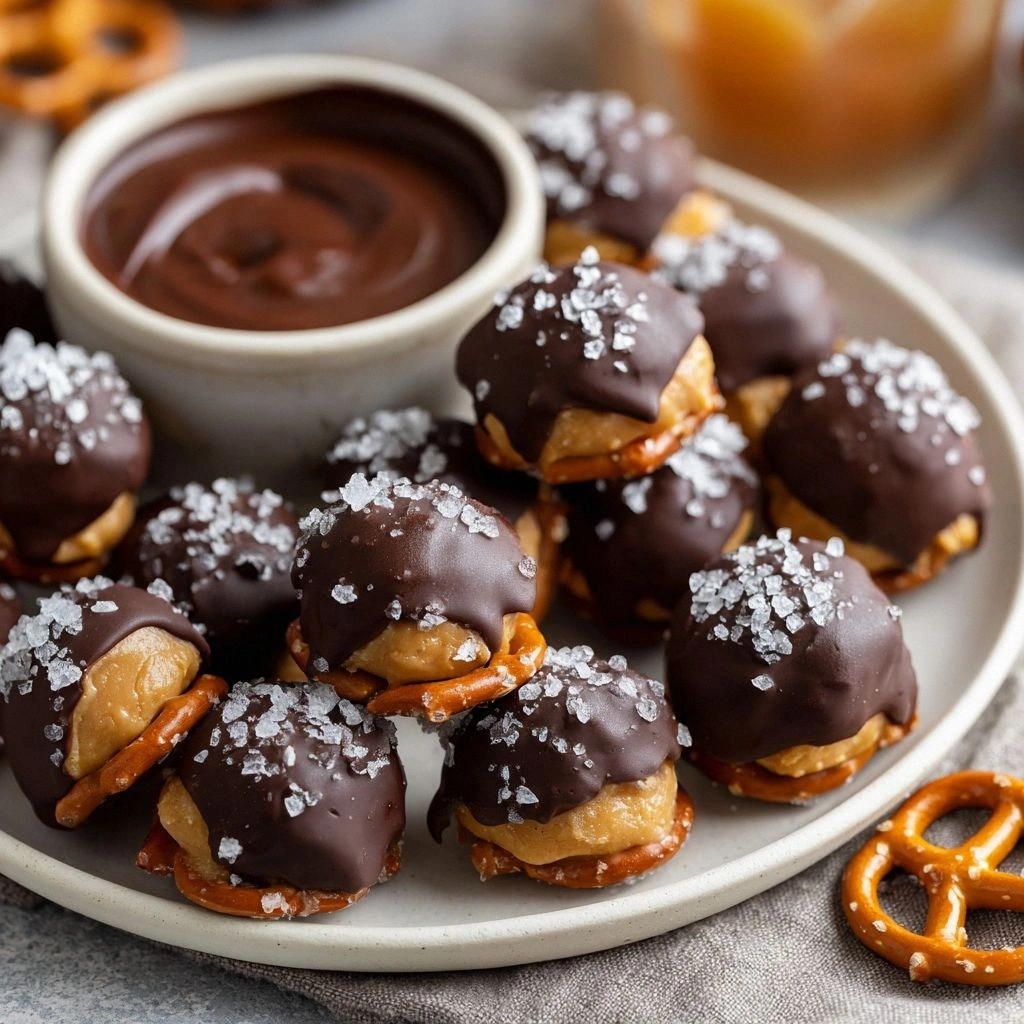
Picture this: a handful of pretzels, each coated in a glossy peanut butter glaze that shimmers like a sunrise on a glass surface, then dusted with a light sprinkle of sea salt that adds a subtle pop of flavor. The contrast between the sweet honey glaze and the salty crunch is like a duet, where each note plays off the other. I dare you to taste this and not go back for seconds. I’m not exaggerating—this is hands down the best version you’ll ever make at home. If you’ve ever struggled with the classic pretzel bite, you’re not alone. I’ve been there, watching my friends devour my batch before I even finished mixing. That moment, that first bite, is pure magic.
What makes this version stand out isn’t just the combination of flavors; it’s the technique that turns a simple snack into an experience. I use a low‑heat glaze that ensures the peanut butter doesn’t burn, preserving its nutty aroma. The pretzels are toasted just enough to keep their crunch, but not so much that they lose their signature chew. I add a dash of cinnamon for warmth, a hint that turns the snack into a comforting treat. The final touch is a quick drizzle of melted chocolate that gives it a glossy finish. It’s not just a snack; it’s a conversation starter, a crowd‑pleaser, and a recipe that will make your kitchen smell like a bakery. Picture yourself pulling this out of the oven, the whole kitchen smelling incredible, and everyone’s eyes lighting up at the sight of those glossy, salty‑sweet bites.
Okay, ready for the game‑changer? I’ll walk you through every single step, from the first whisk to the final drizzle. By the end, you’ll wonder how you ever made it any other way. Let’s dive into the world of Peanut Butter Pretzel Bites: S.
What Makes This Version Stand Out
- Flavor Fusion: The marriage of creamy peanut butter, golden honey, and sea salt creates a taste profile that feels both familiar and adventurous. Each bite offers a sweet burst followed by a savory finish that lingers on the palate.
- Crisp Texture: The pretzels retain their signature crunch while the glaze adds a subtle chewiness. This duality makes every bite a delightful contrast.
- Simplicity: With only a handful of ingredients, the recipe is quick to assemble, making it perfect for last‑minute snack needs or spontaneous party treats.
- Visual Appeal: The glossy glaze and specks of sea salt give the bites a professional, Instagram‑ready finish that elevates a simple snack into a showstopper.
- Make‑ahead Friendly: Once glazed, the bites can be stored in an airtight container for up to a week, allowing you to prep in advance and serve on demand.
- Versatile Flavor Profile: The base is neutral enough to pair with chocolate, caramel, or even a spicy kick, making it a canvas for creative variations.
- Kid‑Friendly: The sweet‑salty combination is a hit with children, while the nutty richness satisfies adults’ cravings for a more indulgent treat.
- Budget‑Friendly: Using pantry staples keeps costs low, yet the end result feels luxurious and sophisticated.
Alright, let's break down exactly what goes into this masterpiece…
Inside the Ingredient List
The Flavor Base
Creamy peanut butter is the heart of this recipe. It provides a rich, nutty foundation that balances the sweet honey. Using a high‑quality, natural peanut butter without added oils ensures a pure flavor profile. If you’re on a low‑sugar diet, opt for a reduced‑sugar version or replace honey with a sugar substitute like maple syrup.
Honey is the sweet counterpoint to the salty pretzels. Its floral notes bring depth and a natural gloss to the glaze. The viscosity of honey also helps the glaze adhere to the pretzels, creating a uniform coating. If you’re allergic to honey or prefer a vegan option, agave nectar or brown rice syrup works as a suitable substitute.
The Texture Crew
Pretzel sticks are the canvas of this snack. They deliver the quintessential crunch that keeps the bites interesting. Choose whole‑grain pretzels for added fiber and a slightly nutty flavor. If you prefer a softer bite, opt for pretzel crumbs rolled into small balls and baked.
Butter is essential for achieving that glossy finish. It melts into the glaze, creating a silky sheen that catches the light. A pinch of sea salt in the butter enhances the overall flavor, ensuring each bite is balanced. For a dairy‑free version, use coconut butter or a vegan butter substitute.
The Unexpected Star
Powdered sugar is the sweetener that gives the glaze its smooth texture. It dissolves quickly, preventing any gritty mouthfeel. A light dusting of cinnamon adds warmth and complexity, turning a simple snack into a comforting treat. If you’re watching your carb intake, consider a low‑carb sweetener like erythritol.
The Final Flourish
A drizzle of melted dark chocolate adds a decadent finish that contrasts with the salty glaze. The chocolate’s bitterness balances the sweetness, creating a multi‑layered flavor profile. If you’re not a chocolate fan, a sprinkle of toasted coconut or crushed nuts can replace the chocolate for a different twist.
Everything's prepped? Good. Let's get into the real action…
The Method — Step by Step
- Preheat the Oven: Set your oven to 325°F (165°C). This low temperature ensures the glaze cooks evenly without scorching the peanut butter. While the oven warms, line a baking sheet with parchment paper to prevent sticking. The gentle heat will give the pretzels a perfect golden edge.
- Prepare the Glaze: In a small saucepan, combine 1 cup creamy peanut butter, 1/4 cup honey, 1/4 cup melted butter, and a pinch of sea salt. Warm the mixture over low heat, stirring constantly until it’s smooth and glossy. If the glaze thickens too much, add a teaspoon of warm water to loosen it. The goal is a pourable consistency that coats the pretzels evenly.
- Coat the Pretzels: Place 2 cups crushed pretzels in a large mixing bowl. Pour the glaze over the pretzels, tossing gently until each piece is fully coated. The pretzels should look like tiny, salty gold nuggets. If you find the glaze clumping, give it a quick stir or add a splash of water.
- Add Sweetness: Sprinkle 1/2 cup powdered sugar and 1 tsp cinnamon over the coated pretzels. Toss again to distribute the sugar evenly. The powdered sugar will help the glaze set, while the cinnamon adds a subtle warmth. Be careful not to over‑toss, or you’ll end up with clumpy sugar.
- Spread on Baking Sheet: Arrange the glazed pretzels in a single layer on the prepared baking sheet. Leave a little space between each bite so they can crisp up. The spacing also allows the glaze to set without pooling.
- Bake: Place the sheet in the preheated oven and bake for 15 minutes. Keep an eye on the glaze; it should start to bubble and turn a light golden brown. The pretzels will develop a crisp exterior while remaining chewy inside. This step is crucial for achieving the perfect crunch.
- Cool and Drizzle: Remove the sheet from the oven and let the bites cool for 5 minutes. While they’re still warm, drizzle 1/4 cup melted dark chocolate over the top. The chocolate will set into a shiny, slightly brittle coating that contrasts with the chewy pretzels.
- Let Set: Allow the chocolate to harden completely before serving. This usually takes about 10 minutes at room temperature. If you’re in a hurry, place the sheet in the refrigerator for 5 minutes to speed up the setting process. The result is a glossy, bite‑size treat that’s ready to devour.
- Serve and Enjoy: Transfer the bites to a serving platter or a reusable container. They’re perfect for parties, game nights, or a midnight snack. The sweet‑salty combo will have everyone reaching for more. Remember, this recipe is best enjoyed fresh, but you can store leftovers for up to a week.
That's it — you did it. But hold on, I've got a few more tricks that'll take this to another level…
Insider Tricks for Flawless Results
The Temperature Rule Nobody Follows
Many people bake these bites at a high temperature, hoping for a crispier finish. However, the glaze actually burns at 375°F, so the key is to keep the oven low and steady. This slow heat allows the peanut butter to melt into the pretzels without caramelizing, preserving its nutty aroma. If you’re using a convection oven, reduce the temperature by 25°F to compensate for the fan’s efficiency.
Why Your Nose Knows Best
When the glaze starts to bubble, that’s the exact moment to add the chocolate drizzle. The aroma at this point signals that the peanut butter has fully incorporated. If you wait too long, the glaze may settle, and the chocolate will spread unevenly. Trust your senses; the smell is your best guide.
The 5-Minute Rest That Changes Everything
After removing the baking sheet from the oven, let the bites rest for five minutes before drizzling the chocolate. This pause allows the glaze to set slightly, preventing it from sliding off. A quick rest also gives the chocolate a chance to coat the surface evenly, creating a smooth finish. Skipping this step can lead to uneven chocolate coverage.
Use a Light Touch with the Chocolate
When drizzling melted chocolate, aim for a thin, even layer rather than a thick blanket. A thin layer will set faster and keep the bite from feeling too heavy. If you prefer a richer chocolate flavor, add a few drops of espresso to the chocolate before drizzling; the espresso will deepen the flavor without adding caffeine.
Keep It Airtight
Store the finished bites in an airtight container at room temperature for up to a week. The airtight seal prevents the pretzels from absorbing moisture, keeping them crisp. If you’re in a humid climate, add a small packet of silica gel to the container to absorb excess moisture.
Serve with a Twist
Pair the bites with a cold glass of milk or a hot cup of coffee for an instant flavor upgrade. The milk’s creaminess balances the salty glaze, while the coffee’s bitterness cuts through the sweetness. For a dessert version, serve them with a scoop of vanilla ice cream.
Creative Twists and Variations
This recipe is a playground. Here are some of my favorite ways to switch things up:
Chocolate‑Covered Pretzel Bites
Replace the honey with a tablespoon of cocoa powder for a deep chocolate flavor. Keep the rest of the glaze the same, then drizzle with melted dark chocolate. The result is a double chocolate treat that satisfies any sweet tooth.
Spicy Peanut Butter Pretzels
Add a pinch of cayenne pepper or a dash of sriracha to the glaze for a fiery kick. The heat balances the sweet glaze, creating a bold, unexpected flavor profile. Perfect for game nights when you want to spice things up.
Nutty Crunch Variation
Fold in 1/4 cup chopped walnuts or almonds before baking. The nuts add texture and a nutty aroma that complements the peanut butter base. They also provide an extra protein boost.
Vegan Version
Swap the dairy butter for coconut butter and use a plant‑based peanut butter. Replace the honey with agave nectar or maple syrup. The result is a cruelty‑free snack that still delivers on flavor.
Low‑Sugar Option
Use an erythritol or stevia blend in place of powdered sugar. Keep the honey amount the same but reduce it slightly to maintain the glaze’s consistency. This version is ideal for those watching their carb intake.
Garnished with Sea Salt Crystals
After the chocolate sets, sprinkle a few flakes of Maldon sea salt on top. The sea salt crystals add a burst of flavor and a satisfying crunch. It’s a simple upgrade that elevates the snack to gourmet status.
Storing and Bringing It Back to Life
Fridge Storage
Place the leftover bites in an airtight container and refrigerate for up to 5 days. The cold environment keeps the glaze from softening, preserving the crunch. Before serving, let them sit at room temperature for 10 minutes to restore their original texture.
Freezer Friendly
For longer storage, freeze the bites in a single layer on a parchment‑lined tray, then transfer them to a freezer bag. They’ll stay good for up to 3 months. Thaw at room temperature for 15 minutes before serving to regain crispness.
Best Reheating Method
Reheat the bites in a preheated 350°F (175°C) oven for 5 minutes. The heat restores the glaze’s sheen without melting the chocolate. A quick splash of water before reheating helps steam the surface, keeping the bites from drying out.