Picture this: a midnight snack attack, the kitchen lights flickering, and the pantry door swinging open like a stage entrance. I was in the middle of a sitcom binge when my craving for something sweet and salty hit the apex of ridiculousness. I pulled out the last bag of Oreos, stared at the empty space where a bowl should be, and thought, “Why not turn these into something that will make my taste buds do a double tap?” The idea was simple yet rebellious: fry them until the edges crackle like a summer campfire and the center melts into a gooey, chocolatey hug. I knew I was about to create a culinary masterpiece that would haunt my friends’ dreams for weeks. Let me walk you through every single step — by the end, you'll wonder how you ever made it any other way.
The first thing that hits you is the unmistakable aroma of chocolate and vanilla, the way it rises from the pan like a sweet perfume. The sound is a gentle hiss, a whisper that says “this is about to get crispy.” As the batter thickens, the texture transitions from silky to a golden crust that feels like a crunchy shell. The taste is a paradox: a sweet, buttery bite followed by a salty crunch that lingers on your tongue. The feeling of holding a warm, golden circle in your hand is like clutching a piece of sunshine.
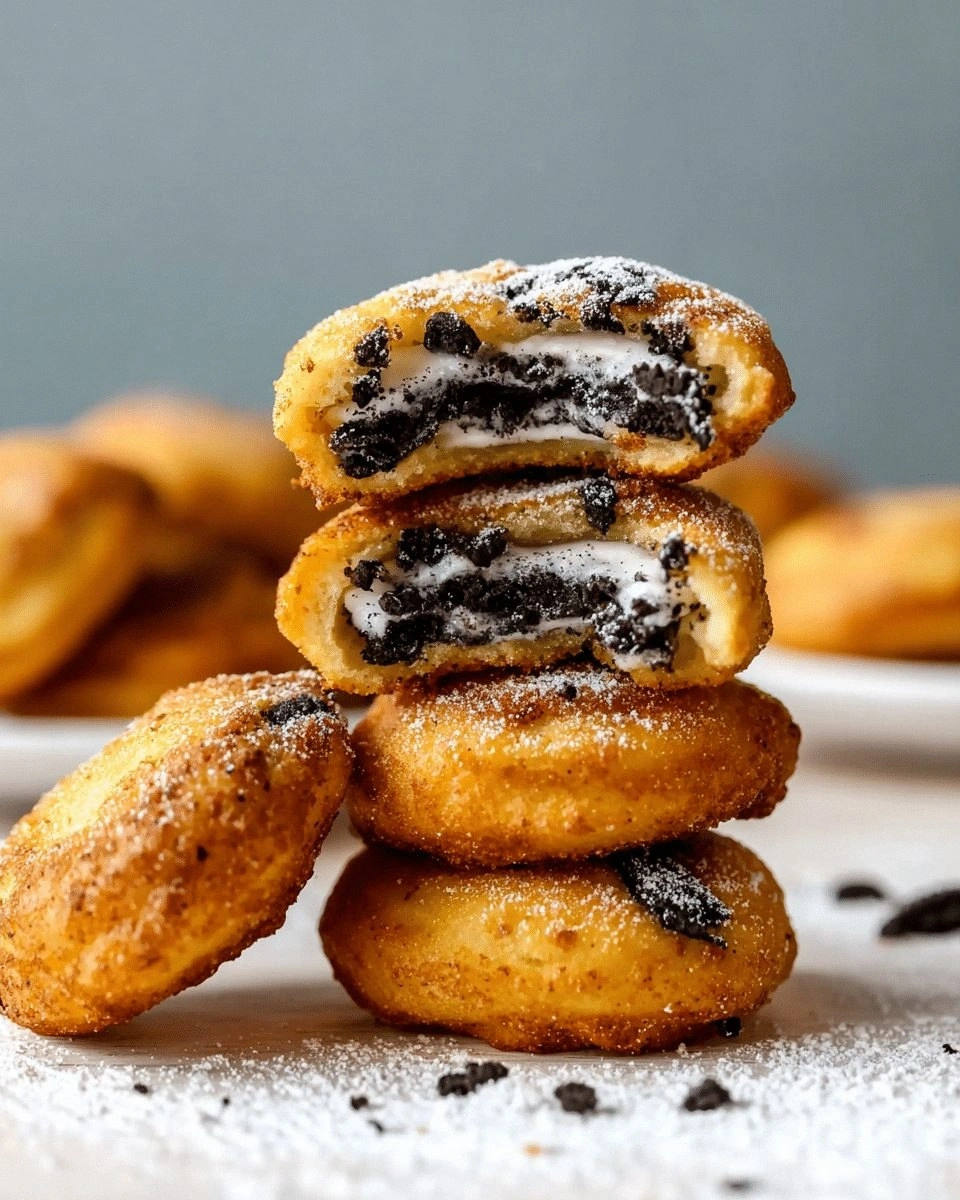
What makes this version stand out is not just the crunch but the harmony of flavors that dance on the palate. The batter, a simple blend of pancake mix, milk, eggs, and oil, creates a light, airy coating that elevates the cookie into a new dimension of texture. The double-fry technique locks in that crispness while preserving the molten chocolate heart. The result is a snack that feels indulgent yet surprisingly balanced, like a perfectly orchestrated symphony of sweet and salty. And the best part? You can make it with pantry staples and a bag of Oreos, so no culinary wizardry is required.
I’ll be honest — I ate half the batch before anyone else got to try it. That moment when the first bite melts in your mouth while the exterior remains crisp is pure magic. Most recipes get this completely wrong, leaving you with soggy or burnt edges. Here’s what actually works: a batter that’s thin enough to coat but thick enough to hold, a high enough oil temperature to seal the exterior, and a quick second fry to finish the job. Picture yourself pulling this out of the pan, the whole kitchen smelling incredible, and the plate shining with golden circles ready to devour.
Okay, ready for the game‑changer? This next part? Pure magic. Stay with me here — this is worth it. I dare you to taste this and not go back for seconds. If you've ever struggled with this, you're not alone — and I've got the fix. Let’s dive in.
What Makes This Version Stand Out
- Flavor: The combination of sweet chocolate and salty crunch is a flavor explosion that will have your friends begging for seconds.
- Texture: The batter creates a crisp exterior that shatters like thin ice, while the inside remains a molten chocolate hug.
- Simplicity: All you need is a bag of Oreos and a box of pancake mix; no elaborate sauces or exotic spices.
- Uniqueness: This recipe uses a pancake batter as a coating, giving a light, airy crunch unlike any other fried cookie.
- Crowd Reaction: At parties, these are the instant hit that turns a quiet gathering into a full‑on snack frenzy.
- Ingredient Quality: Fresh, high‑quality Oreos and a good‑grade pancake mix make the difference between mediocre and mouth‑watering.
- Cooking Method: The double‑frying technique ensures a golden exterior and a perfectly melted center.
- Make‑Ahead Potential: You can prepare the batter ahead of time and freeze the coated Oreos for a quick snack later.
Inside the Ingredient List
The Flavor Base
Oreo Cookies: The star of the show, the Oreo provides the chocolatey, vanilla‑laden bite that melts into a silky center. If you skip it, you lose the signature flavor that makes this recipe unforgettable. For a twist, try using a dark chocolate cookie for a richer taste. When selecting Oreos, look for a fresh bag; stale cookies can result in a dry texture.
Pancake Mix: This pantry staple turns into a batter that coats the cookies with a golden, airy crust. It’s the perfect vehicle for the oil and eggs, creating a light texture that doesn’t overpower the cookie. If you’re lactose intolerant, swap the pancake mix for a dairy‑free version or use a gluten‑free blend for an allergy‑friendly option.
Milk: Milk hydrates the pancake mix and creates the right batter consistency. It also adds a subtle richness that balances the saltiness of the Oreos. If you don’t have milk on hand, water works as a quick substitute, though the flavor will be slightly less creamy.
Eggs: Eggs act as a binder, helping the batter cling to the cookie and creating a silky interior. They also provide structure, ensuring the coating doesn’t crumble during frying. If you’re vegan, use a flaxseed “egg” or a commercial egg replacer to achieve a similar binding effect.
Oil (in batter): The oil in the batter adds a subtle sheen and helps create a crisp exterior. It also prevents the batter from drying out during the frying process. If you want an extra crunchy finish, increase the oil slightly, but keep an eye on the batter’s thickness.
The Texture Crew
Frying Oil: The type of oil you choose affects both flavor and temperature stability. Peanut oil or canola oil are ideal because they have high smoke points and neutral flavors. If you prefer a more aromatic oil, coconut oil gives a subtle tropical hint, but it may impart a slight coconut taste.
Temperature Control: Maintaining the oil at 350°F (175°C) is critical; too low and the coating becomes soggy, too high and the outside burns before the inside melts. Use a candy thermometer or a deep‑fry thermometer for precise control. If you don’t have a thermometer, test the oil by dropping a small spoonful of batter; it should sizzle and rise to the surface within a few seconds.
The Unexpected Star
Optional Toppings: A dusting of powdered sugar or a drizzle of chocolate sauce can elevate the flavor profile. Powdered sugar adds a subtle sweetness that balances the salty crunch, while chocolate sauce turns each bite into a decadent treat. If you’re feeling adventurous, sprinkle crushed sea salt on top for a caramel‑salted twist.
The Final Flourish
Serving Suggestions: Serve hot for maximum gooeyness, or let them cool slightly for a more manageable bite. Pair with a cold glass of milk or a scoop of vanilla ice cream for a classic dessert experience. For a party, arrange them on a platter with a dipping sauce like caramel or peanut butter for extra flair.
The Method — Step by Step
- Heat 2 cups of oil in a heavy‑bottomed pot or deep fryer to 350°F (175°C). The oil should shimmer but not smoke. This temperature is critical; too hot and you’ll get burnt edges, too cool and the coating will be soggy. Keep the oil at a steady temperature with a thermometer or a steady flame.
- In a bowl, whisk together 2 cups pancake mix, 1½ cups milk, 2 eggs, and 4 teaspoons oil until smooth. The batter should be pourable but not watery; add a splash of milk if it’s too thick. A smooth batter ensures a uniform coating and prevents clumping. Let the mixture sit for 5 minutes to allow the mix to hydrate.
- Dip each Oreo into the batter, letting the excess drip back into the bowl. The coating should cling to the cookie without overflowing. Place the coated Oreos on a parchment‑lined tray and let them rest for 30 seconds; this helps the batter set before frying.
- Gently slide the coated Oreos into the hot oil, working in batches to avoid overcrowding. Overcrowding lowers the oil temperature, leading to greasy results. The first few seconds should produce a gentle sizzle and the batter will start to puff and turn golden. Keep an eye on the edges; they should begin to crackle.
- Flip each Oreo after 2 minutes, or when the first side is golden brown. The second side will finish in another 1‑2 minutes. The goal is a deep, even golden crust on both sides. Avoid touching the batter too much, or the coating may crack.
- Remove the fried Oreos with tongs and drain on a paper towel. The paper towel will absorb excess oil, leaving a crisp exterior. Let them rest for 1 minute before serving; this allows the chocolate inside to set slightly and reduces the risk of burns.
- Optional: While still warm, dust with powdered sugar or drizzle melted chocolate over each piece. The sugar adds a sweet crunch, while the chocolate creates a glossy finish. These toppings can be swapped based on your mood or the occasion.
- Serve immediately with a side of vanilla ice cream or a glass of cold milk. The contrast between hot and cold intensifies the flavor experience. If you’re preparing for a party, arrange them on a platter and keep them warm in a low oven (200°F) until serving.
That’s it — you did it. But hold on, I've got a few more tricks that'll take this to another level. Let’s dive into the insider tips that make these fried Oreos flawless every time.
Insider Tricks for Flawless Results
The Temperature Rule Nobody Follows
Many cooks think any high heat will do, but the sweet spot is 350°F (175°C). A thermometer is your best friend; without it, you’re guessing. If the oil is too hot, the coating will burn before the center melts. If it’s too cool, the batter will soak up oil and become greasy.
Why Your Nose Knows Best
A quick sniff test can tell you when the oil is ready. A faint, nutty aroma means it’s near the ideal temperature. If it smells like burnt oil, lower the heat immediately. Trusting your senses can save you from a batch of ruined Oreos.
The 5‑Minute Rest That Changes Everything
After mixing the batter, let it rest for five minutes. This small pause allows the pancake mix to fully absorb the milk, creating a smoother coating. I once skipped this step and ended up with a lumpy batter that clung unevenly to the cookies.
Keep the Batter Light
If you’re aiming for a delicate crunch, whisk the batter until it’s just barely combined. Over‑whisking incorporates air, making the coating thicker and heavier. A light batter ensures the cookie’s interior stays molten while the exterior crisps.
Oil Temperature Is King
The oil’s temperature dictates the texture. Use a digital thermometer to maintain consistency. If you don’t have one, test by dropping a small amount of batter; it should sizzle and rise to the surface within 3–4 seconds.
Serve Immediately or Reheat
Fried Oreos are at their best when hot. If you need to store them, let them cool completely, then refrigerate. When reheating, add a splash of water to create steam, which helps restore crispness. Avoid microwaving in a hurry; the heat can make them soggy.
Creative Twists and Variations
Chocolate‑Covered Crunch
After frying, dip each Oreo in melted dark chocolate and let it set on parchment. The chocolate coating adds depth and a glossy finish, making each bite feel like a chocolate shell. Pair with a drizzle of sea salt for a caramel‑salted experience.
Spiced Cinnamon Swirl
Add a teaspoon of ground cinnamon to the batter for a warm, aromatic twist. The cinnamon complements the chocolate center and adds a subtle spice note. Finish with a dusting of powdered sugar for a sweet‑spicy balance.
Nutty Peanut Butter Twist
Swap the standard batter for a peanut butter‑flavored mix, or fold in a tablespoon of peanut butter into the batter. The nutty flavor pairs beautifully with the cookie’s chocolate core. A drizzle of honey after frying gives a sticky, sweet finish.
Caramel‑Laced Delight
Add a splash of caramel sauce to the batter for a buttery sweetness. The caramel infuses the coating with a rich, buttery flavor that complements the chocolate. A sprinkle of crushed pecans adds crunch and a nutty finish.
Minty Fresh Surprise
Stir a teaspoon of mint extract into the batter for a refreshing minty undertone. The mint pairs unexpectedly well with chocolate, creating a cooling aftertaste. Finish with a light dusting of crushed peppermint candies for extra flair.
Savory Cheese‑Infused Bite
Incorporate grated cheddar cheese into the batter for a savory twist. The cheese melts into the coating, adding a salty, umami flavor that contrasts the sweet cookie. This version is perfect for game nights when you want a snack that’s both sweet and savory.
Storing and Bringing It Back to Life
Fridge Storage
Store fried Oreos in an airtight container in the refrigerator for up to 2 days. The oil will set, so let them cool completely before sealing. When you’re ready to eat, reheat in a 350°F oven for 5 minutes to restore crispness.
Freezer Friendly
Freezing is a great option for batch cooking. Lay the fried Oreos on a parchment‑lined tray, freeze until solid, then transfer to a freezer bag. They’ll stay fresh for up to 2 weeks. Thaw at room temperature before reheating.
Best Reheating Method
The secret to reviving fried Oreos is to use an oven, not a microwave. Preheat to 350°F and bake for 5 minutes, or until the coating is hot and crispy. A quick splash of water before reheating creates steam that keeps the coating from becoming soggy.