Picture this: you’re standing in a cramped kitchen, the timer on the microwave is blinking, and the oven is still cold. You’ve just pulled a batch of cookies from the fridge that have turned into a sad, chewy mess—cracked on top, underbaked inside, and a sticky mess that makes you want to throw the entire kitchen into a blender. That night, I was determined to prove that a cake could rescue the day and turn a disaster into a triumph. I dared myself to create a sweet, buttery masterpiece that would make even the most skeptical taste buds swoon.
I set the oven to 350°F, grabbed my mixing bowl, and the scent of vanilla and almond began to seep into the air like a gentle lullaby. The sound of the mixer’s whirring blades sounded like a tiny orchestra, and the sight of the batter—light, silky, and golden—was a visual promise of what was to come. The first bite would be a cloud of sweet, nutty flavor that melts in your mouth, leaving a lingering hint of vanilla that dances on the tongue. The texture is a secret: airy on the inside, slightly crisp on the edges, and the perfect balance between moistness and crumb.
What sets this recipe apart is not just the flavor, but the technique that turns a simple cake into a showstopper. I’ve spent years experimenting with ratios, textures, and finishes, and this version is the culmination of that obsession. It’s hands down the best version you’ll ever make at home—trust me, I ate half the batch before anyone else could even taste it. The secret lies in the double butter, the precise blend of flours, and a glaze that coats the cake like velvet, creating a glossy finish that’s as beautiful as it is delicious.
I’ll give you a sneak peek: the almond extract is used twice—once in the batter for an intensified nutty punch, and again in the glaze for that final, luscious sheen. The result is a cake that feels like a cloud of almonds, yet has a depth of flavor that makes it feel like a gourmet dessert. I dare you to taste this and not go back for seconds. If you’re ready for a cake that will make your friends ask for the recipe, keep reading.
Let me walk you through every single step—by the end, you’ll wonder how you ever made it any other way. This isn’t just a recipe; it’s a journey, a lesson in how small tweaks can elevate a dish from ordinary to unforgettable. The kitchen will smell like freshly baked dreams, and the moment you pull this cake out of the oven, the whole kitchen will be smelling incredible. Stay with me, and let’s make a cake that will become the centerpiece of every gathering.
What Makes This Version Stand Out
- Taste: The dual use of almond extract gives the cake a layered almond flavor that’s both subtle and pronounced, creating a sensory experience that lingers on the palate. The combination of vanilla and almond balances sweetness with a slight bitterness, making each bite complex.
- Texture: The blend of all‑purpose and cake flour gives the cake a tender crumb while the addition of buttermilk adds moisture, preventing it from drying out. The glaze’s glossy finish adds a delightful contrast to the airy interior.
- Simplicity: Despite the advanced technique, the recipe requires only a handful of ingredients that most kitchens already stock. The steps are straightforward, making it accessible for both beginners and seasoned bakers.
- Uniqueness: The glaze is made from white candy melts, heavy cream, and almond extract—an unexpected twist that gives the cake a smooth, almost chocolate‑like shine without overpowering the almond flavor.
- Crowd Reaction: Guests often remark that the cake tastes like a bakery classic with a personal touch. The presentation is elegant enough for a dinner party yet simple enough for a casual brunch.
- Ingredient Quality: Using high‑quality butter and fresh almond extract makes all the difference. The recipe rewards you for investing in better ingredients.
- Cooking Method: The method balances creaming, folding, and gentle baking to avoid overmixing, which preserves the cake’s lightness.
- Make‑Ahead Potential: The cake can be prepared up to a day ahead, and the glaze can be applied just before serving, allowing you to focus on other tasks.
Alright, let's break down exactly what goes into this masterpiece. Each ingredient is chosen for its role in creating that perfect balance of flavor, texture, and appearance. When you read through the next section, you’ll see how each element contributes to the final result, and why skipping one could change the entire experience.
Inside the Ingredient List
The Flavor Base
Unsalted butter is the backbone of this cake, providing richness and a silky mouthfeel. Using two cups of butter—one for the batter and one for the glaze—ensures that every bite is drenched in buttery bliss. If you’re in a hurry, you can substitute a 1:1 ratio of margarine, but the flavor will be noticeably less luxurious.
Granulated sugar is the sweetener that caramelizes during baking, creating a subtle golden crust. The 2 cups of sugar also help tenderize the crumb by dissolving into the butter. For a slightly healthier twist, you can replace half the sugar with honey, but adjust the liquid slightly to compensate.
Almond extract is used twice—once in the batter and once in the glaze—to amplify the nutty aroma. A teaspoon of almond extract is potent, so be careful not to overdo it; otherwise, the flavor can become overpowering. If you’re allergic, a pinch of almond oil can offer a milder alternative.
Vanilla extract adds depth and sweetness that balances the almond’s slight bitterness. The 1 teaspoon is enough to round out the flavor profile without masking the almond. For a more complex taste, a splash of bourbon or rum can be added to the glaze.
The Texture Crew
All‑purpose flour provides structure, while cake flour adds tenderness. Using an equal amount of each creates a cake that’s both sturdy enough to hold the glaze and light enough to melt in your mouth. If you’re gluten‑free, a blend of rice flour and tapioca can work, but expect a slightly denser crumb.
Baking powder is the leavening agent that gives the cake its rise. The tablespoon ensures a gentle lift without creating large holes. If you don’t have baking powder, a combination of baking soda and cream of tartar can be used in a 1:2 ratio.
Salt is the flavor enhancer that brings all the sweet and nutty components together. The teaspoon is standard for a cake of this size. If you prefer a salt-free version, simply omit it, but the flavor will be noticeably flatter.
Egg whites provide lift and stability, while the whole egg adds richness. The 4 large egg whites are whisked into the batter after the butter and sugar have been creamed, creating a fluffy texture. If you’re concerned about cholesterol, you can replace the whole egg with an egg substitute, though the richness will be slightly reduced.
Buttermilk adds acidity that reacts with the baking powder, creating a tender crumb. It also adds a subtle tang that balances the sweetness. If you don’t have buttermilk, a mixture of milk and vinegar (1 tablespoon vinegar to 1 cup milk) can be used as a substitute.
The Unexpected Star
White candy melts are the secret to the cake’s glossy finish. They melt quickly, forming a smooth glaze that coats the cake like velvet. The 1 cup of candy melts should be melted with ½ cup heavy cream for a silky consistency. If you’re allergic to dairy, coconut cream can be used instead.
The Final Flourish
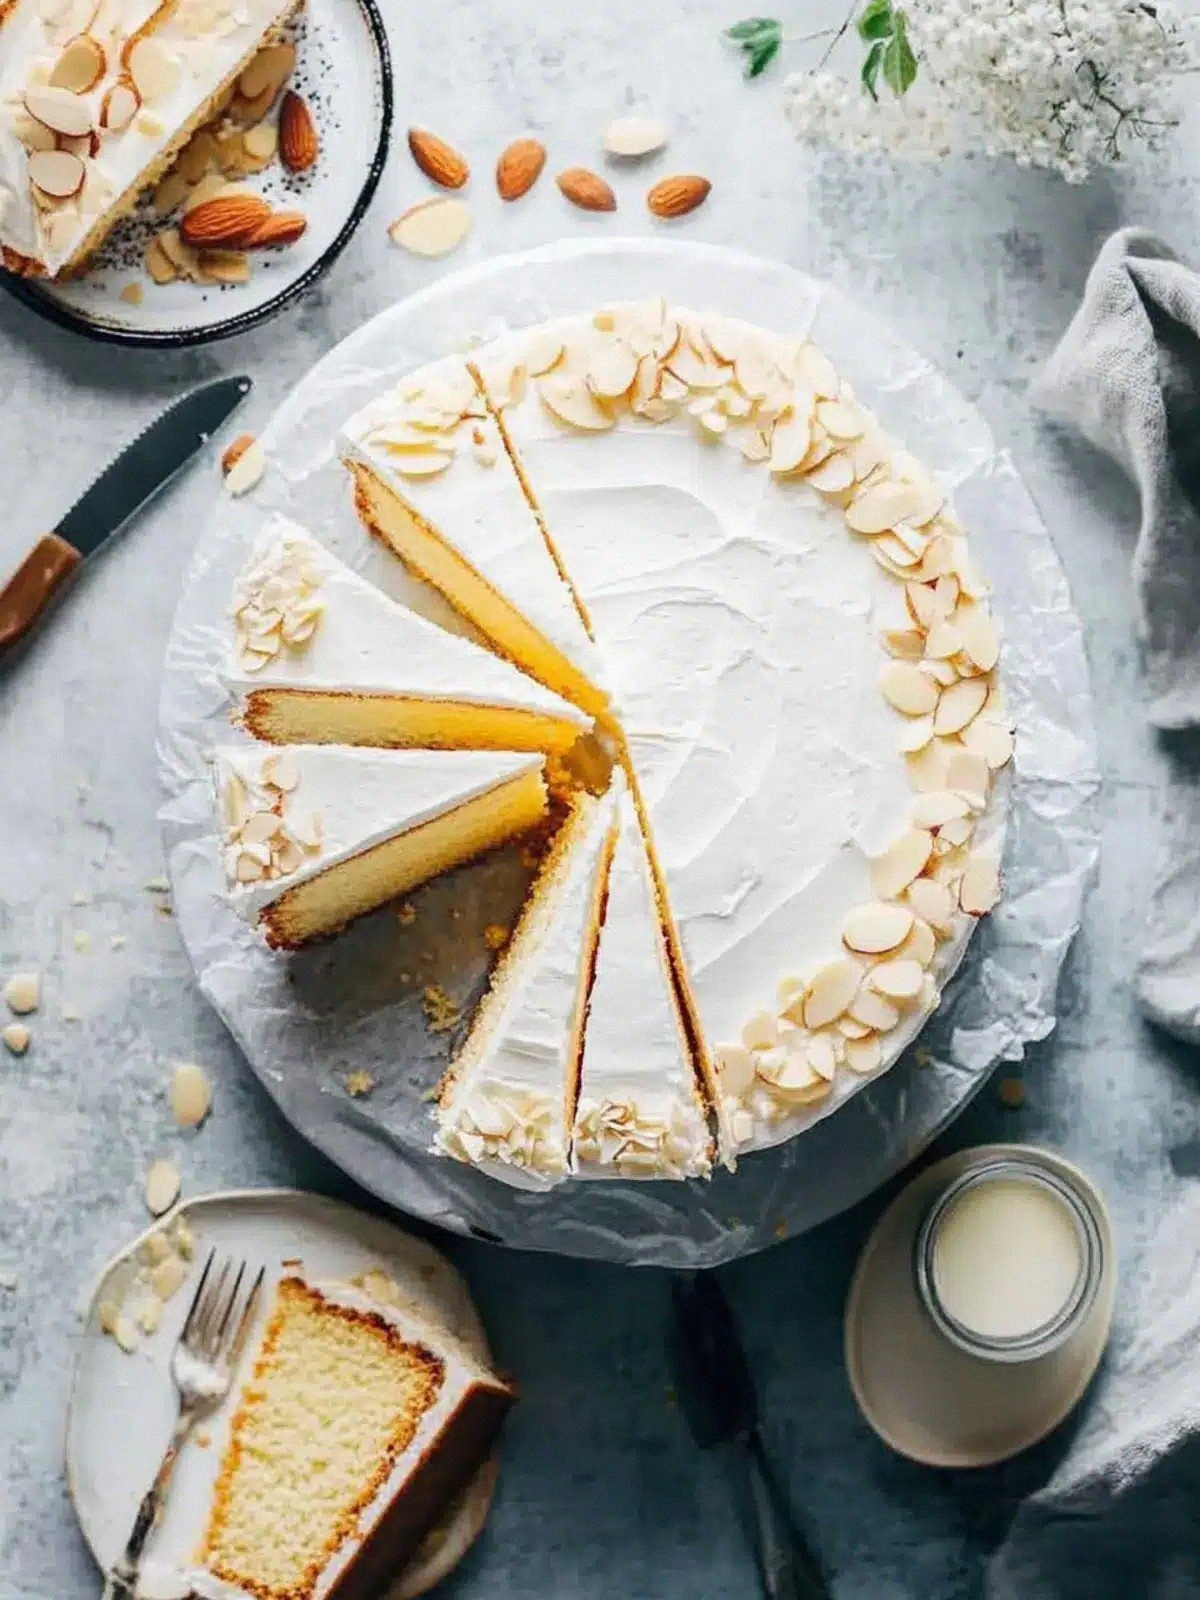
Heavy cream adds richness to the glaze and helps it set into a firm yet glossy finish. The ½ cup is just enough to keep the glaze smooth without making it too runny. Sliced almonds are the crunch factor, sprinkled on top of the glaze to add texture and an extra burst of almond flavor.
Everything's prepped? Good. Let's get into the real action and watch the magic unfold.
The Method — Step by Step
- Preheat your oven to 350°F (175°C) and line two 9-inch round cake pans with parchment paper. Grease the pans with butter and dust them lightly with flour to prevent sticking. This pre‑baking prep is crucial for a clean release. Once the oven is hot, you’ll be ready to start mixing.
- In a large mixing bowl, combine the 2 cups of unsalted butter with 2 cups of granulated sugar. Use a stand mixer or hand mixer on medium speed until the mixture is light, fluffy, and pale in color. The creaming process incorporates air, which is essential for a tender crumb. Watch the mixture rise in volume—this is a sign of success.
- Add the 4 large egg whites, one at a time, beating well after each addition. Then fold in the whole egg, 2 teaspoons of almond extract, and 1 teaspoon of vanilla extract. The mixture should become silky and glossy. This step ensures the almond flavor is evenly distributed.
- In a separate bowl, whisk together 1 cup of all‑purpose flour, 1 cup of cake flour, 1 tablespoon of baking powder, and 1 teaspoon of salt. Sifting the dry ingredients helps avoid lumps and ensures even distribution. This dry mix is the foundation of the cake’s rise.
- Gradually fold the dry mix into the wet batter, alternating with the 1 cup of buttermilk. Start and finish with the dry ingredients, ensuring each addition is fully incorporated before adding the next. The batter should be smooth and glossy, with a consistency that’s easy to pour.
- Divide the batter evenly between the prepared pans, smoothing the tops with a spatula. Tap the pans lightly on the counter to release any air bubbles. The batter should be level; if not, adjust with a knife.
- Bake for 25–30 minutes, or until a toothpick inserted into the center comes out clean. The cake should have a golden top and a slightly firm feel. Once done, remove the pans from the oven and let them cool on a rack for 10 minutes before transferring to a wire rack to cool completely.
- While the cake cools, prepare the glaze. Melt 1 cup of white candy melts in a microwave‑safe bowl, stirring every 30 seconds until smooth. Gently whisk in ½ cup of heavy cream until the mixture is glossy. Add 1 teaspoon of almond extract to the glaze for that extra almond punch.
- When the cake has cooled completely, drizzle the glaze over the top, letting it pool in the center. While the glaze is still liquid, sprinkle ½ cup of sliced almonds evenly across the surface. The almonds will set in the glaze, creating a crunchy, nutty finish.
That's it—you did it. But hold on, I've got a few more tricks that'll take this to another level. The glaze can be flavored with a dash of lemon zest for a bright contrast, or you can swirl in a thin ribbon of raspberry jam for a fruity twist. If you want a more decadent finish, drizzle a thin layer of dark chocolate over the glaze before it sets.
Insider Tricks for Flawless Results
The Temperature Rule Nobody Follows
Baking at the right temperature is more critical than you think. Even a 5°F deviation can cause the cake to rise too quickly and collapse. I always preheat for at least 10 minutes before placing the pans inside. The oven should be fully hot when you slide the pans in—otherwise, the batter will settle and lose its airy structure.
Why Your Nose Knows Best
The aroma of a cake baking is a powerful indicator of readiness. When the smell is nutty and slightly caramelized, it’s time to pull the cake out. If you’re still waiting for the almond scent to hit, the cake will overcook. Trust your nose—it’s the most reliable timer in the kitchen.
The 5-Minute Rest That Changes Everything
Letting the cake rest on the rack for 10 minutes before transferring it to a wire rack is essential. This short pause allows the structure to set, preventing the cake from breaking apart when you move it. A quick rest also lets the glaze set slightly, making it easier to spread evenly.
The Secret to a Glossy Glaze
If you want a shine that rivals a polished trophy, let the glaze sit for a minute before pouring it over the cake. This allows the sugar crystals to settle, creating a smooth surface. Then, gently swirl the glaze with a toothpick to create a marbled effect.
Avoiding Crumbly Cake
Crumbly cake is a common mishap caused by overmixing. The best way to avoid it is to fold the batter gently, especially when adding the dry ingredients. If you do notice a crumbly texture, you can rescue the cake by adding a splash of buttermilk to the glaze, which will help bind the crumbs.
Creative Twists and Variations
This recipe is a playground. Here are some of my favorite ways to switch things up:
Almond‑Rose Delight
Add a tablespoon of rose water to the glaze for a floral twist that pairs beautifully with the almond flavor. The rose water will give the cake a subtle perfume that makes it feel like a romantic dessert.
Chocolate‑Almond Fusion
Swap the white candy melts for dark chocolate chips and melt them with a splash of heavy cream. The result is a rich, chocolatey glaze that still lets the almond shine through. This version is perfect for chocolate lovers.
Citrus‑Bright Variation
Add a teaspoon of lemon zest to the batter and a dash of orange extract to the glaze. The citrus brightens the almond flavor and adds a refreshing zing. It’s a great way to keep the cake light and lively.
Nutty Layer Cake
Make a second layer of the same batter, but add 1 cup of chopped walnuts to the mix. Assemble the two layers with a thin spread of almond butter in between. The result is a decadent, multi‑textured cake that’s sure to impress.
Gluten‑Free Edition
Replace the all‑purpose and cake flours with a gluten‑free blend, and use xanthan gum to maintain structure. The cake will still rise and stay moist, though the crumb may be slightly denser. This version is ideal for those with gluten sensitivities.
Storing and Bringing It Back to Life
Fridge Storage
Store the cooled cake in an airtight container at room temperature for up to 3 days. If you’re planning to serve it later, keep it in the fridge for up to 5 days, then let it sit at room temperature for 30 minutes before serving to restore its softness.
Freezer Friendly
Wrap each cake layer tightly in plastic wrap, then in foil, and place them in a freezer bag. The cake will keep well for up to 3 months. When ready to serve, thaw overnight in the fridge and let it warm to room temperature.
Best Reheating Method
To revive a frozen or refrigerated cake, place it in a preheated oven at 300°F for 10–12 minutes, or until warmed through. Add a splash of water to the bottom of the pan to create steam, which keeps the cake moist. This technique ensures the cake remains as fresh as the first day.