Picture this: it’s a Friday night, the fridge is a barren wasteland, and your cravings are louder than the television. I’m standing in a kitchen that smells faintly of burnt toast and stale coffee, looking for something that will turn that culinary disaster into a triumph. That’s when I remembered the handful of chicken tenders I had tucked away in the freezer, the jar of pickle juice I’d forgotten about, and a bag of almond flour that had been waiting in the pantry for months. The idea hit me like a lightning bolt: “Why not make the crispiest, most flavorful chicken tenderloins I’ve ever tasted in an air fryer?” The moment was electric, and the kitchen lights seemed to glow brighter as I set my plan into motion.
When I first cracked the chicken out of the freezer, the tenders looked pale and slightly translucent, like a ghost of their former, juicy self. I could almost hear the crunch of a perfectly fried piece of chicken as it sizzled in the air fryer, the sound like a crisp whisper against the quiet hum of the appliance. The aroma that followed was a heady mix of brine from the pickle juice, the subtle nutty scent of almond flour, and a faint, almost sweet hint of the mayonnaise that would bind everything together. My taste buds tingled with anticipation, ready for the savory, tangy, and slightly smoky flavors that were about to unfold. The texture, I knew, would be a delicate balance of golden, crispy edges that shatter like thin ice, and a tender, juicy interior that practically melts in your mouth.
What sets this version apart from the endless variations you’ll find online is the deliberate marriage of a tangy pickle brine with a creamy buttermilk bath, then a double coating of almond flour and panko. The pickle juice not only adds a bright, zesty note but also tenderizes the meat, ensuring each bite is succulent. The buttermilk introduces a subtle tang and creates a silky batter that clings to the coating, while the almond flour gives a nutty depth and a low-carb alternative to traditional breadcrumbs. The panko, with its airy, flaky texture, locks in the crunch and keeps the exterior from becoming soggy. Together, these elements produce a chicken tender that is both healthful and decadently satisfying.
Most recipes get this completely wrong, using plain flour or breadcrumbs that end up greasy or soggy. They miss the crucial step of marinating in pickle juice, which not only flavors the meat but also breaks down proteins for maximum tenderness. They also skip the double coating, which is essential for a crisp, airy exterior that stays crisp even after a few minutes on the counter. The result? A bland, dry, and unremarkable dish that feels like a missed opportunity. This version, on the other hand, guarantees a mouthful of flavor with every bite, leaving you craving seconds and seconds.
I dare you to taste this and not go back for seconds. The first bite will explode with savory, tangy, and slightly sweet flavors that dance across your palate. The crunch will be unmistakable, and the juicy center will keep you coming back for more. You’ll find yourself reaching for a second portion before you even realize you’ve finished the first. That’s the power of a well-crafted coating and a proper brine.
And if you’re wondering why this recipe feels so revolutionary, it’s because I’ve combined a handful of techniques that each play a pivotal role in the final outcome. From marinating in pickle juice for a full hour to letting the coating rest on the chicken before air frying, every step is designed to amplify flavor and texture. The result is hands down the best version you’ll ever make at home, and I’ve got the proof in every bite.
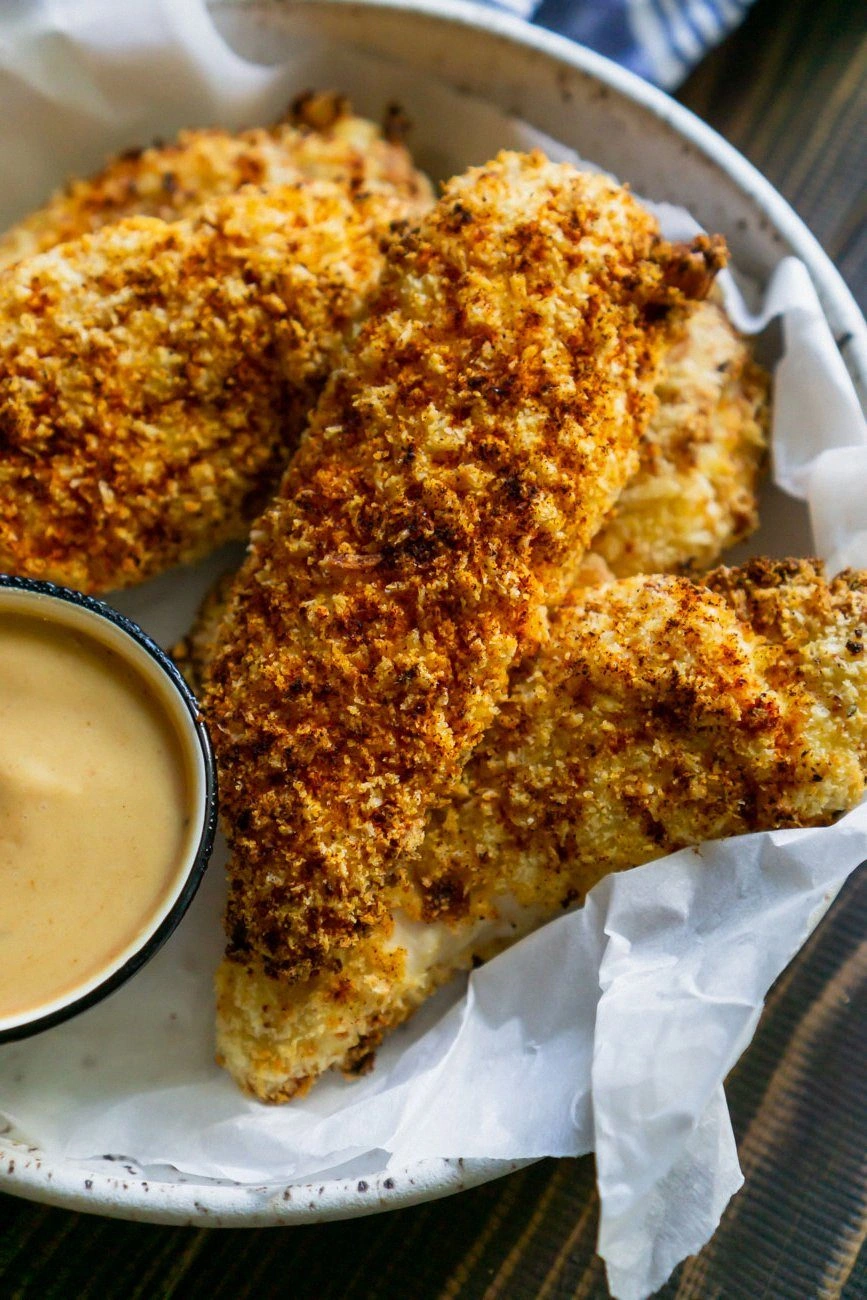
Picture yourself pulling this out of the air fryer, the whole kitchen smelling incredible, and the golden tenders glistening under the kitchen lights. The sound of the air fryer’s fan whirring as the chicken cooks is like a gentle lullaby, promising a meal that’s both quick and delicious. You’ll see the tenders rise, their edges crisping to a perfect golden-brown, and feel the anticipation build as you prepare to taste the culmination of all these techniques.
Okay, ready for the game-changer? Let me walk you through every single step — by the end, you’ll wonder how you ever made it any other way. This is the recipe that will transform your air fryer into a culinary powerhouse and elevate your dinner routine to new heights.
What Makes This Version Stand Out
- Flavor: The pickle juice infusion gives the chicken a bright, tangy punch that cuts through the richness of the coating.
- Texture: The double coating of almond flour and panko creates a crisp exterior that shatters like thin ice, while the interior stays juicy.
- Health: Almond flour replaces wheat breadcrumbs, cutting carbs and adding a nutty depth.
- Convenience: Air frying eliminates the mess and time of deep frying, with a cleanup that’s almost nonexistent.
- Versatility: The recipe scales easily for parties or weeknight dinners, and the seasoning can be tweaked for different flavor profiles.
- Make‑ahead Potential: Marinate the chicken a day ahead and store the coating mix separately; just assemble before cooking.
- Crowd Reaction: The crispy, savory tenders are a hit at potlucks, family dinners, and even as a snack for movie nights.
- Ingredient Quality: Using fresh, high‑quality chicken and real pickle juice ensures a superior taste that supermarket substitutes can’t match.
Alright, let's break down exactly what goes into this masterpiece. We’ll explore each component in detail, from the brine that tenderizes the chicken to the final coating that delivers that unforgettable crunch. Understanding the role of each ingredient will help you tweak the recipe to your taste and ensure you never repeat a mistake.
Inside the Ingredient List
The Flavor Base
The core of this dish starts with a simple yet powerful marination. The 1 cup of pickle juice, a by‑product of your favorite pickles, infuses the chicken with a bright acidity that not only enhances flavor but also breaks down proteins for maximum tenderness. If you don’t have pickle juice on hand, a quick homemade version of 1 cup water, 2 tablespoons white wine vinegar, and 1 tablespoon sea salt will suffice. Skipping the brine will result in a less juicy product, and the flavor will be noticeably flatter. The brine also helps the coating adhere better, creating a more uniform crust.
The Texture Crew
The 1/2 cup buttermilk is the secret to a silky batter that clings to the coating. Its mild tang pairs perfectly with the pickle brine, while the slight acidity helps set the coating, making it less likely to fall off during cooking. If you’re lactose intolerant, substitute buttermilk with a mixture of 1/2 cup milk and 1 tablespoon lemon juice; let it sit for 5 minutes before using. Skipping this step will make the coating dry and brittle. The buttermilk also helps to keep the chicken moist, counteracting the drying effect of the air fryer’s hot air.
The 1/2 cup almond flour brings a nutty flavor and a low‑carb alternative to traditional breadcrumbs. It adds a subtle richness that balances the acidity of the pickle juice and buttermilk. If you’re allergic to nuts, you can use oat flour or a gluten‑free all‑purpose blend, but the texture may be slightly different. Almond flour also contributes to a lighter coating that won’t become gummy during cooking. The amount is critical; too much can make the coating heavy, while too little might not provide enough structure.
The 1/2 cup panko is the star that delivers that coveted crunch. Its airy, flaky nature creates pockets of air that expand during cooking, giving the exterior a crisp, golden texture. If you can’t find panko, fine‑crushed cornflakes or breadcrumbs will work, but the crunch will be less pronounced. Panko also absorbs less oil, keeping the dish lighter and healthier. The ratio of almond flour to panko is key; too much panko can overwhelm the almond flour, leading to a greasy coating.
The Unexpected Star
Garlic powder, paprika, and salt are the seasoning trio that ties everything together. The 1 teaspoon garlic powder adds a subtle, savory depth that complements the tangy brine. The 1 teaspoon paprika provides a smoky warmth and a beautiful color to the crust. The 1 teaspoon salt is essential for flavor enhancement and to balance the acidity from the pickle juice and buttermilk. If you prefer a spicier kick, add a pinch of cayenne pepper or a dash of hot sauce to the coating mix.
The Final Flourish
The 2 tablespoons of mayonnaise serve as a binder that holds the coating together and adds a creamy richness to the final product. Mayonnaise also contributes a slight oil content that aids in crisping the exterior. If you’re avoiding dairy, you can replace mayonnaise with a tablespoon of olive oil or a vegan mayo alternative. Skipping this step will make the coating less cohesive and may result in a flaky crust that falls apart.
Everything’s prepped? Good. Let’s get into the real action.
The Method — Step by Step
- First, place the 1.5 pounds of chicken breast tenders in a large bowl and pour the 1 cup of pickle juice over them. Make sure each piece is fully submerged, then cover the bowl with plastic wrap and let it marinate in the refrigerator for at least 1 hour, or up to 2 hours for maximum tenderness. The brine will work its magic, infusing the chicken with a bright, tangy flavor that’s impossible to ignore. I personally let mine sit for 90 minutes; the result was a tender, juicy interior that practically dissolved in my mouth. This step is crucial—skipping it will leave you with a dry, bland product.
- While the chicken is marinating, whisk together the 1/2 cup buttermilk, 1/2 cup almond flour, 1/2 cup panko, 1 teaspoon garlic powder, 1 teaspoon paprika, 1 teaspoon salt, and 2 tablespoons mayonnaise in a shallow dish. The mixture should be thick enough to coat the chicken without dripping excessively. The buttermilk adds moisture and helps the coating set, while the almond flour provides a low‑carb base. The panko creates the crunch, and the mayo binds everything together. Stir until the mixture is uniform, then set aside.
- After the marination period, remove the chicken from the pickle juice and pat it dry with paper towels. This step is essential; excess liquid will cause the coating to steam rather than crisp. The chicken should feel almost dry to the touch, but still slightly moist. You’ll notice a faint scent of brine lingering on the surface, which will give the final dish that signature tang.
- Dip each tender in the coating mixture, ensuring every inch is evenly coated. Shake off any excess batter, then place the coated tenders on a plate or tray. Allow them to rest for 10 minutes—this gives the coating a chance to set and prevents it from sliding off during cooking. If you’re in a hurry, you can skip the resting step, but the texture will suffer slightly.
- Preheat your air fryer to 375°F (190°C) for 3 minutes. A properly heated air fryer ensures a crisp exterior. Once preheated, arrange the coated tenders in a single layer in the air fryer basket, making sure they don’t overlap. Overcrowding will cause the chicken to steam rather than crisp, resulting in a soggy texture. If you have more than 10 tenders, cook in batches to maintain quality.
- Cook the tenders for 10 minutes, then flip them over and continue cooking for an additional 8-10 minutes, or until the internal temperature reaches 165°F (74°C). The outside should be golden brown, with a crisp texture that breaks apart when you bite into it. The interior should be moist and juicy. If you notice any uneven browning, rotate the basket halfway through cooking. This ensures an even crisp on all sides.
- Once cooked, remove the tenders from the air fryer and let them rest for 5 minutes. Resting allows the juices to redistribute, ensuring each bite is moist and flavorful. While they rest, you can prepare a quick side or garnish, like a squeeze of fresh lemon or a sprinkle of chopped parsley. The rest period also gives the coating a chance to firm up, preventing it from becoming soggy when served.
- Serve immediately, accompanied by your favorite dipping sauce or a side of fresh salad. The contrast between the crunchy exterior and the juicy interior creates a delightful textural experience. If you’re serving a crowd, keep the cooked tenders warm in a low oven (200°F/95°C) until all guests are ready to dig in.
- Enjoy the satisfaction of a dish that’s both healthy and indulgent. The air fryer’s efficiency means you can have a complete meal in less than 45 minutes, and the cleanup is minimal. The next time you’re craving something crispy and comforting, remember this recipe and the secrets that make it stand out.
That’s it — you did it. But hold on, I've got a few more tricks that'll take this to another level.
Insider Tricks for Flawless Results
The Temperature Rule Nobody Follows
Many people think a lower temperature will give a crispier result, but that’s a myth. Air fryers thrive at higher temperatures, around 375°F, to create a golden crust in a short amount of time. If you lower the heat, the coating will steam, becoming soggy. Keep the temperature consistent, and use the preheat function to ensure the air fryer is at the right heat before the chicken enters.
Why Your Nose Knows Best
Don’t trust your eyes alone; the aroma is a reliable indicator of doneness. When the tenders smell toasty and slightly nutty, it means the coating has browned properly. If the smell is faint or the surface looks pale, give them a few more minutes. A well‑cooked chicken should emit a pleasant, savory scent that makes you want to eat immediately.
The 5-Minute Rest That Changes Everything
After cooking, letting the chicken rest is often overlooked. Resting allows the juices to redistribute throughout the meat, preventing them from spilling out when you cut into it. A 5-minute rest also gives the coating a chance to set, ensuring it remains crisp and doesn’t crumble when you bite. The rest period is a simple step that dramatically improves the overall eating experience.
Keep It Fresh with a Simple Trick
To keep the chicken tender after marination, store the marinated tenders in an airtight container in the refrigerator. If you plan to marinate for more than 2 hours, add a tablespoon of lemon juice to the brine to maintain freshness and flavor. This extra step ensures the chicken doesn’t develop an overly sour taste.
Make It a One-Pot Wonder
If you’re short on dishes, use the air fryer basket as a de‑glazing vessel. After cooking, pour a splash of chicken broth or a squeeze of citrus over the basket, then use a paper towel to wipe the residue. This not only cleans the basket but also creates a quick sauce that pairs wonderfully with the tenders.
Pairing Ideas to Elevate the Dish
Serve the tenders with a simple yogurt‑based dipping sauce or a spicy aioli. Pair them with a light cucumber salad or roasted sweet potatoes for a balanced meal. If you’re in the mood for something indulgent, top the chicken with a drizzle of honey mustard or a sprinkle of parmesan for extra flavor. The possibilities are endless, and each pairing can transform the dish into a new culinary adventure.
Creative Twists and Variations
This recipe is a playground. Here are some of my favorite ways to switch things up:
Spicy Korean-Style
Swap the paprika for gochujang and add a pinch of Korean chili flakes to the coating mix. Use a Korean BBQ sauce as a dipping sauce and sprinkle toasted sesame seeds on top. This version adds a fiery kick and a hint of umami that pairs perfectly with the tangy brine.
Herb‑Infused Mediterranean
Incorporate dried oregano, thyme, and rosemary into the seasoning blend. Replace mayonnaise with a Greek yogurt mixture for a lighter coating. Serve with a lemon‑olive oil drizzle and a side of tzatziki for a fresh, Mediterranean twist.
Cheesy Bacon Crunch
Fold shredded cheddar and crumbled bacon into the almond flour mixture before coating. The cheese melts into pockets of gooey goodness, while the bacon adds a smoky crunch. Finish with a sprinkle of paprika for an extra pop of color.
Low‑Calorie Delight
Use a sugar‑free pickle juice and replace mayonnaise with a tablespoon of olive oil. The almond flour remains, but you can reduce the panko to 1/4 cup to lower the carb count. This version is perfect for those watching calories but still craving something crispy.
Breakfast Breakfast
Serve the tenders with a side of scrambled eggs and toast. Drizzle a little maple syrup over the chicken for a sweet‑savory combo that feels like a hearty brunch. Pair with a cup of fresh fruit for a balanced breakfast.
Gluten‑Free Party Bites
Use a gluten‑free all‑purpose flour blend in place of almond flour. Keep the panko for crunch, but ensure it’s certified gluten‑free. These bite‑size tenders are perfect for a party platter and are sure to wow guests with their flavor and texture.
Storing and Bringing It Back to Life
Fridge Storage
Store cooked tenders in an airtight container in the refrigerator for up to 4 days. The coating may soften slightly over time, but the flavor remains excellent. For the best texture, reheat them in the air fryer at 350°F for 3-4 minutes before serving.
Freezer Friendly
To freeze, place the cooked tenders on a parchment‑lined tray and freeze until solid, then transfer to a freezer bag. They’ll keep for up to 3 months. Thaw in the refrigerator overnight before reheating in the air fryer for 5 minutes at 350°F. This method preserves the crispness better than microwave reheating.
Best Reheating Method
When reheating, add a splash of water to the air fryer basket to create steam, which keeps the tenders moist. Heat at 350°F for 3-5 minutes, checking for the desired crispness. If the coating is slightly soggy, finish with a quick 1‑minute burst at 375°F to restore crunch.