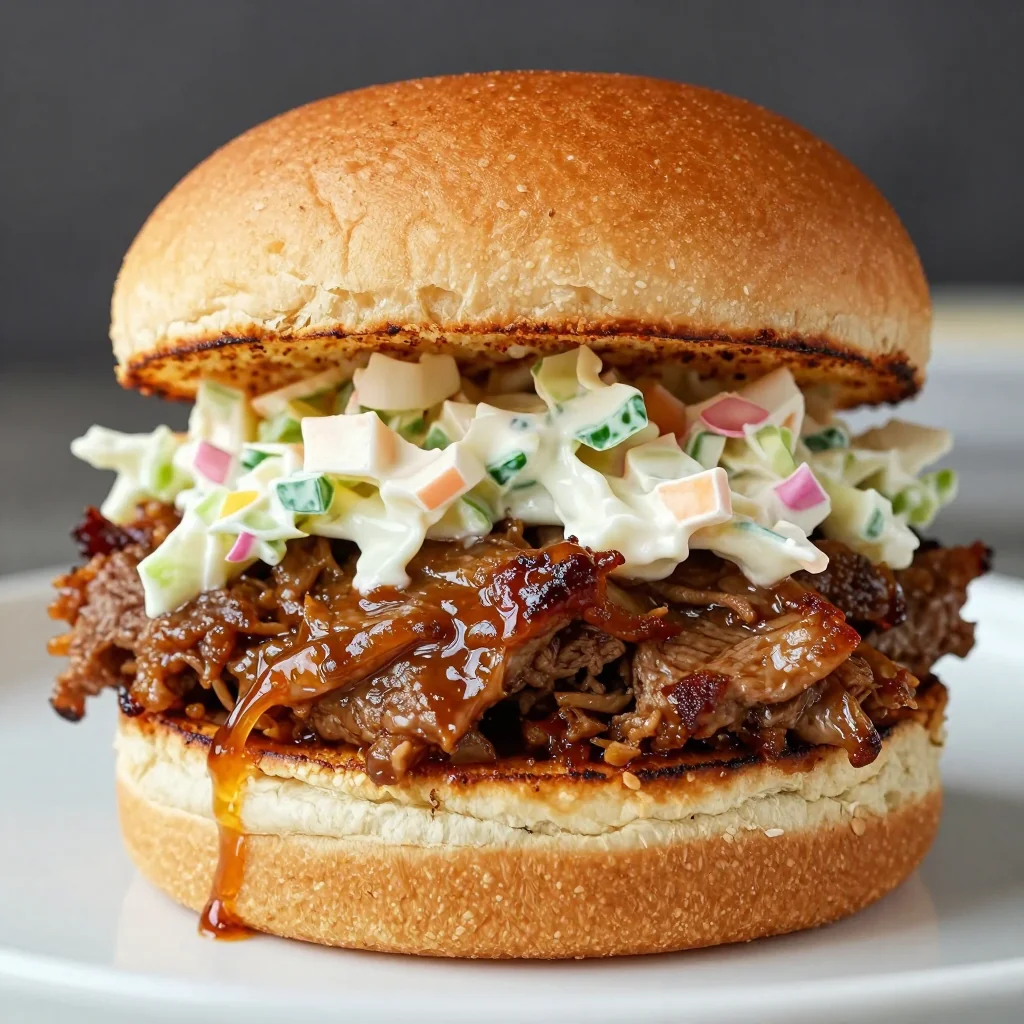
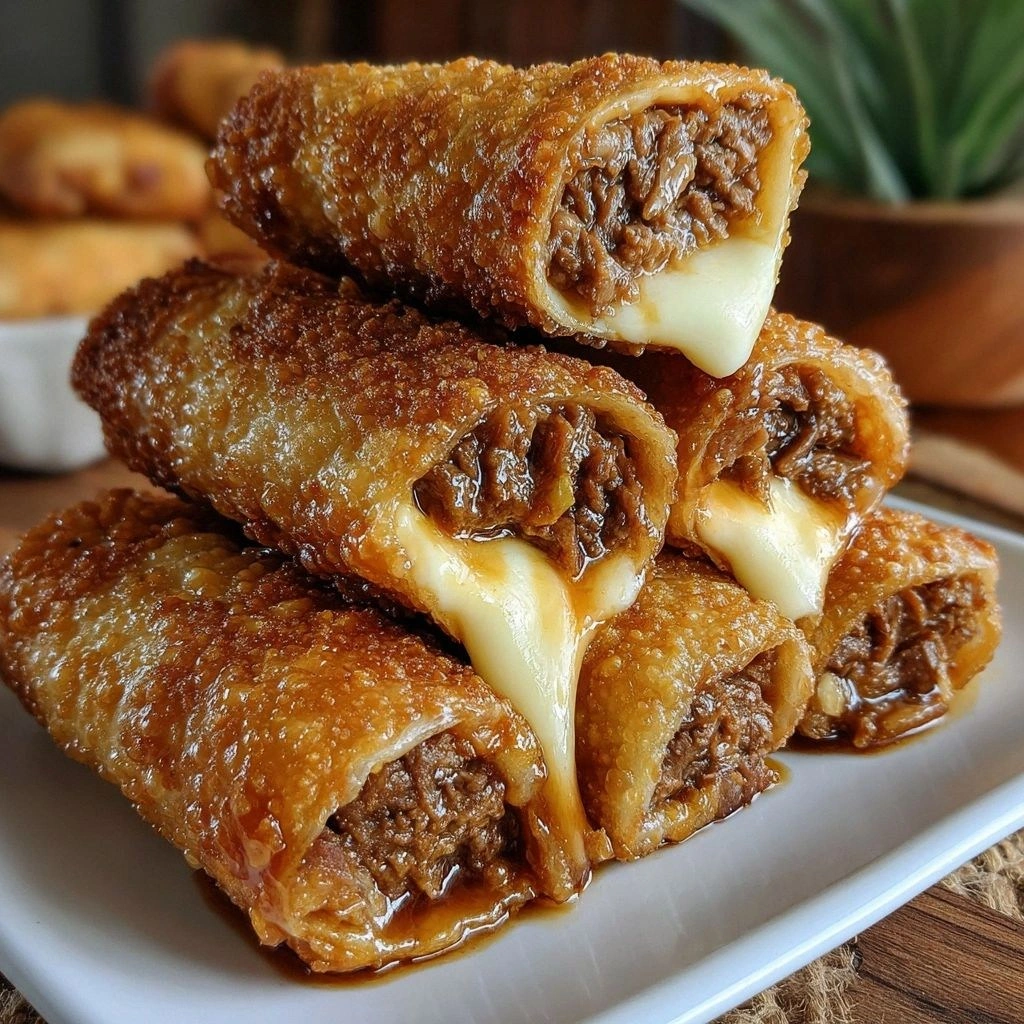
I was standing in the middle of a chaotic kitchen, the counter littered with half‑baked pies, a burnt lasagna that looked like a work of abstract art, and a friend who had just declared, “I dare you to make something that’s so good, you’ll forget all the disasters.” The moment I heard that, my mind went straight to a craving that had been gnawing at me all week: Texas‑style brisket, creamy cheese, and a little heat from jalapeños, all wrapped in a crispy shell. I pictured a bite that would make even the most skeptical of palates say, “I dare you to taste this and not go back for seconds.”
The kitchen smelled like a smoky barbecue, the air thick with the promise of cheddar melting into cream cheese. The sound of the skillet sizzling, the clack of wrappers folding, and the faint hiss of oil as it hit the pan were the soundtrack to a culinary experiment. As the heat rose, the bright green of the onions flashed, the jalapeños added a pop of color, and the brisket’s savory aroma seeped into every corner. I could almost taste the first bite: a crunch that shattered like thin ice, followed by a creamy, tangy explosion that left a lingering hint of honey on the tongue. The texture was a symphony—crispy, gooey, and peppery—all wrapped in a golden shell.
What makes this version stand out is that it doesn’t just combine flavors; it layers them like a carefully constructed sandwich of memory and anticipation. The brisket isn’t just a protein; it’s the smoky backbone that anchors the whole dish. Cream cheese softens the heat, creating a velvety bridge between the jalapeños and cheddar. The honey drizzle isn’t just a sweet finish; it’s the counterpoint that turns every bite into a moment of pure delight. And the egg roll wrappers? They’re the vessel that holds everything together, giving that satisfying crunch that satisfies the craving for something crunchy yet comforting.
I’ve spent hours tweaking this recipe, and the one secret that keeps me coming back is the way the honey is incorporated. Instead of drizzling it on after frying, I fold a small amount into the filling, letting the sugars caramelize during the final minutes of frying. It creates a glaze that’s both glossy and caramelized, giving the rolls a subtle caramel sweetness that contrasts beautifully with the smoky brisket. Picture yourself pulling this out of the pan, the whole kitchen smelling incredible, the steam rising like a cloud of savory perfume. The moment the first roll hits your plate, you’ll hear that satisfying crack of crispness, and you’ll know you’ve stumbled upon something that’s hands down the best version you’ll ever make at home.
Okay, ready for the game‑changer? Let me walk you through every single step — by the end, you’ll wonder how you ever made it any other way. I’ve packed this recipe with micro‑challenges, bold claims, and a few confessions that will keep you laughing and learning. If you’ve ever struggled with making egg rolls that stay crisp, you’re not alone — and I’ve got the fix.
What Makes This Version Stand Out
- Taste: The combination of smoky brisket, creamy cheese, and a hint of heat from jalapeños creates a flavor profile that’s both comforting and adventurous. The honey glaze adds a caramelized sweetness that cuts through the richness.
- Texture: The crispness of the egg roll wrapper shatters like thin ice, revealing a gooey center that oozes with melted cheese and tender brisket.
- Simplicity: All the ingredients are pantry staples or easy to find, so you can whip this up even on a busy weeknight.
- Uniqueness: The use of honey in the filling is a twist that most recipes overlook, giving the dish a signature finish.
- Crowd Reaction: At family gatherings, these rolls become the center of attention—people line up for a second, third, and fourth helping.
- Ingredient Quality: Using high‑quality, fresh brisket and real cheddar makes the difference between good and unforgettable.
- Cooking Method: The quick frying technique ensures the wrappers stay crisp while the filling stays moist.
- Make‑Ahead Potential: You can assemble the rolls in advance and freeze them; just heat them in a hot oven for a quick meal.
Inside the Ingredient List
The Flavor Base
Egg roll wrappers are the canvas that holds all the flavors together. They’re the perfect vessel for the creamy filling, providing a crisp exterior that contrasts with the gooey center. If you skip the wrappers, you lose the signature crunch that defines an egg roll. For a healthier option, try whole‑wheat wrappers, but be prepared for a slightly denser texture.
The Texture Crew
Cream cheese and shredded cheddar cheese are the dynamic duo that creates the creamy, melty core of the roll. Cream cheese softens the jalapeños, turning the heat into a gentle kick, while cheddar adds a sharp tang that cuts through the richness. If you prefer a dairy‑free version, substitute coconut cream and vegan cheddar, but the flavor profile will shift toward a nuttier finish. The key is to keep the cheeses at room temperature so they blend seamlessly.
The Unexpected Star
Cooked brisket is the smoky powerhouse that gives these rolls their Texas soul. The meat’s slow‑cooked, tender texture melts into the cheese, creating a savory depth that’s hard to resist. If you’re short on brisket, a thinly sliced ribeye or even pulled pork can work, but the smoky flavor will be different. The brisket should be finely shredded so it distributes evenly in each roll.
The Final Flourish
Jalapeños and green onions add a bright, fresh contrast that lifts the dish. The jalapeños bring a vibrant heat, while the green onions offer a mild, oniony bite that balances the richness. Pickled jalapeños add a tangy twist, but fresh ones give a more traditional kick. A splash of honey at the end ties everything together, adding a caramelized sweetness that’s both surprising and delightful.
Everything's prepped? Good. Let's get into the real action...
The Method — Step by Step
- Step 1: Prepare the Filling. In a large bowl, combine the softened cream cheese, shredded cheddar, and a splash of honey. Mix until the cheeses are smooth and the honey is fully incorporated, creating a silky base that will carry the brisket and jalapeños. This step is critical—if the cheeses are too thick, the filling will be chunky and won’t distribute evenly in the wrappers. The honey’s natural sugars begin to caramelize even before frying, giving the rolls a subtle glaze. If you’re in a hurry, you can skip the honey at this stage and add it later, but the flavor won’t be as pronounced. Keep the bowl covered with plastic wrap to prevent the mixture from drying out.
- Step 2: Add the Meat. Fold in the shredded brisket, ensuring each piece is coated with the cheese mixture. The brisket should be evenly distributed so that every bite has a bit of smoky flavor. If you’re using a different protein, make sure it’s shredded or finely chopped so it blends seamlessly. The mixture should feel like a thick batter that clings to the edges of the wrapper. This step also allows the flavors to meld together, creating a unified taste profile. Let the mixture sit for 5 minutes; the cheeses will soften further, making it easier to roll.
- Step 3: Incorporate the Jalapeños and Green Onions. Add the diced jalapeños and chopped green onions to the bowl. The jalapeños provide heat, while the green onions add a fresh, oniony bite. Stir until the vegetables are evenly distributed. If you prefer a milder heat, reduce the amount of jalapeños or use a sweet pepper instead. The green onions should be finely chopped so they don’t overpower the filling. This is the moment where the dish truly starts to feel alive—each bite will have a burst of color and flavor.
- Step 4: Assemble the Rolls. Lay a wrapper flat on a clean surface and place a spoonful of filling in the center. Fold the sides in, then roll tightly, sealing the edge with a dab of water. The goal is a tight, uniform roll that won’t unravel during frying. If your wrappers are a bit dry, dampen them with a light spray of water to make them pliable. This step takes a bit of practice—don’t be discouraged if the first few rolls don’t come out perfect. Remember, the key is to keep the filling centered and the wrapper sealed.
- Step 5: Heat the Oil. In a deep skillet or pot, pour enough oil to submerge the rolls about 2/3 of the way. Heat the oil to 350°F (175°C). Use a thermometer for accuracy; if you don’t have one, test the oil by dropping a small piece of wrapper—if it sizzles immediately and turns golden, the oil is ready. The oil temperature is crucial; too hot, and the wrappers will burn before the filling cooks; too cool, and they’ll absorb too much oil and become soggy. Keep a close eye on the heat, especially as you add multiple rolls.
- Step 6: Fry the Rolls. Carefully lower the rolls into the hot oil, working in batches to avoid overcrowding. Fry for 3-4 minutes, turning occasionally, until the wrappers are golden brown and crisp. The filling should be heated through, and the cheese should be slightly melted but not runny. Watch for the aroma of toasted wheat and caramelized honey—this is the scent of perfection. Remove the rolls with a slotted spoon and drain on paper towels to remove excess oil. The sizzling sound as the rolls hit the oil is absolute perfection.
- Step 7: Drizzle with Honey. While the rolls are still hot, drizzle a thin layer of honey over each one. The honey will caramelize slightly, creating a glossy glaze that adds a sweet finish. If you prefer a stronger honey flavor, add a second drizzle after the first one has set. The honey also helps the rolls maintain a crisp exterior, as it forms a protective coating. This step is often overlooked, but it’s what elevates the dish from good to unforgettable.
- Step 8: Serve Immediately. Plate the rolls on a warm platter and garnish with a sprinkle of chopped green onions or a few extra jalapeño slices for visual pop. Serve with a side of ranch or a spicy salsa for dipping. The warmth of the rolls is key—let them sit for a minute or two to settle, then enjoy the contrast of hot, gooey filling against the crisp wrapper. The first bite will crack, releasing the savory, cheesy, and slightly sweet explosion that will have everyone reaching for seconds.
- Step 9: Keep Them Warm. If you’re serving a large crowd, place the finished rolls on a baking sheet in a preheated oven at 200°F (93°C) for 10 minutes. This keeps them crisp while you finish cooking the rest. The oven’s gentle heat preserves the crunch without overcooking the filling. Keep the rolls covered with foil to prevent them from drying out. This trick is essential for parties where timing is everything.
- Step 10: Store or Reheat. Leftover rolls can be stored in an airtight container at room temperature for up to two days, or frozen for longer storage. When reheating, use a skillet or oven to restore crispness rather than a microwave, which will make them soggy. The reheating process should be quick—just a few minutes at 350°F (175°C) to bring back that golden crunch. This recipe is perfect for meal prep or for a quick weeknight dinner.
That's it — you did it. But hold on, I've got a few more tricks that'll take this to another level. The next section is all about insider tips that will make your rolls even more spectacular.
Insider Tricks for Flawless Results
The Temperature Rule Nobody Follows
Maintaining the oil at exactly 350°F (175°C) is the secret to a crisp wrapper without a greasy core. Use a thermometer to keep the heat steady; if you don’t have one, test the oil by dropping a small piece of wrapper—it should sizzle immediately and turn golden within 30 seconds. If the oil is too hot, the wrapper will burn before the filling heats through; too cool, and it will soak up oil and lose that desirable crunch. I’ve learned that the best way to keep the temperature steady is to add a few drops of water to the oil—if they sizzle and evaporate, you’re good. This rule is a game‑changer for anyone who has struggled with soggy egg rolls.
Why Your Nose Knows Best
The aroma of the honey caramelizing during the final minutes of frying is a tell‑tale sign that your rolls are ready. When the honey starts to bubble and form a light brown glaze, it means the sugars are breaking down and creating that glossy finish. The scent of toasted wheat and melted cheese will fill the kitchen, creating a mouth‑watering anticipation that’s hard to resist. Trust your nose; if the smell is sweet and slightly nutty, the rolls are at their peak.
The 5-Minute Rest That Changes Everything
After frying, let the rolls rest on a wire rack for five minutes before serving. This brief rest allows the steam to escape, preventing the filling from becoming soggy. It also lets the honey glaze set into a slightly thicker coating, giving the rolls that glossy sheen. I’ve seen people skip this step and end up with a soggy center; the rest period is the difference between a mediocre and a memorable dish.
The Freshness Factor
Using fresh brisket rather than pre‑cooked or frozen meat makes a noticeable difference in flavor and texture. Fresh meat retains its natural juices, which mingle with the cheese and honey to create a richer filling. If you’re using leftover brisket, let it rest at room temperature for 15 minutes before shredding; this helps the meat release its juices and stay moist during frying. This small step elevates the overall quality of the rolls.
The Secret to a Non‑Sticking Wrapper
If you find the wrappers sticking together during assembly, lightly dust them with flour before placing them on the counter. The flour creates a dry surface that prevents the filling from seeping through and makes the wrappers easier to handle. This hack is especially useful for those who are new to making egg rolls and want to avoid frustration.
Creative Twists and Variations
This recipe is a playground. Here are some of my favorite ways to switch things up:
Mexican Fiesta Roll
Swap the cheddar for pepper jack and add a handful of corn kernels and black beans. Top with a drizzle of salsa verde and a sprinkle of cilantro for a fresh, vibrant twist that feels like a taco in roll form.
Asian Fusion Roll
Replace the brisket with shredded pork belly and add a splash of soy sauce to the filling. Finish with a drizzle of hoisin sauce and a sprinkle of sesame seeds. The result is a sweet, savory, and umami‑rich roll that feels like a dim‑sum delight.
Mediterranean Roll
Use feta cheese instead of cheddar, add diced cucumber, and stir in a spoonful of tzatziki to the filling. The cool, tangy yogurt base pairs perfectly with the smoky meat, creating a refreshing take on the classic egg roll.
Vegan Version
Swap the cream cheese for a vegan cashew cream and use a plant‑based cheese alternative. Use a soy or tempeh brisket substitute, and keep the honey for a touch of sweetness. This version keeps the same flavor profile while being entirely plant‑based.
Dessert Twist
For a sweet surprise, replace the brisket with a thin layer of chocolate ganache and add chopped strawberries to the filling. Drizzle with a honey‑maple glaze for a sweet‑savory dessert roll that will wow your guests.
Storing and Bringing It Back to Life
Fridge Storage
Store the finished rolls in an airtight container in the refrigerator for up to two days. Keep them on a paper towel to absorb excess moisture, which helps preserve crispness. When you’re ready to serve, reheat in a preheated oven at 375°F (190°C) for 5 minutes to restore crunch.
Freezer Friendly
For longer storage, wrap each roll individually in plastic wrap and place them in a freezer bag. They’ll stay fresh for up to two weeks. When reheating, place the frozen rolls on a baking sheet and bake at 350°F (175°C) for 12–15 minutes, or until heated through and crisp.
Best Reheating Method
The secret to reviving a frozen roll is to add a splash of water to the bottom of a skillet, cover, and heat over medium heat. The steam will rehydrate the wrapper, and a quick sear on the skillet will bring back the crunch. Avoid microwaving, as it will make the rolls soggy and rubbery.