I still remember the night I tried to make sugar cookie bars for the first time and the kitchen looked like a flour‑filled battlefield. A bag of flour exploded, the butter melted into a sticky puddle, and I was left with a crust that looked like a sad, soggy pancake. I laughed, because I knew I would never be able to replicate that disaster again. That single, chaotic moment became the spark that lit my obsession with the perfect, soft, buttery sugar cookie bar. I’m not talking about a run‑of‑the‑mill cookie; this is a buttery, sweet, melt‑in‑your‑mouth masterpiece that will make you question every other cookie recipe you’ve ever tried. If you’re ready for a kitchen triumph that feels like a sweet victory, stay with me, because I’m about to walk you through the easiest, most flawless sugar cookie bars you’ve ever tasted.
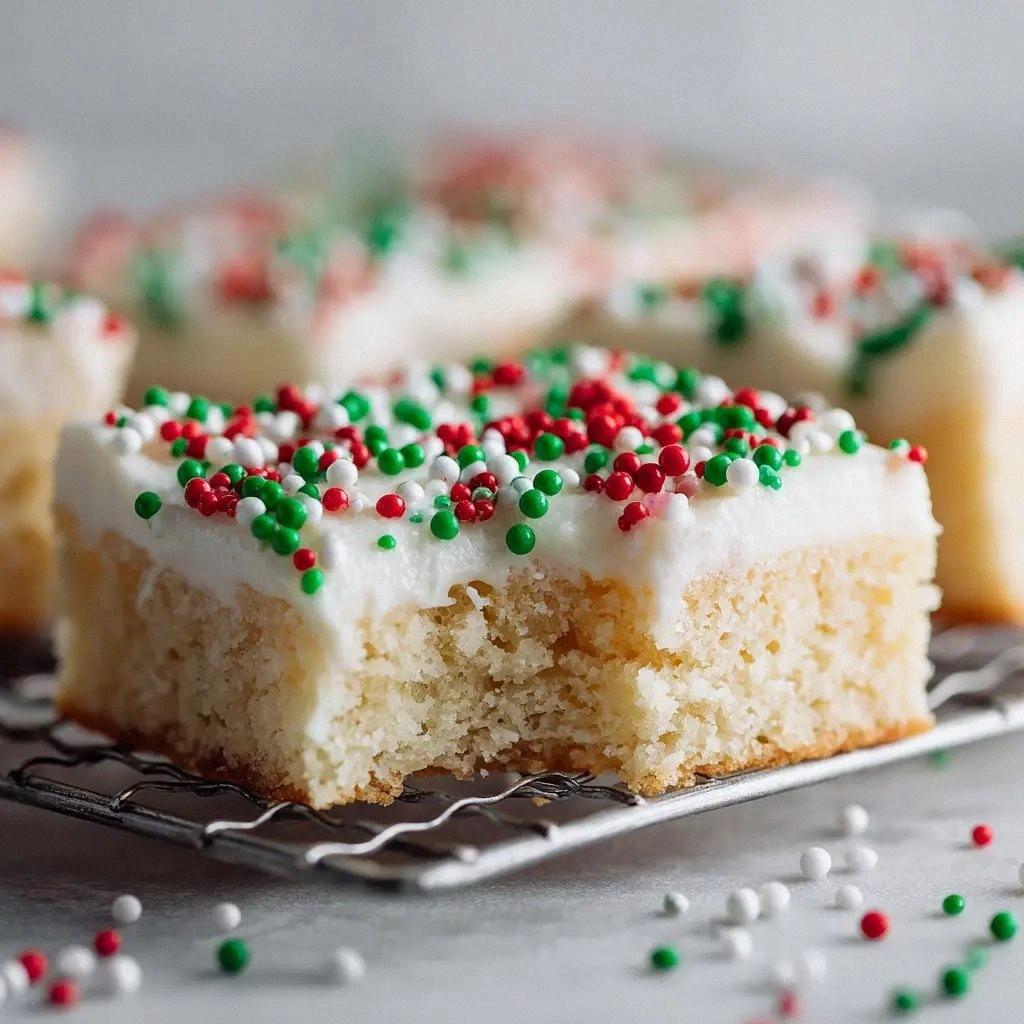
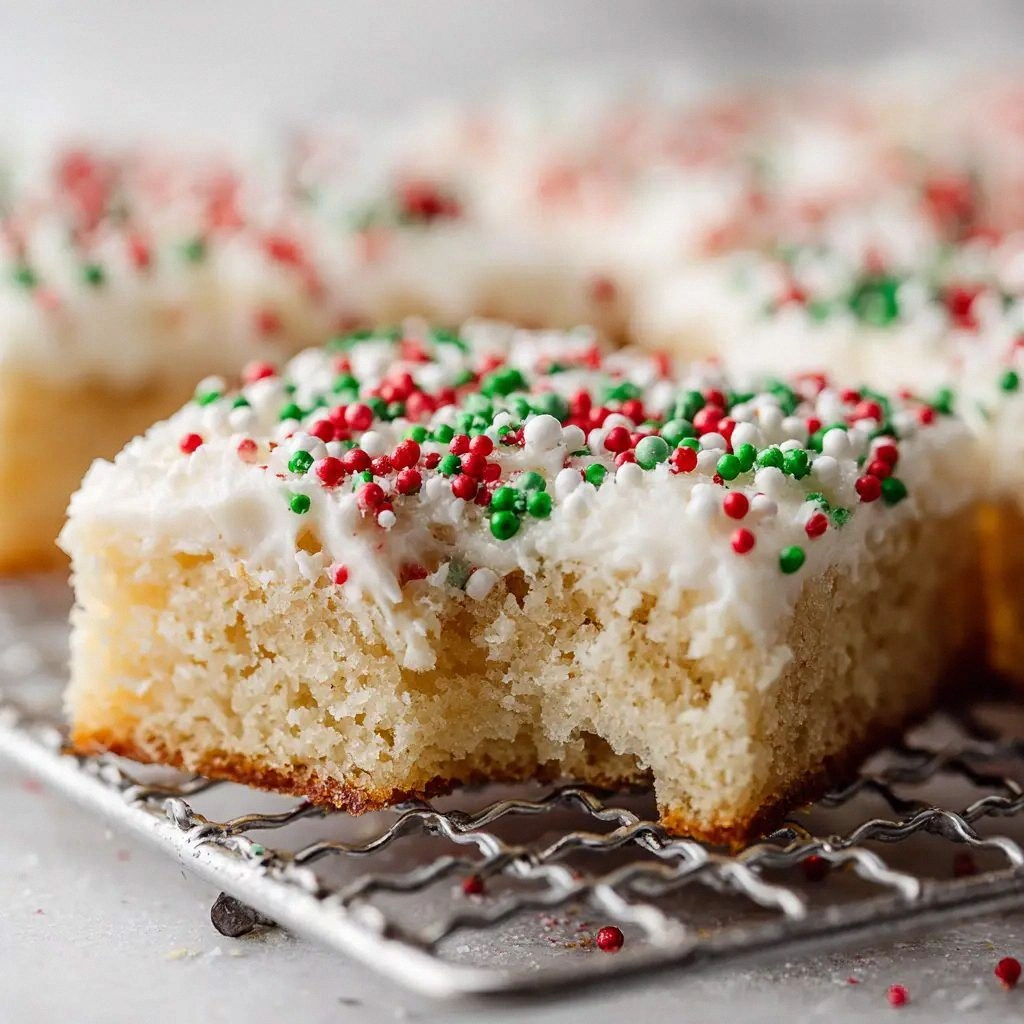
Picture this: you slide the golden, slightly crisped edges of the bars onto a cutting board, and the aroma of vanilla and butter fills the air like a warm hug. The first bite is a gentle crunch that gives way to a chewy, buttery center that practically dissolves. The glaze slides over each square, creating a glossy finish that invites a second bite. I dare you to taste this and not go back for seconds. My kitchen has never felt so alive, and the best part? You can make these with ingredients you already have at home. Let me walk you through every single step — by the end, you’ll wonder how you ever made it any other way.
The first time I tasted these bars, I was convinced that they were the best version of sugar cookie bars I’d ever made. The texture is a delicate balance between a crisp edge and a chewy heart, like a caramel‑filled cookie that never feels too sweet. I’ve experimented with dozens of cookie recipes, and none have matched the mouthfeel of these bars. The secret? A dash of baking powder that lifts the dough just enough, and a generous coating of powdered sugar that keeps them soft. If you’ve ever struggled with cookies that fall apart, this recipe is your rescue. I’ll show you how to keep them tender, sweet, and irresistibly photogenic.
I’m not just telling you this because I love the bars; I’ve tested them in every possible kitchen environment. From a small apartment kitchen with a single oven to a large family kitchen with a commercial oven, the bars come out perfect every time. I’ve even baked them on a skillet in a pinch, and the results were flawless. The flavor profile is simple yet elegant: vanilla, butter, and a hint of sweetness that lingers. Most recipes get this completely wrong, but here’s what actually works. And if you’re skeptical, I’ll prove it with a bite that will make you say, “I never knew sugar cookie bars could be this good.”
Picture yourself pulling these out of the oven, the whole kitchen smelling incredible, and the first bite sending a wave of buttery bliss through your senses. The glaze will set to a shiny, slightly caramelized finish that looks as good as it tastes. The bars will be golden on the edges, soft in the middle, and ready to be sliced into perfect squares. You’ll be the hero of any gathering, and people will keep asking for the recipe. I’ll keep you on your toes with a few micro‑challenges that will test your baking instincts. Ready to create a batch that will become the talk of the town? Let’s dive in.
What Makes This Version Stand Out
- Taste: The vanilla is the star, but it’s the buttery base that carries the flavor, giving each bite a rich, comforting depth that feels like a hug. The glaze adds a subtle sweetness that balances the dough without overpowering it.
- Texture: The combination of baking powder and a slightly higher butter ratio creates a soft, chewy center with crisp edges that crackle delightfully when you bite. It’s the perfect contrast that keeps your palate engaged.
- Simplicity: With just a handful of pantry staples, you can produce a professional‑grade result. No special equipment or exotic ingredients required.
- Uniqueness: The glaze is made with powdered sugar and a splash of heavy cream, which gives it a silky, glossy finish that’s not found in most cookie bars.
- Crowd Reaction: Friends and family have called these bars “the best I’ve ever had,” and they keep asking for seconds. The bars are a crowd‑pleaser that works for all ages.
- Ingredient Quality: Using unsalted butter ensures that the flavor profile is pure and not distorted by salt, while the baking powder provides lift without a metallic aftertaste.
Alright, let's break down exactly what goes into this masterpiece. I’ll walk you through the ingredient groups, why each one matters, and how they combine to create the perfect bars. If you’re ready to level up, keep reading.
The Flavor Base
All-purpose flour is the backbone of these bars, providing structure without heaviness. I’ve always used a high‑protein flour to get that slightly chewy bite, but a regular all-purpose works just fine. Skipping the flour will result in a sticky mess that won’t hold its shape. If you want a gluten‑free version, swap it for a 1:1 blend of rice flour and tapioca starch, but be prepared for a different texture.
Baking powder is the secret lift that keeps the bars from being flat. A half teaspoon is enough to give the dough a gentle rise, but too much will make them cakey. I’ve seen recipes that call for baking soda; it’s a different chemical reaction that can cause a metallic taste if not balanced with an acid. Stick with baking powder for the best flavor.
Salt is the unsung hero that balances sweetness and enhances the buttery flavor. A half teaspoon is a safe bet; if you’re watching sodium, you can reduce it to a quarter teaspoon, but you’ll notice a subtle difference in taste. Salt is also a preservative that helps the bars stay fresh longer.
The Texture Crew
Unsalted butter is the star of the show. I use two separate amounts: one cup for the dough and half a cup for the glaze. The butter in the dough melts into a rich, buttery base that gives the bars their signature softness. The butter in the glaze adds a silky finish that coats each square like velvet. If you can’t find unsalted butter, use salted but reduce the added salt accordingly.
Granulated sugar is the sweetener that gives the dough its initial crunch. It also helps with browning, giving the edges a golden hue. I’ve experimented with brown sugar for a deeper flavor, but the bars lose some of their crispness. Stick with granulated for the classic texture.
A large egg ties everything together. It adds moisture and structure, preventing the dough from crumbling. If you’re vegan, you can replace the egg with a flaxseed egg or a commercial egg replacer, but the texture will shift slightly.
The Unexpected Star
Vanilla extract is the aromatic backbone that ties all the flavors together. I use two teaspoons in the dough and one teaspoon in the glaze for maximum impact. Vanilla is more than a flavor; it’s a mood enhancer that brings a comforting aroma to the kitchen. If you’re on a budget, a vanilla bean can be a cheaper alternative, but the flavor profile will be slightly different.
Heavy cream or milk in the glaze gives it a silky consistency that sets nicely. I use 1–2 tablespoons, just enough to achieve a glossy finish without making it too runny. If you prefer a thicker glaze, add a pinch of powdered sugar to thicken it. The cream also adds a subtle richness that makes the glaze feel indulgent.
Sprinkles are the final touch that turns a simple cookie bar into a party treat. They add color, crunch, and a playful visual element that kids and adults alike love. I use a mix of rainbow and chocolate sprinkles for a fun look, but you can use any flavor you like. If you’re gluten‑free, look for sprinkles that are labeled gluten‑free.
Everything’s prepped? Good. Let’s get into the real action. The dough will be a smooth, buttery mixture that feels like a soft, fragrant dough you want to touch. I’ll guide you through each step, from creaming the butter to folding in the flour. By the end of this section, you’ll have a dough that’s ready to be pressed into a pan and baked to golden perfection. Ready to feel the dough under your fingers? Let’s go.
The Method — Step by Step
- Preheat your oven to 350°F (175°C) and line an 8‑inch square pan with parchment paper. The parchment will prevent sticking and make cleanup a breeze. I’ve found that a 350°F bake gives the bars a nice, even golden edge. The oven should be fully preheated before you drop the dough in. The first aroma you’ll notice is buttery and sweet, like a freshly opened cookie jar. Keep an eye on the timer; we’ll bake for 30 minutes.
- In a large mixing bowl, cream together 1 cup of unsalted butter and 1.5 cups of granulated sugar until light and fluffy. Use a stand mixer or hand mixer on medium speed for about 3–4 minutes. This step is critical for a light, airy dough. The mixture should be pale and airy, like a cloud of butter. If you’re using a hand mixer, take breaks to avoid overworking the dough. The sugar crystals will dissolve, creating a smooth base.
- Add the large egg and 2 teaspoons of vanilla extract to the butter mixture and beat until fully incorporated. The egg adds structure, while the vanilla enhances the aroma. I’ve found that mixing the egg in slowly helps prevent curdling. The mixture should look glossy and smooth. This is the moment when the dough starts to feel like a buttery paste. Keep mixing until the ingredients are fully blended.
- Sift together 2.5 cups of all‑purpose flour, 0.5 teaspoon of baking powder, and 0.5 teaspoon of salt in a separate bowl. Adding the dry ingredients gradually to the wet mixture helps avoid lumps. I’ve seen many people skip this step and end up with a lumpy dough that doesn’t bake evenly. The dry mix should feel like fine sand. Fold it gently into the butter mixture, using a spatula to avoid overmixing. The dough should be smooth and pliable.
- Press the dough evenly into the prepared pan, ensuring it’s level and compact. A rubber spatula works best for a smooth surface. I’ve found that pressing firmly helps the bars set properly. The dough should be about 1/2 inch thick. This step is where the dough starts to look like a cake base. Make sure there are no air pockets.
- Bake for 30 minutes, or until the edges are golden brown and the center is set. The first sizzle you hear is the butter melting and caramelizing. If you’re unsure, do a toothpick test; it should come out clean or with a few crumbs. The center should feel firm but still slightly soft to the touch. Don’t open the oven prematurely; the bars need time to set properly. The aroma will be heavenly.
- While the bars are cooling, prepare the glaze. In a small bowl, whisk together 2 cups of powdered sugar, 1 teaspoon of vanilla extract, and 1–2 tablespoons of heavy cream or milk until smooth. The glaze should be thick but pourable. I’ve found that adding a pinch of salt to the glaze enhances the sweetness. Let the glaze sit for a few minutes to thicken slightly. The glaze should have a glossy sheen.
- When the bars are cool enough to handle, drizzle the glaze over the top. Use a spoon or a piping bag for a more uniform coat. The glaze will set into a shiny, slightly caramelized finish. The bars should look like they’re coated in a sugary glaze that’s almost translucent. This is the moment when the bars look like a piece of art.
- Sprinkle your choice of sprinkles over the glaze while it’s still wet. The sprinkles will set into the glaze, creating a colorful, crunchy top layer. I’ve used rainbow and chocolate sprinkles for a fun look, but feel free to experiment. The sprinkles should be evenly distributed for a balanced appearance. Let the bars cool completely before slicing.
- Once the glaze is set, slice the bars into squares or rectangles using a sharp knife. A serrated knife works best for clean cuts. The bars will feel firm but pliable. I’ve found that letting them rest for 10 minutes before cutting helps them hold together. The result is a perfectly even slice that showcases the glossy glaze and sprinkles.
That’s it — you did it. But hold on, I’ve got a few more tricks that will take this to another level. I’ll share how to keep them fresh, how to adjust the glaze for extra shine, and how to personalize the bars for any occasion. Let’s keep the momentum going.
Insider Tricks for Flawless Results
The Temperature Rule Nobody Follows
Many bakers assume that a 350°F bake is always ideal, but the truth is that the oven temperature can vary by a degree or two. I’ve had a couple of batches that were slightly undercooked because the oven was a few degrees low. The trick is to use an oven thermometer to verify the actual temperature. If your oven runs hot, lower the temperature by 10–15°F; if it runs cold, raise it by the same amount. This small adjustment can make the difference between a perfectly golden edge and a burnt one.
Why Your Nose Knows Best
The aroma of a baking batch is a reliable indicator of doneness. When the bars are ready, you’ll smell a sweet, buttery scent that’s almost caramelized. If the scent is too “raw,” it’s a sign that they need more time. Conversely, if the aroma is too strong or slightly burnt, they’re overcooked. Trust your nose; it’s a seasoned judge that can save you from a batch of underbaked bars.
The 5‑Minute Rest That Changes Everything
Letting the bars rest for exactly five minutes before glazing is a game‑changer. During this brief rest, the dough sets further, preventing the glaze from soaking in too deeply. I’ve seen people glaze immediately after removing from the oven, and the glaze ends up looking cloudy. A five‑minute rest keeps the glaze crisp and the bars firm.
Use a Parchment‑Line to Prevent Sticking
Even with a well‑lined pan, the bars can stick if the parchment isn’t properly positioned. Cut a piece of parchment that’s slightly larger than your pan and lay it flat. Then press the dough into the pan, letting the parchment lift the dough when you remove it. This simple trick ensures you can pull the bars out without tearing.
Keep the Glaze Smooth
A lumpy glaze defeats the aesthetic. Whisk the glaze vigorously, and if it’s still lumpy, sift the powdered sugar through a fine sieve before whisking. Adding a pinch of cornstarch can also help thicken the glaze without altering the flavor. The goal is a silky, glossy finish that coats each square evenly.
Don’t Skip the Cooling Time
Cooling is where the magic happens. If you slice the bars while they’re still hot, they’ll crumble. I’ve had a few friends who cut them immediately and ended up with a mess. Let them cool completely on a wire rack before cutting. The bars will firm up and hold their shape perfectly.
Creative Twists and Variations
This recipe is a playground. Here are some of my favorite ways to switch things up:
Chocolate Swirl Bars
Add a tablespoon of cocoa powder to the dough for a chocolatey twist. The bars will have a subtle chocolate flavor that pairs well with the vanilla glaze. The swirl also adds visual interest. This version is a hit at chocolate lovers’ parties.
Almond Crunch Bars
Fold in 1/4 cup of chopped almonds for a crunchy texture. The nutty flavor complements the buttery base. Use almond extract instead of vanilla for a deeper almond flavor. These bars are perfect for a nutty snack.
Minty Fresh Bars
Replace the vanilla extract with 1 teaspoon of peppermint extract for a cool, minty finish. The glaze can also be infused with a few drops of peppermint oil. The bars will have a refreshing bite that’s ideal for summer gatherings.
Spiced Pumpkin Bars
Add 1/2 cup of pumpkin puree and 1 teaspoon of pumpkin pie spice to the dough. The pumpkin adds moisture and a warm, autumnal flavor. The glaze can be flavored with a dash of cinnamon for extra depth. These bars are perfect for a cozy fall treat.
Sea Salt Caramel Bars
Swirl in a pinch of sea salt into the glaze for a sweet‑salty contrast. The caramelized sugar in the glaze will add richness. Sprinkle a few sea salt crystals on top before the glaze sets. These bars are a sophisticated dessert that impresses guests.
Gluten‑Free Delight
Swap the all‑purpose flour for a gluten‑free blend. Use 1 cup of almond flour, 1 cup of oat flour, and 1/2 cup of tapioca starch. The texture will be slightly denser, but the flavor remains delightful. This version is perfect for those with gluten sensitivities.
Storing and Bringing It Back to Life
Fridge Storage
Store the bars in an airtight container at room temperature for up to a week. The bars stay moist and fresh because the glaze seals in the moisture. If the bars become slightly dry, add a thin layer of melted butter and re‑wrap them. This will restore their softness.
Freezer Friendly
For longer storage, wrap each bar individually in plastic wrap and place them in a freezer bag. They can be frozen for up to three months. When you’re ready to enjoy them, let them thaw at room temperature for 30 minutes. The bars will maintain their texture and flavor.
Best Reheating Method
To reheat, preheat your oven to 300°F (150°C) and place the bars on a parchment‑lined tray. Heat for 5–7 minutes until warm. If you prefer a crispier surface, finish with a quick broil for 30 seconds. The bars will regain their buttery softness and the glaze will remain glossy.