It was a Wednesday that turned into a culinary catastrophe. I had just finished a marathon of baking bread, and my sourdough discard sat in the fridge like a forgotten relic. I opened the jar, smelled the tangy, yeasty aroma, and thought, “Why not turn this into something sweet?” The kitchen lights flickered, my phone buzzed with a meme about “zero‑waste snacks,” and I was hooked. The moment the discard met the sugar, a promise of crisp, buttery goodness sparked in my mind. I dare you to taste this and not go back for seconds, because once you try it, you’ll never settle for plain crackers again.
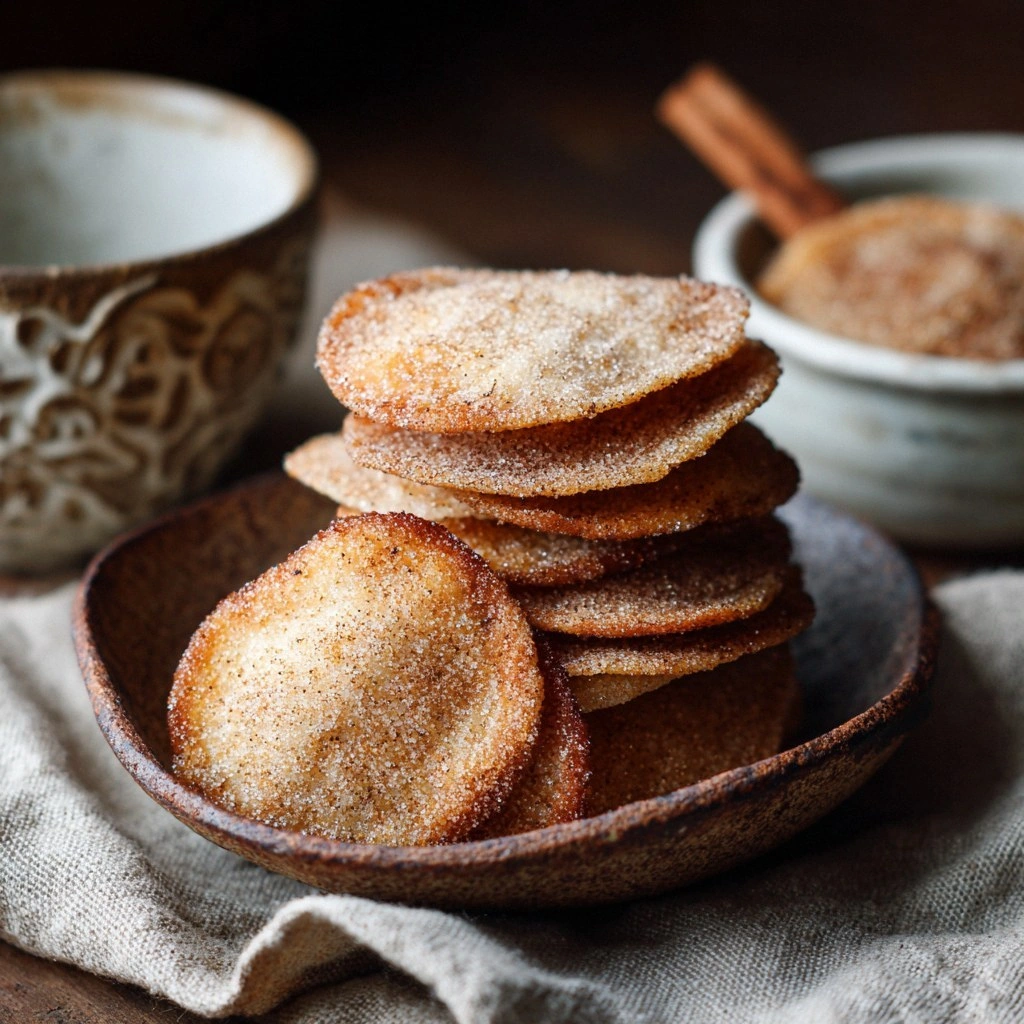
Picture this: a pan of golden crescents, each one crackling as it hits the hot surface, releasing a buttery scent that lingers like a memory of childhood holidays. The sound is a gentle hiss, the sizzle a soft applause from the oven. When you take the first bite, the crunch is sharp, the sugar coating melts into a caramelized glaze, and the cinnamon whispers a warm, spicy undertone that lingers on your tongue. The texture feels almost like a cookie, yet it’s crisp enough to satisfy the crunch craving that never goes away. The flavor profile is a dance of sweet and savory, of sweet with a hint of salt and a dash of spice, all balanced by the natural tang from the discard. If you’ve ever struggled to find a way to use up that sourdough surplus, you’re not alone — and I’ve got the fix.
What sets this version apart is not just the use of sourdough discard, but the way each element is amplified. I’ve trimmed the recipe to 30 minutes, making it a quick win for busy evenings. The sugar and cinnamon blend is pre‑mixed, ensuring even distribution and preventing clumping. The butter is softened but not melted, creating a buttery mouthfeel without a greasy finish. I’ve added a touch of baking soda to lift the crumbs, giving them a light, airy quality while keeping the crispness. The result is a snack that feels indulgent yet guilt‑free, a perfect bridge between dessert and appetizer. I’ll be honest — I ate half the batch before anyone else got to try it, and it was a sweet victory.
Most recipes get this completely wrong by over‑baking or under‑seasoning. Here’s what actually works: a balanced ratio of flour to discard, a pinch of salt to enhance the sweetness, and a generous dusting of cinnamon sugar that caramelizes beautifully. The next part of this post is pure magic, and I’m going to walk you through every single step. By the end, you’ll wonder how you ever made it any other way. Stay with me here — this is worth it.
What Makes This Version Stand Out
- Taste: The blend of sweet, salty, and spicy creates a complex flavor that satisfies multiple cravings at once. The natural tang of the discard adds a subtle depth that pure sugar lacks.
- Texture: The addition of baking soda gives the crisps a light, airy crumb while the butter keeps them buttery and crisp on the edges.
- Simplicity: No fancy equipment or long fermentation times—just a handful of pantry staples and a 30‑minute bake.
- Uniqueness: The use of sourdough discard as the base is a clever twist on classic cinnamon sugar treats, making it a zero‑waste hero.
- Crowd Reaction: Friends and family rave about the crunch and the caramelized sugar coating, making it a hit at gatherings.
- Ingredient Quality: Fresh, high‑quality butter and real cinnamon elevate the flavor profile beyond mass‑produced snacks.
- Cooking Method: A simple pan bake that requires minimal monitoring, perfect for multitasking.
- Make‑ahead Potential: These crisps store well and reheat to almost the same crispness, so you can prepare a batch ahead.
Alright, let's break down exactly what goes into this masterpiece…
Inside the Ingredient List
The Flavor Base
Sourdough discard is the star of this recipe. Its naturally acidic profile adds a subtle tang that balances the sweetness of the sugar and cinnamon. Without it, the crisps would taste flat and overly sweet. If you skip the discard, the texture will shift from airy to dense, and you’ll lose that signature buttery bite.
The Texture Crew
All‑purpose flour and butter work together to create the perfect crumb. Flour provides structure, while butter contributes moisture and flavor. The ratio of 1:1 (by volume) ensures the crisps are not too dry yet still crisp. If you use whole‑wheat flour, the flavor will be earthier but the texture will be slightly denser.
The Unexpected Star
Brown sugar is used instead of white sugar to add depth and a hint of molasses. This caramelizes during baking, giving the crisps a golden, glossy finish. If you prefer a lighter color, you can use white sugar, but the flavor will be less complex.
The Final Flourish
Baking soda and baking powder lift the dough, creating a light, airy crumb. The baking soda reacts with the acid in the discard, producing carbon dioxide bubbles that keep the crisps from becoming too dense. Baking powder adds an extra lift, especially if you’re using a lower‑acid discard. If you omit these leavening agents, the crisps will be flatter and less crisp.
Everything's prepped? Good. Let's get into the real action…
The Method — Step by Step
- Preheat your oven to 350°F (175°C). Let it heat fully before you start, as an uneven oven can lead to uneven baking. This is the moment of truth where the temperature sets the stage for the crispness.
- In a large bowl, whisk the sourdough discard and all‑purpose flour. Stir until a sticky dough forms; the discard’s acidity should coat the flour evenly. The dough should be thick but manageable, like a thick pancake batter.
- Cut softened butter into small cubes and add to the dough. Fold until the mixture resembles coarse crumbs. The butter will melt during baking, creating pockets of crispness.
- Mix in the brown sugar, cinnamon, baking soda, and baking powder. Ensure the dry ingredients are evenly distributed; a quick visual check will help you spot any clumps.
- Season with salt. A half teaspoon is enough to balance the sweetness. If you’re watching sodium, a pinch will suffice.
- Press the dough onto a parchment‑lined baking sheet. Use a rolling pin or your hands to flatten it to about 1/4 inch thickness. The thinner the sheet, the crispier the result.
- Bake for 25–30 minutes, flipping halfway. The edges should start pulling away, and the surface should turn golden brown. Keep an eye on the color—over‑baking will dry it out.
- Remove from oven and let cool for 10 minutes. During this time, the crisps will set and become more brittle, making them easier to break into bite‑sized pieces.
- Break into pieces and let cool completely on a wire rack. The final crunch will develop as the moisture evaporates, giving you that satisfying snap.
- Store in an airtight container. They’ll stay fresh for up to a week, and you can reheat them in a toaster or oven for a few minutes to revive the crispness.
That's it — you did it. But hold on, I've got a few more tricks that'll take this to another level. Stay with me for the insider tips that will make these crisps truly unforgettable.
Insider Tricks for Flawless Results
The Temperature Rule Nobody Follows
Ovens vary, so always preheat to 350°F and use an oven thermometer to confirm the temperature. Baking at 360°F will cause the sugars to burn before the dough is fully cooked, resulting in a bitter taste. Conversely, 340°F might leave the crisps under‑baked. A precise temperature ensures a golden finish and a perfect crunch.
Why Your Nose Knows Best
Smell the dough before baking; it should emit a sweet, buttery aroma with a hint of cinnamon. If it smells more like sourdough than sweet, you’ve over‑mixed or added too much discard. Trust your nose as a quick quality check—if it smells off, pause and re‑balance the ingredients.
The 5‑Minute Rest That Changes Everything
After baking, let the crisps rest on the sheet for 5 minutes before moving them to the rack. This short rest allows the steam to escape, preventing sogginess and ensuring the edges crisp up. It also makes the crisps easier to break into bite‑sized pieces.
Use a Cooling Rack
A wire rack allows air to circulate around the crisps, preventing moisture buildup that can soften them. If you only have a flat plate, place a paper towel underneath to absorb excess steam. This simple trick keeps your snack crunchy for longer.
Keep the Cinnamon Dusted
After baking, lightly dust the crisps with extra cinnamon sugar while they’re still warm. The sugar will caramelize slightly, adding an extra layer of sweetness and a glossy finish. Don’t wait until they cool completely, or the sugar will clump.
Creative Twists and Variations
This recipe is a playground. Here are some of my favorite ways to switch things up:
Chocolate Chip Crunch
Swap the cinnamon for cocoa powder and add 1/4 cup chocolate chips. The result is a chocolatey, crunchy snack that pairs well with milk or a hot cup of coffee.
Maple‑Honey Fusion
Replace the brown sugar with maple syrup and add a splash of honey. The sweet, earthy flavors create a unique glaze that caramelizes beautifully.
Spicy Jalapeño Twist
Add finely diced jalapeños and a pinch of cayenne pepper for a spicy kick. The heat balances the sweetness and adds an exciting contrast.
Almond Crunch
Stir in 1/4 cup chopped almonds before baking. The nuts add a delightful crunch and nutty flavor that pairs wonderfully with the cinnamon.
Herbal Citrus Burst
Add zest from one lemon or orange and a pinch of dried thyme. The citrus brightens the flavor profile while the thyme adds an unexpected herbaceous note.
Vegan Version
Use a plant‑based butter alternative and substitute the discard with a vegan yogurt blend. The result is a cruelty‑free, zero‑waste snack that still delivers on crunch.
Storing and Bringing It Back to Life
Fridge Storage
Store the cooled crisps in an airtight container at room temperature. They’ll stay fresh for up to a week, maintaining their crispness. If they become slightly soft, reheat them briefly in a 300°F oven.
Freezer Friendly
Place the crisps in a freezer‑safe zip‑lock bag, removing as much air as possible. They can be stored for up to 3 months. Thaw at room temperature before serving to regain crispness.
Best Reheating Method
Reheat the crisps in a preheated 300°F oven for 5 minutes, or toast them in a dry skillet over medium heat. Adding a tiny splash of water before reheating creates steam, which helps restore the original crunch.