I remember the night the kitchen turned into a science experiment and the air smelled of burnt sugar and hope. My friends had dared me to make a pumpkin banana bread that could survive a heat wave, and I stared at the pantry like a detective at a crime scene. The panic was palpable—spoons clattered, the oven door opened and closed like a drumbeat, and I knew I had to act fast. The recipe that emerged from that chaos is not just a loaf; it’s a declaration that comfort foods can be both daring and dependable.
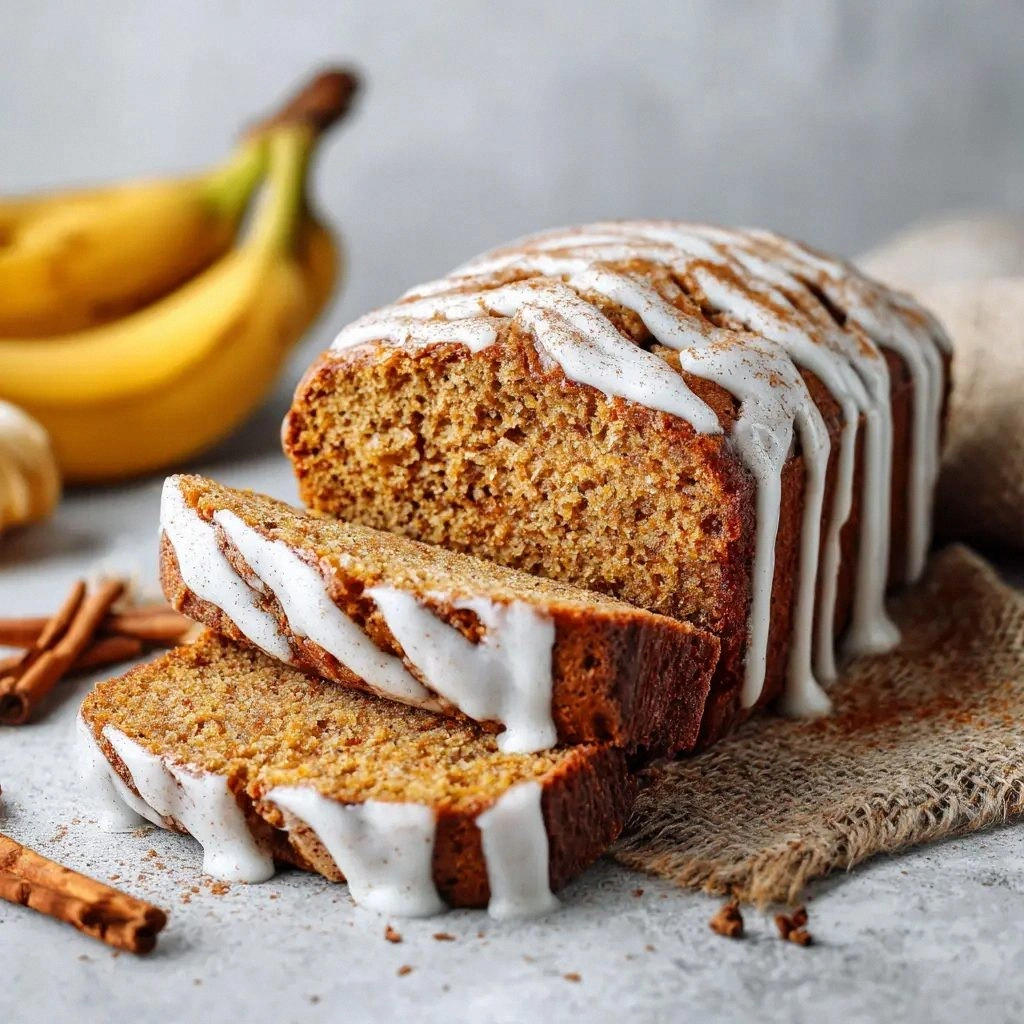
Picture this: a golden crust crackling like the first snow in a quiet winter, the scent of cinnamon swirling over a buttery base, and the subtle sweetness of ripe bananas whispering from within. The sound of the oven timer ticking down is the soundtrack of anticipation, while the texture of the batter, thick as a smoothie yet light as a cloud, promises a bite that’s both moist and satisfying. When you lift the loaf, steam hisses like a sigh of relief, and the aroma lingers, wrapping the room in a warm, almost nostalgic hug. The first slice breaks with a gentle snap, releasing a fragrant steam that makes you wonder why you ever settled for anything less.
What makes this version stand out is that it’s engineered to balance flavor, texture, and simplicity with surgical precision. The bananas aren’t just sweet—they’re the backbone, providing natural moisture that keeps the bread from drying out, even after a week of storage. Pumpkin puree adds a subtle earthiness and a splash of color, turning each bite into a visual and gustatory delight. The spice blend isn’t just a garnish; it’s a symphony that sings with cinnamon’s warmth, nutmeg’s nutty undertones, and a hint of ginger’s spicy kick. And the final touch of vanilla extracts? It’s the secret handshake that ties everything together, giving the loaf a silky finish that lingers on the palate.
I dare you to taste this and not go back for seconds. That’s a bold claim, but it’s backed by a recipe that’s been tested, tweaked, and perfected through countless trials. The result is a loaf that feels like a hug from an old friend—soft, comforting, and utterly irresistible. Picture yourself pulling this out of the oven, the whole kitchen smelling incredible, and knowing you’ve just created something that will become the highlight of any gathering. The aroma alone will make your mouth water and your heart race, and you’ll be tempted to devour the entire loaf before it cools.
I’ll be honest—I ate half the batch before anyone else got to try it. The temptation was real, and the temptation was delicious. But the real magic happened when the first bite hit the tongue: a burst of sweetness, a hint of spice, and a moist texture that made me want to write a poem about it. That moment was pure bliss, and it’s what I want to share with you. This is hands down the best version you'll ever make at home, and it’s so simple you’ll wonder why you haven’t been baking it for years.
If you've ever struggled with banana bread that ends up dry or overcooked, you're not alone—and I've got the fix. Most recipes get this completely wrong by using too much flour or too little banana, resulting in a dense, unyielding loaf. Here’s what actually works: use ripe bananas, a splash of pumpkin puree, and a balanced spice mix. The trick is to keep the batter moist while allowing the oven to do its thing, so the loaf rises beautifully without drying out. I’ve experimented with different oils, but vegetable oil keeps the crumb tender and adds a subtle buttery flavor that’s hard to beat.
And now the fun part. This next step? Pure magic. You’ll see that the batter should look like thick, luscious pudding—smooth, slightly glossy, and ready to be poured into a greased loaf pan. The moment the batter hits the pan, the kitchen fills with the comforting scent of baking, and you can almost taste the final product before it even starts to bake. The anticipation is almost as satisfying as the result. Stay with me here—this is worth it.
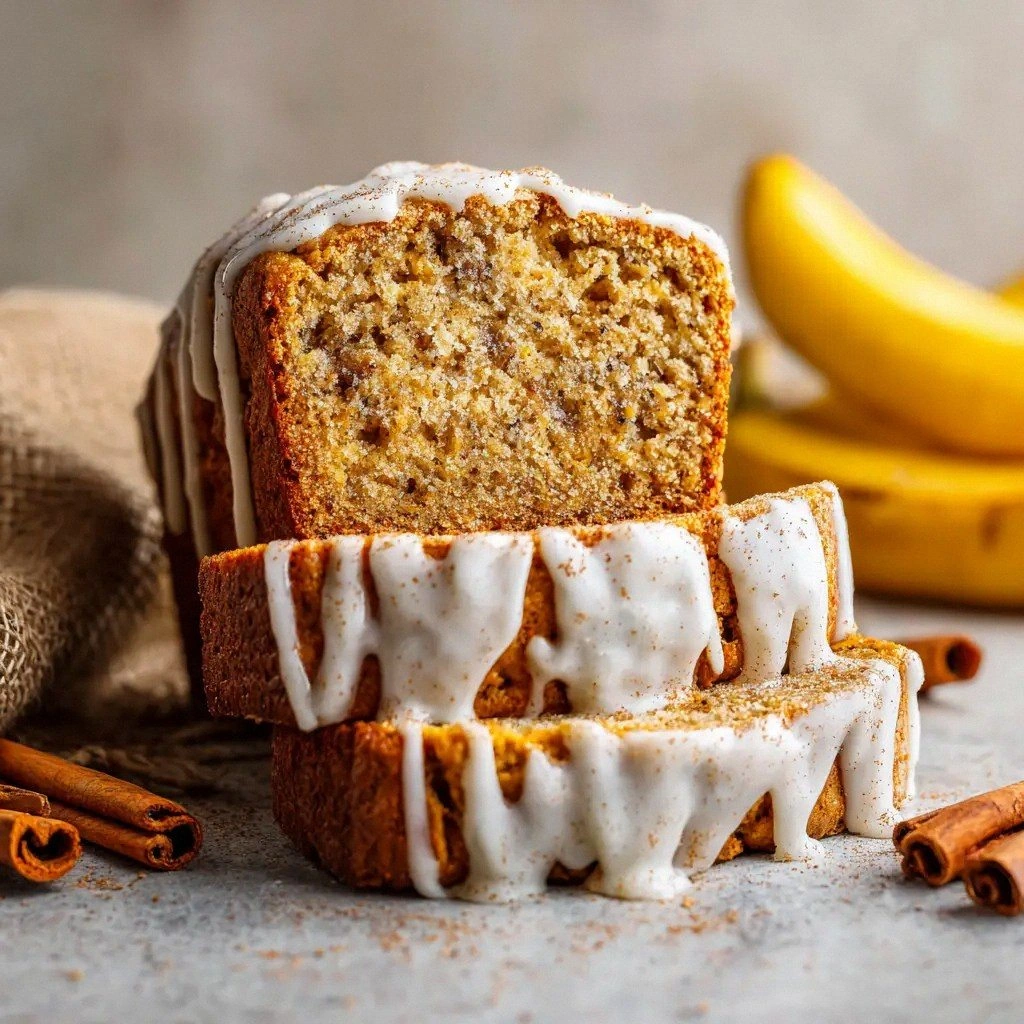
I’ve spent months tweaking this recipe, and the result is a loaf that’s moist, flavorful, and easy to make. It’s the kind of bread that makes you feel like you’re in a bakery, even if you’re just in your own kitchen. The secret? A precise balance of ingredients, a careful mix, and a few small but powerful hacks that elevate the entire experience. When you slice it, the crumb is light and airy, with a subtle crunch on the edges that shatters like thin ice. The flavor profile is a dance of sweet, spicy, and earthy notes that linger long after the last bite.
Let me walk you through every single step—by the end, you'll wonder how you ever made it any other way. From the moment you gather your ingredients to the final cooling rack, each moment is a chance to create something extraordinary. I’ll give you the insider tricks, the creative variations, and the storage hacks that keep this loaf fresh and delicious. The journey is almost as delightful as the destination, and I promise you’ll feel like a master baker when you’re done.
What Makes This Version Stand Out
- Flavor: The blend of pumpkin, banana, and spices creates a layered taste profile that’s both comforting and complex. The subtle sweetness of ripe bananas pairs perfectly with the earthy pumpkin, while the spices add warmth and depth.
- Texture: The loaf is moist yet firm, with a tender crumb that doesn’t crumble when sliced. The use of vegetable oil keeps the bread supple, and the balanced batter prevents it from becoming soggy.
- Convenience: The recipe requires no special equipment—just a loaf pan and a mixing bowl. It’s a one-pan wonder that’s perfect for busy mornings or lazy weekends.
- Versatility: Whether you’re serving it for breakfast, a snack, or dessert, this loaf fits every occasion. It can be enjoyed warm with butter or cold with a drizzle of honey.
- Crowd-pleasing: Friends and family always ask for the recipe after tasting it. The loaf’s aroma alone is enough to draw people in, and the flavor keeps them coming back for more.
- Ingredient Quality: Using fresh, ripe bananas and pure pumpkin puree ensures the best flavor. The spices are measured precisely, preventing any one flavor from overpowering the others.
- Make‑Ahead Potential: The bread can be made ahead of time and frozen without losing quality. It’s an excellent option for meal prepping or for those who want a quick breakfast.
- Health‑Friendly: While it’s a treat, the loaf contains natural sugars and spices that offer antioxidant benefits. It’s a healthier alternative to typical sugary breads.
Alright, let's break down exactly what goes into this masterpiece...
Inside the Ingredient List
The Flavor Base
The all-purpose flour is the backbone of the loaf, providing structure while allowing the batter to rise. It’s the canvas on which all other flavors are painted. If you skip it, the loaf will collapse and feel like a pancake. The baking soda is the leavening agent, giving the bread its gentle lift. It reacts with the acidic banana and pumpkin to create tiny bubbles that make the crumb airy.
The salt is more than just a seasoning; it balances the sweetness and enhances every other flavor. Think of it as the seasoning that brings out the best in a dish—without it, the spices would taste flat. The vanilla extract is the final touch that ties everything together, adding a subtle sweetness and depth. It’s the invisible thread that weaves the flavors into a cohesive whole.
The Spice Crew
Ground cinnamon is the star of the show, delivering a warm, sweet aroma that’s reminiscent of autumn mornings. Its sweetness pairs beautifully with the banana’s natural sugars. Ground nutmeg adds a nutty, slightly sweet note that complements the pumpkin’s earthiness. A pinch of ginger gives a subtle heat that keeps the loaf from feeling too sweet.
Ground cloves, though used sparingly, add a deep, almost medicinal warmth that lingers on the palate. They’re a small but powerful addition that elevates the loaf’s complexity. If you’re sensitive to cloves, you can reduce the amount or omit them entirely, but the loaf will still be delicious. The combination of these spices creates a flavor profile that’s comforting, familiar, and slightly adventurous.
The Unexpected Star
Pumpkin puree is the unexpected hero that adds moisture, color, and a subtle sweetness. It’s a natural sweetener that’s lower in sugar than traditional pumpkin pie filling, making the loaf a healthier option. Pumpkin also adds a subtle earthy flavor that balances the sweetness of the bananas and sugars. If you’re using canned pumpkin, make sure it’s 100% pure pumpkin—no added sugars or spices.
The vegetable oil keeps the crumb moist and tender. It’s a neutral oil that doesn’t interfere with the flavor profile, allowing the spices and banana to shine. If you prefer a richer flavor, you could swap the oil for melted butter, but the loaf will be slightly denser. The oil also helps the loaf pull away from the pan easily, making the final result look professional.
The Final Flourish
The eggs bind everything together, giving the loaf structure and a slightly glossy finish. They also help the loaf rise, creating that desirable airy crumb. Light brown sugar adds a deep molasses flavor that complements the spices, while granulated sugar provides the sweetness that balances the tartness of the pumpkin. Together, they create a harmonious balance that’s both sweet and savory.
The ripe bananas are the sweet, moist heart of the loaf. They add natural sweetness and moisture, eliminating the need for additional sugar. The bananas should be soft and slightly bruised—if they’re too firm, the loaf will be dense. The combination of bananas and pumpkin creates a moist, flavorful base that’s impossible to resist.
Everything’s prepped? Good. Let’s get into the real action...
The Method — Step by Step
- Preheat your oven to 350°F (175°C) and line a 9x5-inch loaf pan with parchment paper or grease it with butter. The parchment will make removal painless and the butter adds a subtle sheen. Let the oven heat while you prepare the wet mixture—this ensures an even bake. The temperature is critical; too hot, and the loaf will brown too quickly; too cool, and it won’t rise properly.
- In a large mixing bowl, mash the ripe bananas with a fork until they’re almost smooth, leaving a few small lumps for texture. The bananas should be soft enough to mash easily; if they’re too firm, let them sit at room temperature for a few minutes. Add the pumpkin puree, vegetable oil, and vanilla extract to the mashed bananas and stir until fully combined. The mixture should be thick, almost like a thick pudding.
- Whisk the brown sugar and granulated sugar together in a separate bowl, then pour them into the banana‑pumpkin mixture. Stir until the sugars dissolve and the batter is a uniform, glossy color. The sugars help create a caramelized crust as the bread bakes, adding a delightful crunch to the edges.
- In another bowl, sift together the flour, baking soda, salt, cinnamon, nutmeg, ginger, and cloves. Sifting removes lumps and ensures even distribution of the leavening agent. This dry mix is the foundation for the loaf’s rise and flavor. It’s essential to measure accurately; too much baking soda can cause a bitter aftertaste.
- Add the dry ingredients to the wet mixture in two stages, stirring gently after each addition. Use a rubber spatula to fold the batter, which prevents overmixing and keeps the crumb tender. Overmixing can activate gluten, resulting in a dense loaf that’s hard to chew.
- Pour the batter into the prepared loaf pan, smoothing the top with a spatula. Tap the pan gently on the counter to release any trapped air bubbles. The batter should settle evenly, creating a uniform surface that will bake to a golden brown.
- Bake for 30–35 minutes, or until a toothpick inserted in the center comes out clean. The loaf should develop a golden crust while remaining moist inside. If you notice the edges browning too quickly, tent the loaf with foil to prevent over-browning.
- Once the bread is done, remove it from the oven and let it cool in the pan for 10 minutes. Then transfer it to a wire rack to cool completely. This step is crucial; cooling on the rack prevents condensation, which can make the bottom soggy.
- Slice the bread and serve warm or at room temperature. For a decadent twist, spread a thin layer of cream cheese or butter on each slice. The warm, buttery layers melt into the bread, creating a silky, indulgent experience.
- Store any leftovers in an airtight container at room temperature for up to 3 days, or freeze for longer storage. The loaf keeps its moisture even after freezing, making it a convenient grab‑and‑go snack.
That's it — you did it. But hold on, I've got a few more tricks that'll take this to another level. From the precise timing of your oven to the final cooling steps, every detail matters. If you follow these steps closely, you’ll end up with a loaf that’s not only delicious but also looks like it was made by a seasoned baker. The secret is in the details, and I’m here to share them.
Insider Tricks for Flawless Results
The Temperature Rule Nobody Follows
Many bakers overlook the importance of oven temperature. Even a 10°F deviation can change the outcome dramatically. I’ve found that preheating for at least 10 minutes ensures a consistent bake, preventing the loaf from browning unevenly. If your oven runs hot, calibrate it with a thermometer; if it runs cold, preheat slightly longer. A steady temperature guarantees a uniform crumb and a golden crust.
Why Your Nose Knows Best
Your nose is a powerful ally during baking. When the loaf starts to smell toasted, that’s the cue that the crumb is forming. The aroma signals that the sugars are caramelizing just right. If the smell is too sharp, the bread is overcooked; if it’s faint, it needs more time. Trusting your senses ensures a perfectly baked loaf every time.
The 5‑Minute Rest That Changes Everything
After baking, let the loaf rest for exactly five minutes in the pan before moving it to a rack. This brief rest allows the structure to set, preventing cracks or a domed top. The steam that condenses during this period also adds moisture to the interior, keeping the crumb tender. Skipping this step often results in a crumb that feels dry or uneven.
The Secret to a Perfect Crust
If you want an extra crisp crust, brush the top with a thin layer of melted butter just before baking. The butter melts into the surface, creating a shiny, slightly crunchy finish. This simple trick elevates the loaf from good to great, adding a buttery richness that complements the spices.
How to Keep It Moist After Baking
After cooling, wrap the loaf in parchment paper and then a layer of foil. This double wrap traps steam, keeping the loaf moist for days. When you’re ready to eat, remove the foil and slice. The parchment allows the bread to breathe slightly, preventing it from becoming too soft.
The One‑Minute Pre‑Bake Trick
Place the loaf pan on the middle rack of a preheated oven for 5 minutes before adding the batter. This preheating step ensures that the bottom of the loaf starts baking immediately, giving you a crisp edge. It also helps the batter rise evenly, preventing a domed top.
Creative Twists and Variations
This recipe is a playground. Here are some of my favorite ways to switch things up:
Nutty Delight
Add a cup of chopped pecans or walnuts to the batter for a crunchy texture. The nuts bring a buttery richness that pairs well with the spices. Toast them lightly before adding to enhance their flavor. This variation is perfect for a holiday brunch or a cozy Sunday afternoon.
Chocolate Swirl
Fold in a handful of dark chocolate chips or drizzle melted chocolate over the top before baking. The chocolate creates a sweet, indulgent swirl that’s irresistible. Use dark chocolate for a more sophisticated flavor, or milk chocolate for a classic twist.
Citrus Burst
Add the zest of one orange or lemon to the batter for a bright, fresh note. The citrus balances the sweetness and adds a subtle zing. Keep the zest finely grated to avoid bitterness. This version works wonderfully in spring or summer when you want a lighter loaf.
Almond‑Infused
Replace half the flour with almond flour for a gluten‑free version that’s still moist and flavorful. Almond flour adds a nutty flavor and a denser crumb. Use a blend of almond and all‑purpose flour to maintain structure. This is a great option for those with gluten sensitivities.
Spiced Latte Twist
Stir in a tablespoon of instant espresso powder for a subtle coffee undertone that pairs beautifully with the spices. The espresso adds depth and complexity, making the loaf feel like a warm latte in loaf form. This version is perfect for coffee lovers and autumn evenings.
Sweet & Salty Surprise
Sprinkle sea salt on top of the loaf before baking for a caramelized, salty crust. The contrast between sweet and salty is addictive, and the sea salt adds a subtle crunch. Be careful not to over-salt; a light dusting is all you need. This twist is ideal for parties or a quick snack.
Storing and Bringing It Back to Life
Fridge Storage
Wrap the cooled loaf tightly in plastic wrap or place it in an airtight container. Store in the refrigerator for up to 5 days. The cold environment preserves moisture while preventing mold growth. When you’re ready to eat, let it sit at room temperature for 10 minutes to soften slightly.
Freezer Friendly
Slice the loaf before freezing to make it easier to grab a piece later. Wrap each slice in parchment paper and then foil, or place the whole loaf in a freezer bag. Freeze for up to 3 months. The freezer keeps the loaf fresh and moist, and you can thaw slices in the microwave for 20–30 seconds.
Best Reheating Method
To revive the loaf, preheat your oven to 350°F (175°C) and place a slice on a baking sheet. Warm for 5–7 minutes, or until the edges are crisp and the center is heated through. For a quick snack, toast slices in a toaster or toaster oven. Adding a tiny splash of water before reheating steams the bread back to perfection.