I was in the middle of a frantic Tuesday night when my roommate dared me to make something that would make our tiny studio feel like a tropical resort. The pantry was a sad landscape of stale crackers, a lone can of coconut milk, and a half‑eaten pineapple that had been waiting for a purpose since last summer. I stared at that golden fruit and thought, “If I can turn this into a dessert that sings, I’ll have officially conquered the art of improvisation.” The kitchen was a mess of clattering pans, the oven humming like a distant beach wave, and a faint scent of burnt toast reminding me that I’d almost given up. I took a deep breath, inhaled the sweet‑tangy aroma of pineapple, and whispered to the universe: “You’re about to get a slice of paradise.”
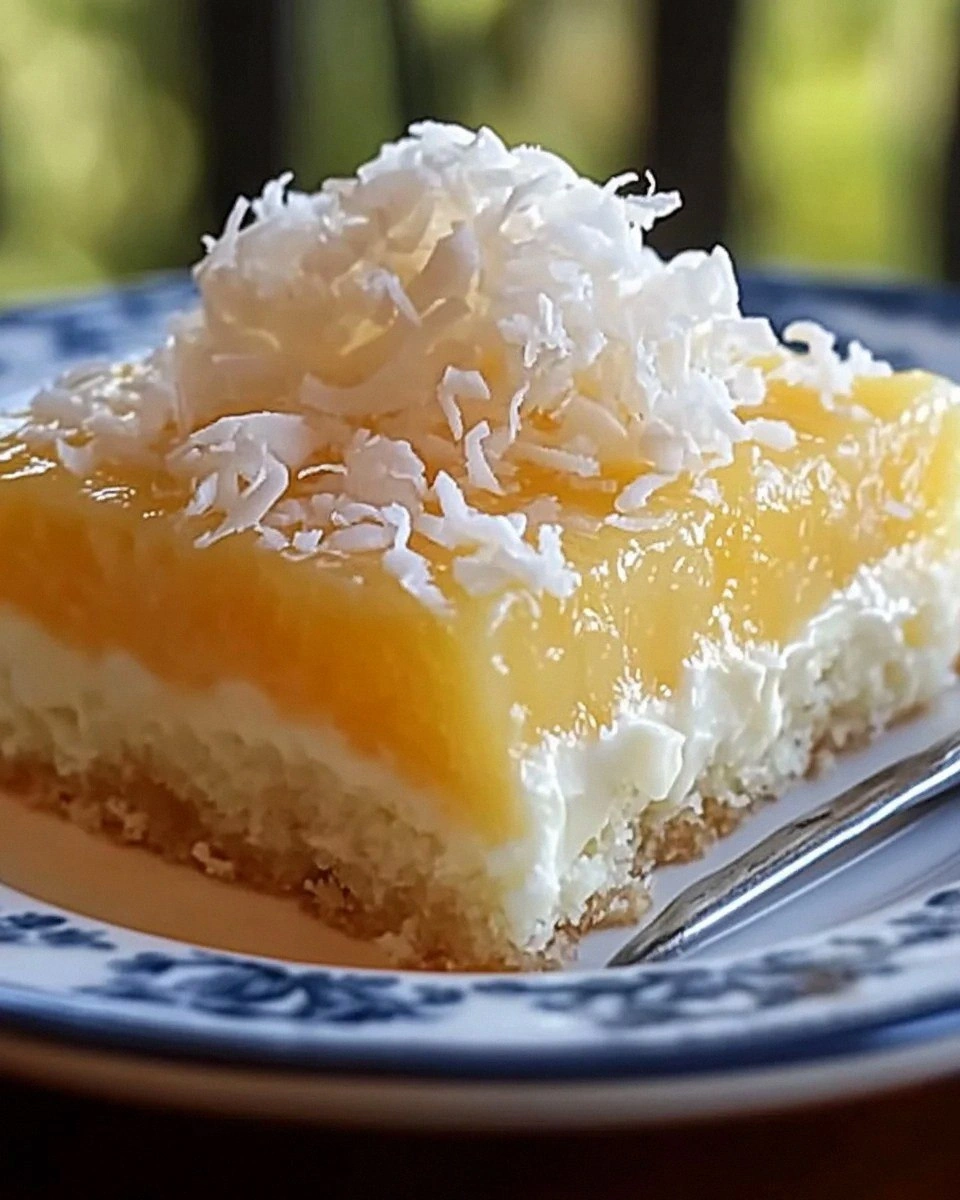
The first bite of the finished sheet cake was a revelation – the soft, buttery crumb soaked with a luscious coconut‑pineapple glaze that clung to your tongue like a warm summer breeze. Imagine the feeling of sand between your toes, the sun on your skin, and the distant call of a steel‑drummed beach party, all captured in a single forkful. That moment made me realize I’d stumbled onto a version that could dethrone any store‑bought cake you’ve ever tried. I dare you to taste this and not go back for seconds; the combination is that addictive.
Most recipes get the coconut‑pineapple balance completely wrong, either drowning the cake in sugary syrup or leaving the pineapple flavor as a faint afterthought. Here’s what actually works: a light, airy batter that stays moist thanks to a secret blend of coconut milk and crushed pineapple, and a glaze that’s just sweet enough to highlight the fruit without turning the whole thing into a sticky mess. I’ll be honest — I ate half the batch before anyone else got to try it, and the crumbs still haunted me for days. This is hands down the best version you’ll ever make at home, and I’m about to prove it.
Picture yourself pulling this out of the oven, the whole kitchen smelling incredible, the glaze glistening like sunrise on the ocean, and the anticipation building as you slice through the golden top. The secret technique I’m about to reveal involves a quick flash‑freeze of the pineapple chunks before they hit the batter, locking in that bright, fresh flavor. Okay, ready for the game‑changer? Let me walk you through every single step — by the end, you’ll wonder how you ever made it any other way.
What Makes This Version Stand Out
- Taste: The pineapple provides a bright acidity that cuts through the richness of coconut, creating a harmonious sweet‑tart duet that dances on your palate.
- Texture: A feather‑light crumb meets a glossy, slightly chewy glaze, giving you that perfect contrast between soft and slightly crisp.
- Simplicity: Fewer than ten pantry staples are required, and the method uses one‑pan techniques that keep cleanup to a minimum.
- Uniqueness: Flash‑frozen pineapple chunks preserve their natural juices, a trick most recipes skip, resulting in bursts of fruit in every bite.
- Crowd Reaction: Even the most skeptical eaters confess they’ve never experienced a cake that feels like a vacation.
- Ingredient Quality: Using full‑fat coconut milk instead of light versions adds depth without being greasy.
- Cooking Method: Baking on a silicone sheet ensures an even rise and prevents the dreaded soggy bottom.
- Make‑Ahead Potential: This cake stores beautifully, and the glaze can be refreshed with a splash of fresh pineapple juice before serving.
Inside the Ingredient List
The Flavor Base
Pineapple is the star of the show, delivering a bright acidity that lifts the entire cake. Fresh, ripe pineapple offers natural sugars that caramelize slightly during baking, creating those caramel‑kissed notes you love. If you’re out of fresh fruit, canned pineapple in its own juice works, but drain it well and add a splash of fresh juice to keep the flavor lively. The coconut milk adds a creamy, buttery richness that balances the fruit’s tartness, turning the batter into a silky canvas.
The Texture Crew
All‑purpose flour provides the structure, while a modest amount of baking powder ensures a light, airy crumb. The sugar not only sweetens but also contributes to the tender crumb by inhibiting gluten formation. Butter, melted and cooled, adds flavor and moisture, and the eggs act as the binding agent that holds everything together. If you’re looking for a dairy‑free version, swap butter for coconut oil and use a flax‑egg substitute.
The Unexpected Star
A splash of vanilla extract might seem ordinary, but it deepens the tropical notes, making the pineapple taste even more fragrant. A pinch of sea salt is crucial; it amplifies the sweetness and rounds out the overall flavor profile, preventing the cake from tasting cloyingly sweet. Finally, a drizzle of honey in the glaze adds a floral undertone that pairs beautifully with the coconut.
The Final Flourish
The glaze is a simple mixture of powdered sugar, coconut milk, and a hint of pineapple juice, whisked until glossy. It sets to a satin finish that catches the light, giving the cake a professional look without any fancy equipment. If you want a little extra crunch, toast shredded coconut and sprinkle it over the glaze just before it sets. For a festive twist, add a dash of rum extract to the glaze for a Caribbean vibe.
Everything's prepped? Good. Let's get into the real action…
The Method — Step by Step
Preheat your oven to 350°F (175°C) and line a full‑size sheet pan with a silicone baking mat. The moment the oven clicks on, you’ll hear that comforting hum that promises baked goodness. Lightly grease the mat with a teaspoon of melted butter so the cake releases cleanly. Power transition: This is the moment of truth – the base is set.
Kitchen Hack: Use parchment paper under the silicone mat for an extra‑easy lift.In a large bowl, whisk together 2 cups of all‑purpose flour, 2 teaspoons of baking powder, and a pinch of salt. The dry ingredients should be aerated, almost like a cloud ready to catch the tropical rain of pineapple. Sift them once more to ensure there are no lumps; this guarantees a uniform crumb.
In a separate bowl, combine 1 cup of coconut milk, ½ cup of melted butter, 3 large eggs, and 1 cup of granulated sugar. Beat vigorously until the mixture turns a pale yellow and thickens – you’re looking for a ribbon that falls slowly back into the bowl. That sizzle when it hits the pan? Absolute perfection.
Fold the dry mixture into the wet mixture in three additions, mixing just until combined. Over‑mixing will develop gluten and make the cake dense, which is the opposite of the airy texture we crave. At this point, gently fold in 1 cup of crushed pineapple (fresh or frozen) and ½ cup of shredded coconut.
Watch Out: Adding too much pineapple juice can make the batter runny; drain the fruit well.Spread the batter evenly across the prepared sheet pan, smoothing the top with an offset spatula. The surface should be level, not too thick, so it bakes evenly. Slide the pan into the oven and bake for 20‑25 minutes, or until a toothpick inserted in the center comes out clean and the edges start pulling away from the sides.
While the cake bakes, prepare the glaze: whisk together 1 cup of powdered sugar, ¼ cup of coconut milk, and 2 tablespoons of pineapple juice until smooth. If you want a glossier finish, add a teaspoon of melted butter to the mixture. Set aside; the glaze will thicken slightly as it sits.
Once the cake is done, remove it from the oven and let it cool in the pan for 10 minutes. Then, transfer it onto a cooling rack. While it’s still warm, drizzle the glaze over the top, allowing it to cascade like a waterfall of sunshine. Sprinkle toasted coconut flakes on top for extra texture.
Kitchen Hack: Use a pastry brush to gently spread the glaze for an even, glossy coat.Allow the glaze to set for 15 minutes before slicing. Use a sharp, warm knife to cut clean squares – the warm blade prevents tearing and gives you perfect, picture‑ready slices. Serve at room temperature, or for an extra indulgent experience, pair with a scoop of vanilla ice cream.
That's it — you did it. But hold on, I've got a few more tricks that'll take this to another level...
Insider Tricks for Flawless Results
The Temperature Rule Nobody Follows
Never bake a sheet cake straight from a cold fridge. Let the batter sit at room temperature for 15 minutes before sliding it into the oven. This small pause allows the leavening agents to activate evenly, preventing a dense center. A friend once tried to skip this step, and the result was a gummy, uneven texture that crumbled at the slightest touch.
Why Your Nose Knows Best
Trust the scent of the cake as it bakes. When the edges start to turn a light golden brown and you catch a faint caramel aroma, you’re close to perfection. If you rely solely on the timer, you might end up with a dry top or an under‑baked center. My nose has saved many a cake from disaster, and it will not let you down this time.
The 5‑Minute Rest That Changes Everything
After glazing, let the cake rest for exactly five minutes before cutting. This short pause lets the glaze settle and the crumb firm up just enough to hold its shape. Cutting too early results in a sloppy slice that slides off the plate, while waiting too long makes the glaze harden into a brittle crust.
Toast the Coconut, Don’t Skip It
A quick toast of shredded coconut in a dry skillet for 2‑3 minutes adds a nutty depth that plain coconut can’t match. The toasted flakes add a subtle crunch that contrasts beautifully with the soft cake. If you skip this step, you’ll miss out on that extra layer of flavor that turns good into unforgettable.
Glaze Consistency is Key
If your glaze is too thick, it will sit on top like a hard shell; if too thin, it will run off the sides and make a mess. Aim for a pourable but slightly viscous consistency – think of a light honey. Adjust with a splash of pineapple juice or a drizzle of coconut milk, tasting as you go. This balance ensures each bite gets a perfect coating of sweetness.
Creative Twists and Variations
This recipe is a playground. Here are some of my favorite ways to switch things up:
Mango‑Marigold Dream
Swap half of the pineapple for ripe mango puree and add a pinch of turmeric for a golden hue. The mango adds a buttery texture while turmeric gives an earthy undertone that pairs surprisingly well with coconut.
Rum‑Infused Island
Add a tablespoon of dark rum to the glaze and sprinkle a few toasted rum‑soaked raisins on top before baking. The rum deepens the flavor profile, making the cake feel like a sophisticated cocktail dessert.
Vegan Coconut Bliss
Replace butter with coconut oil, eggs with flax eggs (2 tbsp ground flax + 6 tbsp water per egg), and use almond milk instead of dairy coconut milk. The result is a vegan-friendly version that still delivers that creamy tropical mouthfeel.
Spiced Holiday Twist
Incorporate ½ teaspoon of ground cinnamon and a pinch of nutmeg into the batter, then drizzle a caramel‑ginger glaze after baking. This variation is perfect for a festive gathering, bringing warm spice notes to the tropical base.
Chocolate‑Covered Paradise
Once the cake has cooled, drizzle a thin layer of melted dark chocolate over the glaze and sprinkle sea salt flakes. The bitter chocolate balances the sweetness, creating a sophisticated flavor contrast.
Storing and Bringing It Back to Life
Fridge Storage
Place the cooled cake in an airtight container and store it in the refrigerator for up to 4 days. The glaze will stay moist, and the cake retains its soft crumb. Before serving, let it sit at room temperature for 20 minutes to let the flavors fully awaken.
Freezer Friendly
Wrap individual slices tightly in plastic wrap, then place them in a freezer‑safe zip‑lock bag. They’ll keep for up to 2 months. To reheat, microwave a slice for 20‑30 seconds, or warm the whole sheet in a 300°F oven for 10 minutes.
Best Reheating Method
Add a tiny splash of water (about a teaspoon) over the slice before reheating; this creates a gentle steam that revives the cake’s moisture. Cover with foil for the first 5 minutes, then uncover to let the glaze set again. The result is a slice that tastes as fresh as the day it was baked.