I never thought a kitchen mishap could lead to a dessert legend. One rainy afternoon, I was juggling a burnt pie crust and a jar of stale jam, and a friend dared me to create something sweet from the chaos. I stared at the melted butter and the crumbs, and the idea of a no‑bake strawberry cream pie popped into my head like a bright neon sign. That moment felt like a culinary revelation, a promise that the best desserts don't always need an oven. And if you’re ready for a recipe that defies expectations, keep reading.
The kitchen smelled of butter and crushed crackers, a sweet perfume that danced in the air. My ears caught the faint hiss of melting butter, a sound that promised a silky base. The sight of the graham cracker crumbs glistening in the pan felt like a crunchy snowstorm. Each aroma, each sound, each visual cue whispered that this dessert would be unforgettable. I could already taste the creamy strawberry swirl that would soon crown the pie.
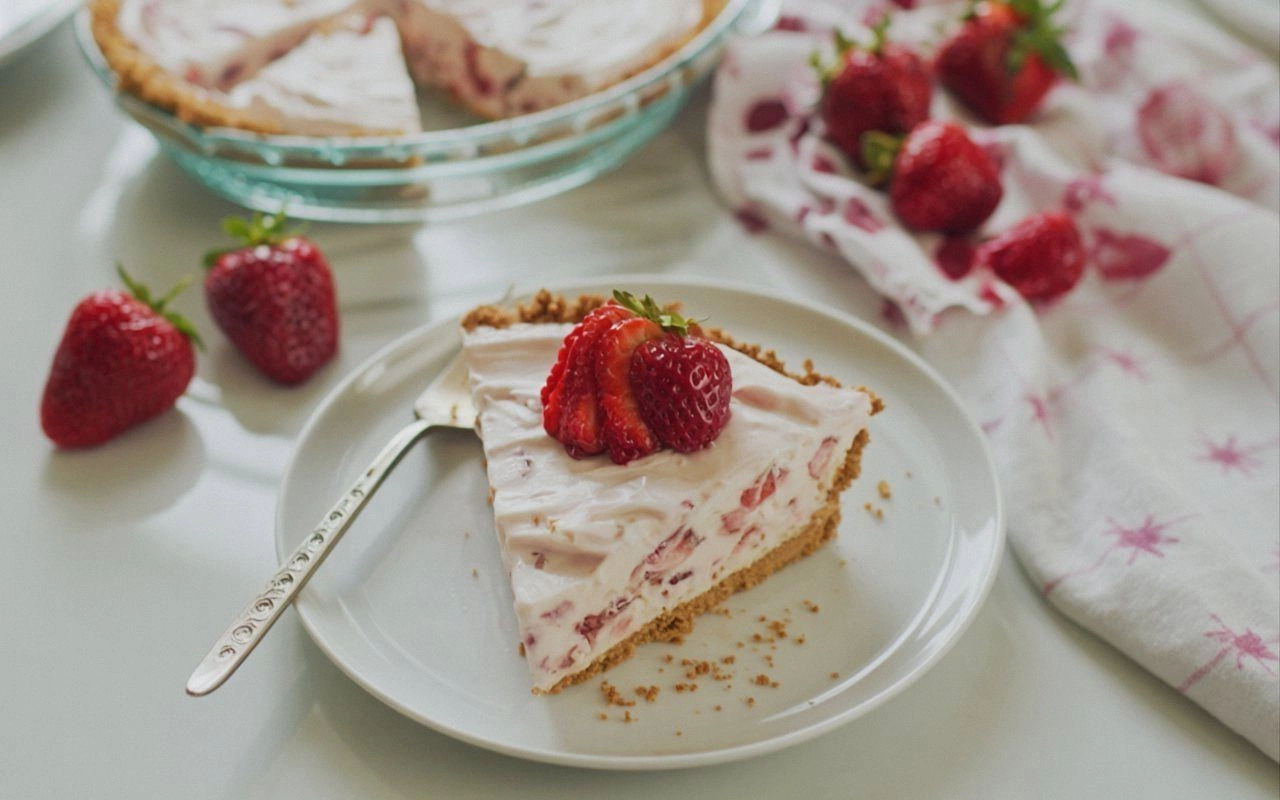
Unlike most strawberry pies that rely on a flaky crust, this version embraces a buttery graham foundation that melts into a crunchy, caramelized shell. The creamy filling, made with sweetened condensed milk and heavy cream, delivers a velvety mouthfeel that clings to your tongue. The jam adds a burst of natural sweetness, while the fresh strawberries provide a juicy counterpoint. Together, these elements create a harmonious balance between sweet, tart, and buttery. It’s a dessert that feels both indulgent and refreshing, a perfect summer treat.
I’ll admit, I was skeptical at first, but the first bite shattered my doubts like a thin ice sheet. The crust was crisp yet tender, the filling airy, and the strawberries burst with flavor. It felt like a dessert that could be made in minutes yet still felt like a gourmet creation. My friends begged for seconds, and I dared them to taste it without going back for more. The challenge was easy to win because the flavors were so addictive.
What makes this version stand out is its simplicity and the sheer joy it brings to the table. The graham crackers are a nostalgic nod to childhood, while the sweetened condensed milk offers a rich, silky texture. The jam’s natural sugar balances the tartness of the strawberries, preventing the pie from feeling heavy. The heavy cream is whipped to a light, airy consistency that floats on top like a cloud. Together, they create a dessert that feels both comforting and sophisticated.
Most recipes get this completely wrong by overcooking the crust or using too much jam, but I’ve discovered the sweet spot that keeps everything together. The crust doesn’t need a second bake; it simply needs to be pressed and chilled. The jam should be seedless for a smoother finish, and the strawberries should be chopped into bite‑sized pieces. By following these small tweaks, you’ll achieve a pie that melts in your mouth without losing its structure. Trust me, this is hands down the best version you'll ever make at home.
If you’ve ever struggled with a no‑bake dessert that falls apart, you’re not alone. The trick lies in balancing the moisture content of the filling with the binding power of the graham crackers. A pinch of salt can elevate the flavors, while a splash of lemon juice brightens the strawberries. The quality of each ingredient matters: fresh, ripe strawberries and real butter will make all the difference. And if you’re feeling adventurous, try swapping the jam for a homemade strawberry compote.
Picture yourself pulling this out of the fridge, the whole kitchen smelling incredible, and the slice of pie glistening under the light. The first bite feels like a burst of summer sunshine on your palate, and the texture is a delightful contrast of crunch and cream. I’m not exaggerating—this dessert is a game changer that will leave your guests asking for the recipe. Let me walk you through every single step—by the end, you'll wonder how you ever made it any other way.
What Makes This Version Stand Out
- Taste: The combination of buttery graham crackers and sweetened condensed milk creates a rich, comforting flavor profile that feels like a hug in dessert form. The subtle sweetness of the jam and the bright acidity of the strawberries lift the entire pie, making each bite a harmonious dance of flavors. It’s a taste that will have your taste buds singing and your friends begging for seconds.
- Texture: The crust is a paradox of crisp and tender, while the filling is airy and silky, offering a contrast that keeps the mouth moving. The strawberries add a juicy pop that breaks up the creamy smoothness, creating a multi‑sensory experience. The result is a dessert that feels like a carnival of textures in every bite.
- Simplicity: No oven, no complicated steps, just a few ingredients that come together in minutes. The process is straightforward enough that even a beginner can nail it, yet sophisticated enough to impress. This simplicity is what makes the pie a go‑to for any occasion.
- Uniqueness: While most strawberry pies rely on a flaky crust, this pie’s graham cracker base is a fresh twist that sets it apart. The use of sweetened condensed milk instead of a traditional custard gives it a silky, velvety texture that’s hard to replicate elsewhere. It’s a unique take that feels brand new even to seasoned dessert lovers.
- Crowd Reaction: Guests have been known to finish the whole pie in one sitting, often leaving a trail of crumbs behind. The sweet, buttery, and fruity flavors combine to create a universal appeal that works for all ages. The pie is the type of dessert that turns a simple gathering into a memorable celebration.
- Ingredient Quality: Each component is chosen for its flavor and texture, from the buttery graham crackers to the fresh strawberries. Using real butter, real jam, and real cream elevates the dish from good to extraordinary. The quality of the ingredients is what makes this pie feel luxurious and satisfying.
- Make‑Ahead Potential: The pie can be assembled and chilled a day in advance, making it perfect for last‑minute dinner parties. The flavors actually deepen with time, creating a richer experience. This makes it a practical choice for busy hosts who still want to wow their guests.
Alright, let's break down exactly what goes into this masterpiece...
Inside the Ingredient List
The Flavor Base
Graham crackers are the backbone of this pie, providing a buttery, slightly sweet foundation that holds the filling together. Without them, the pie would feel flat and lack that comforting crunch. If you prefer a gluten‑free option, try crushed rice crackers; they’ll give a similar texture but with a different flavor profile.
Unsalted butter melts into the cracker crumbs, creating a caramelized coating that adds depth and richness. The butter also helps the crust set firmly when chilled. If you’re watching calories, use a light butter or a butter substitute, but be aware that the flavor will be noticeably lighter.
Sweetened condensed milk is the sweet heart of the filling, lending a silky, almost custard‑like consistency. It balances the tartness of the jam and the strawberries, preventing the pie from feeling too acidic. If you’re craving a lower‑sugar version, swap it for a sugar‑free condensed milk, though the texture may change slightly.
The Texture Crew
Strawberry jam is the sweet, fruity bridge that connects the creamy filling to the fresh strawberries. It adds a glossy sheen and a concentrated berry flavor that makes each bite pop. Seedless jam ensures a smooth texture; if you use a regular jam, be prepared to strain out the seeds.
Heavy cream is whipped until soft peaks form, giving the filling a light, airy quality that floats on top of the crust like a cloud. It’s the key to that luxurious mouthfeel that makes the pie feel indulgent. For a lighter version, use half‑and‑half, but the filling will be less thick.
Fresh strawberries are the star of the show, providing juicy bursts of natural sweetness and a bright, fresh flavor that cuts through the richness. They also add a pop of color and a slight crunch if you keep them whole. If you can’t find fresh strawberries, frozen berries work, just thaw and pat dry before adding.
The Unexpected Star
Extra strawberries and whipped cream are optional but elevate the pie to a new level of decadence. The extra strawberries add texture and a fresh burst of flavor, while the whipped cream provides a final flourish that feels like a cloud of sweetness. If you’re short on time, a few dollops of whipped cream on top are enough to wow.
The Final Flourish
A sprinkle of chopped mint or a dusting of powdered sugar can transform the pie’s visual appeal and add a subtle flavor contrast. Mint provides a cooling effect that pairs beautifully with strawberries, while powdered sugar offers a classic dessert finish. Experiment with different toppings to keep the pie fresh each time you make it.
Everything's prepped? Good. Let's get into the real action...
The Method — Step by Step
- Gather all ingredients and ensure your pie dish is ready for assembly. The pie dish should be 9‑inch, and if it’s non‑stick, you can skip greasing. Keep the dish cool; a chilled dish helps the crust set faster. This is the foundation that will hold everything together. Don't rush—preparation is key.
- Crush the graham crackers into fine crumbs using a plastic bag and a rolling pin or a food processor on low. The crumbs should be coarse enough to hold butter but fine enough to bind. This step is crucial for a crunchy texture. If you skip it, the crust will crumble.
- Melt the butter in a small saucepan over low heat, then stir in the sweetened condensed milk until smooth. The mixture should thicken slightly, but not boil. The butter’s aroma will fill the kitchen, signaling that the crust is almost ready. Watch the heat carefully to avoid scorching.
- Combine the graham cracker crumbs with the melted butter‑milk mixture and stir until every crumb is coated. The mixture should feel sticky but hold together when pressed. This is where the crust starts to take shape. Keep the mixture warm for a few minutes to aid binding.
- Press the crumb mixture firmly into the bottom and up the sides of the pie dish. Use the back of a spoon or a flat‑bottomed glass to create an even layer. The crust should be about 1‑inch thick for a satisfying bite. This step requires precision; a loose crust will collapse later.
- Refrigerate the crust for at least 20 minutes to let it firm up. The cold will help the butter solidify, giving the crust a crisp edge. While the crust chills, you can start the filling. This waiting period is essential for texture.
- Whip the heavy cream until soft peaks form. The cream should be airy and light, yet still hold its shape. If you whisk too hard, it becomes stiff and loses its silky feel. Use a chilled bowl to keep the cream cold.
- Fold the strawberry jam, chopped strawberries, and whipped cream together gently, ensuring the mixture stays airy. The strawberries should be evenly distributed; this prevents clumps of fruit. Once combined, pour the filling over the chilled crust. The filling will settle into the crumbs, creating a layered look.
- Top the pie with extra strawberries and a swirl of whipped cream for a decorative finish. The extra strawberries add a pop of color and fresh flavor. Chill the finished pie for at least 2 hours, preferably overnight, to let the flavors meld. Serve chilled for the best experience.
That's it — you did it. But hold on, I've got a few more tricks that'll take this to another level...
Insider Tricks for Flawless Results
The Temperature Rule Nobody Follows
The key to a firm crust is keeping everything cold. Chill the pie dish before assembly, and refrigerate the crust after pressing. A cold environment prevents the butter from melting too quickly, which would soften the crust. If you’re in a hurry, use a freezer for a quick chill, but watch the time closely.
Why Your Nose Knows Best
When the butter and condensed milk start to caramelize, you'll notice a sweet, nutty aroma. That scent signals that the crust is ready. If you wait too long, the mixture can become overly sweet or burnt. Trust your nose; it’s your best judge of readiness.
The 5-Minute Rest That Changes Everything
After pouring the filling, let the pie rest for 5 minutes before refrigerating. This short rest allows the filling to settle, preventing air pockets. A friend once skipped this step and ended up with a lumpy filling. The difference is like the difference between a smooth jazz track and a scratched vinyl.
Skip the Heavy Cream, Not the Flavor
If you’re avoiding dairy, use a non‑dairy cream like coconut or oat milk, but keep the whipping technique the same. The key is achieving soft peaks. The resulting pie will have a slightly different mouthfeel, but the flavor remains just as delightful.
Use Fresh, Ripe Strawberries for a Burst of Juiciness
Ripe strawberries add a natural sweetness and vibrant color. Look for bright red, firm berries with a slight shine. If you find them too sweet, balance with a splash of lemon juice to cut the sweetness.
Avoid Overmixing the Filling
Whipping the cream too hard can cause it to separate, turning the filling into a watery mess. Gently fold the jam and strawberries into the whipped cream until just combined. The texture will stay light and airy.
Use a Silicone Mould for a Perfect Shape
A silicone mold keeps the crust from sticking and ensures an even thickness. Once the pie is set, you can pop it out easily. This trick is especially handy for making individual servings.
Add a Touch of Vanilla or Almond Extract
A dash of vanilla or almond extract adds depth to the filling without overpowering the strawberry flavor. A half teaspoon of vanilla is enough to lift the overall taste. Experiment with different extracts to find your preferred profile.
Creative Twists and Variations
This recipe is a playground. Here are some of my favorite ways to switch things up:
Chocolate‑Strawberry Fusion
Swap the graham crackers for chocolate cookie crumbs and add a tablespoon of cocoa powder to the filling. The chocolate gives a rich, bittersweet undertone that pairs wonderfully with strawberries. The result feels like a decadent dessert bar.
Minty Freshness
Add a handful of fresh mint leaves to the filling and garnish the top with mint sprigs. The cool mint cuts through the sweetness and adds a refreshing aroma. This variation is perfect for hot summer afternoons.
Almond Crunch
Replace graham crackers with crushed almond biscotti for a nutty crunch. The almonds also bring a subtle earthy flavor that complements the strawberries. This version works well for guests who love a bit of texture.
Lemon‑Zest Surprise
Add a teaspoon of lemon zest to the filling for a bright, citrusy kick. The zest enhances the strawberry's natural tartness and adds a fragrant lift. This twist feels like a fresh summer breeze.
Balsamic Glaze Drizzle
Drizzle a splash of balsamic glaze over the top before serving. The glaze adds a sweet‑savory complexity that turns the pie into a gourmet treat. It’s a bold move that pays off.
Vegan Version
Use coconut cream instead of heavy cream and a plant‑based sweetened condensed milk. Replace graham crackers with a gluten‑free cookie blend. The result is a creamy, dairy‑free dessert that still feels indulgent.
Layered Parfait Twist
Instead of a single pie, layer the crust, filling, and strawberries in a glass to create a parfait. This presentation is visually stunning and easy to serve. The layers maintain their distinct textures.
Storing and Bringing It Back to Life
Fridge Storage
Store the pie in the refrigerator for up to 3 days in an airtight container. The chilled environment keeps the filling firm and the crust crisp. Avoid exposing it to strong odors, as the pie can absorb them quickly. When you’re ready to serve, let it sit at room temperature for 5 minutes to soften slightly.
If you notice the crust softening, a quick chill in the fridge for 10 minutes will restore its crunch. For best results, keep the pie covered with a lid or plastic wrap. The strawberries will remain fresh and juicy, and the filling will stay creamy.
If you plan to store the pie for longer, consider refrigerating it overnight and letting it come to room temperature before serving. This allows the flavors to develop fully, giving you a dessert that tastes even better the next day.
Freezer Friendly
The pie can be frozen for up to 2 weeks if you wrap it tightly in plastic wrap and place it in an airtight container. The filling will set firmly, and the crust will maintain its integrity. When ready to eat, thaw in the refrigerator overnight.
Once thawed, let the pie sit at room temperature for 15 minutes to soften the filling. This step ensures the texture feels as fresh as when it was first made. Avoid refreezing the pie after thawing to preserve quality.
Freezing also allows you to prepare the pie ahead of time for parties. Just remember to label the container with the date to keep track of freshness.
Best Reheating Method
Reheating a no‑bake pie can be tricky, but a gentle microwave heat works well. Place the pie on a microwave‑safe plate and heat on low for 15–20 seconds, checking frequently. Overheating can melt the crust or make the filling runny.
Alternatively, a warm oven set to 200°F (90°C) for 5 minutes will gently warm the pie without melting it. The low temperature preserves the texture while bringing the flavors together. After heating, let it sit for a minute before serving.
Adding a tiny splash of water to the filling before reheating can help it steam back to perfection, restoring its airy quality. This trick is especially useful if the pie feels slightly dense after refrigeration.