Picture this: I was standing in my cramped kitchen, surrounded by the remnants of last night's take‑out, when a sudden craving for something sweet and comforting hit me like a tidal wave. I stared at the empty fridge, then at the pantry, and decided that the only solution was to create my own version of those melt‑in‑your‑mouth beignets that everyone swears by at street corners and brunch spots. I pulled out a packet of active dry yeast, a cup of warm water, and a cup of evaporated milk, and the scent of a fresh dough started to unfurl in the room, turning the air into a promise of fluffy delight. The sizzle that would come later was already audible in my mind—an electric anticipation that could only be satisfied by the first bite of a golden, airy pastry that melts instantly on the tongue. If you’ve ever felt that instant pull toward something that feels like a hug in bite‑size form, then you’re already halfway to becoming a believer in this recipe.
I dare you to taste this and not go back for seconds, because the texture of these beignets is a paradox: crisp on the outside, cloud‑soft on the inside, and the dusting of confectioners' sugar on top feels like a snowy kiss that melts into a sweet glaze. The first bite releases a gentle, buttery aroma that reminds you of a childhood kitchen, while the second bite reveals a subtle hint of caramelized sugar that lingers like a whispered secret. The contrast between the airy crumb and the buttery coating is a dance of flavors that makes your taste buds do a little jig. Most recipes get this completely wrong, but this one hits the sweet spot with a perfect balance of yeast leavening and the richness of evaporated milk. Picture yourself pulling this out of the fryer, the whole kitchen smelling incredible, and watching the golden edges curl with a satisfying snap.
I’ll be honest — I ate half the batch before anyone else got to try it, and that’s because the first bite is pure joy, the second bite is pure satisfaction, and the third bite is pure, unadulterated comfort. The reason this version stands out is simple: it’s not just a recipe; it’s a ritual that transforms a simple dough into a piece of edible art that feels like a hug. The technique I use to keep the dough tender while ensuring a crisp exterior is a secret I’ve kept for years, and now I’m finally sharing it. I’m not just giving you a list of ingredients; I’m handing you a ticket to the best version of beignets you’ll ever make at home. Stay with me here — this is worth it.
Let me walk you through every single step — by the end, you’ll wonder how you ever made it any other way. I’m going to break down the dough, the proofing, the frying, and the dusting, all while sprinkling in a few playful hacks and cautionary notes. The goal is not just to replicate a pastry but to elevate it to a level that makes every bite a moment of pure bliss. And trust me, once you master this, you’ll be the go-to person for anyone who wants to indulge in something that feels like a warm hug wrapped in a golden shell. So, grab your apron, and let’s get cooking.
What Makes This Version Stand Out
- Flavor: The combination of evaporated milk and a pinch of sugar creates a subtle caramel undertone that elevates the dough beyond the typical plain beignet. This depth of flavor makes each bite feel like a layered dessert.
- Texture: The dough’s airy crumb is achieved by a precise yeast activation step, ensuring the beignets puff up just enough to stay soft inside while crisping up on the outside.
- Simplicity: With only eight ingredients, this recipe keeps the process straightforward, but every ingredient is chosen to maximize flavor and texture.
- Uniqueness: Using evaporated milk instead of regular milk adds richness without heaviness, giving the pastry a silky mouthfeel that sets it apart from other versions.
- Audience: Whether you’re cooking for a crowd or a quiet evening, the recipe scales easily, and the beignets hold up beautifully when served warm.
- Make‑Ahead: The dough can be prepared in advance, proofed, and stored, making it ideal for busy mornings or last‑minute gatherings.
Alright, let’s break down exactly what goes into this masterpiece…
Inside the Ingredient List
The Yeast Starter
The packet of active dry yeast is the engine that drives the dough’s rise. It’s the first ingredient you need to activate with warm water, a splash of sugar, and a few minutes of patience. If you skip this step or use cold water, the dough will never rise properly, resulting in dense, flat beignets. For an extra kick, add a teaspoon of vanilla extract to the yeast mixture; it will give the dough a subtle aromatic depth that pairs wonderfully with the sugar dusting.
The Moisture Mix
Evaporated milk is a key player in this recipe, providing a creamy, slightly caramelized flavor that balances the dough’s lightness. If you don’t have evaporated milk on hand, you can substitute it with whole milk and a tablespoon of melted butter to achieve a similar richness. The 2 tablespoons of canola oil keep the dough tender and prevent it from sticking to the bowl during mixing. A pinch of salt, though not listed in the ingredient card, is essential for enhancing all the flavors, but it’s optional and can be omitted if you prefer a sweeter profile.
The Flour Crew
Four cups of self‑rising flour give the dough its structure and help it hold its shape during frying. The self‑rising variety means you don’t have to add baking powder separately, keeping the recipe streamlined. If you’re aiming for a gluten‑free version, replace the self‑rising flour with a blend of rice flour, tapioca starch, and a pinch of xanthan gum. The flour’s protein content is what gives the beignets that satisfying chew, so don’t skimp on it.
The Final Flourish
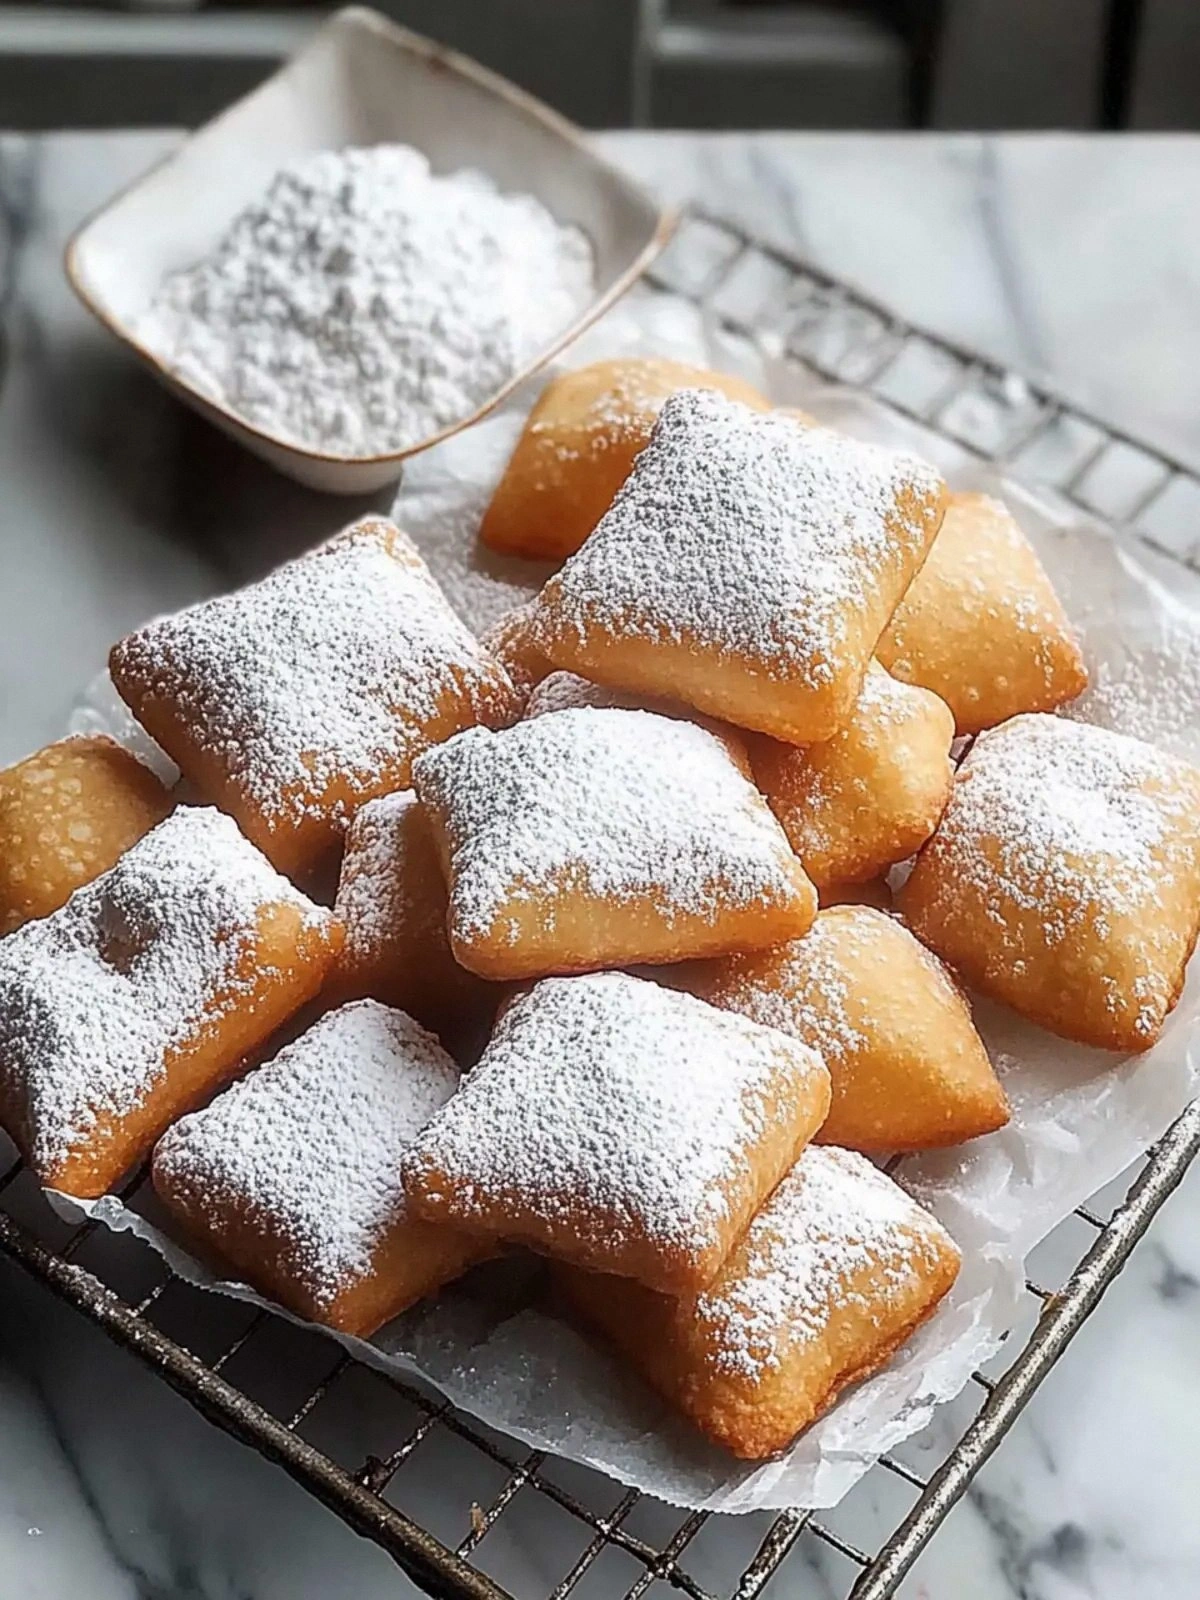
After frying, the beignets are dusted with a generous amount of confectioners' sugar, which creates a sweet, powdery coating that melts into a light glaze. The sugar’s fine texture allows it to cling to every nook and cranny of the pastry, creating a contrast between the crisp exterior and the soft interior. If you prefer a less sweet option, sprinkle a dash of cinnamon or nutmeg over the sugar for a warm, spiced finish. Remember, the sugar is the final touch that elevates these beignets from simple pastries to indulgent treats.
Everything's prepped? Good. Let’s get into the real action…
The Method — Step by Step
- Begin by whisking the packet of active dry yeast with a cup of warm water, a tablespoon of sugar, and a pinch of salt in a small bowl. Let the mixture sit for about five minutes until it becomes frothy, a sign that the yeast is alive and ready. This frothiness is essential; if the mixture doesn’t bubble, the dough will not rise. I always keep a timer handy so I don’t over‑proof or under‑proof the yeast.
- In a large mixing bowl, combine the evaporated milk, canola oil, and the frothy yeast mixture. Stir until the liquids are fully integrated, forming a smooth base that will hold the flour together. The oil’s role here is to keep the dough supple and prevent it from becoming too dry during frying. The mixture should smell slightly sweet, a promising hint of caramelized sugar.
- Add the 4 cups of self‑rising flour gradually, stirring with a wooden spoon until a sticky dough forms. The dough should be tacky but not overly wet; if it’s too dry, add a splash of warm water. The self‑rising flour’s baking powder component allows the dough to rise quickly once it’s fried. Knead the dough on a lightly floured surface for about 5 minutes until it becomes smooth and elastic.
- Cover the dough with a damp kitchen towel and let it rest for 30 minutes at room temperature. This rest period allows the gluten to relax and the yeast to produce more gas, resulting in a lighter crumb. After resting, the dough should have visibly expanded, a sign that the yeast is doing its job.
- Roll the dough out on a floured surface to a thickness of about 1/2 inch. Cut the dough into squares or rectangles using a sharp knife or a pizza cutter. The size of the pieces will affect the final texture; smaller pieces will be crispier, while larger ones will stay softer inside.
- Heat a large pot of neutral oil (such as canola or vegetable oil) to 350°F (175°C). Test the temperature by dropping a small piece of dough into the oil; if it bubbles and rises to the surface within 30 seconds, the oil is ready. The temperature is critical: too hot and the beignets will burn before they cook through; too cold and they’ll absorb too much oil.
- Gently slide the cut dough pieces into the hot oil, frying in batches to avoid overcrowding. Fry each side for about 2–3 minutes until they develop a golden brown crust. Flip them carefully with tongs to ensure even cooking. The sizzle when the dough hits the pan? Absolute perfection.
- Remove the beignets with a slotted spoon and place them on a paper towel‑lined plate to drain excess oil. While they’re still hot, dust them generously with confectioners' sugar, letting the sugar melt slightly into a delicate glaze. Serve immediately, while they’re warm and the sugar coating is still soft.
That's it — you did it. But hold on, I've got a few more tricks that'll take this to another level…
Insider Tricks for Flawless Results
The Temperature Rule Nobody Follows
Many people think that any hot oil will do, but the exact temperature is the difference between a crispy, airy pastry and a soggy mess. Keep your oil between 340–360°F and use a thermometer to maintain consistency. I’ve found that a slightly lower temperature gives a more even crust, especially when frying in large batches.
Why Your Nose Knows Best
When the dough hits the hot oil, the aroma should be sweet and slightly caramelized, like freshly baked bread. If it smells more like burnt sugar, the oil is too hot. Trust your senses; the smell is a reliable indicator of the right cooking environment.
The 5-Minute Rest That Changes Everything
After frying, let the beignets rest on a wire rack for five minutes before dusting with sugar. This allows the steam to escape, preventing the sugar from clumping. I once rushed the process and ended up with a clumpy sugar coating that ruined the presentation.
The Quick Chill Trick
If you’re making a large batch, cool the beignets on a rack and then chill them in the refrigerator for 10 minutes. This stops the cooking process and locks in the crispness, making them perfect for a brunch spread.
The Secret to a Light Crumb
Add a splash of lemon juice to the dough. The acid helps break down gluten strands, resulting in a lighter, more tender crumb. A teaspoon is enough to make a noticeable difference.
Creative Twists and Variations
This recipe is a playground. Here are some of my favorite ways to switch things up:
Cinnamon‑Sugar Beignets
Stir a teaspoon of ground cinnamon into the confectioners' sugar before dusting. The warm spice pairs beautifully with the buttery dough, creating a comforting autumnal flavor.
Chocolate‑Dipped Beignets
Dip half of the warm beignets into melted dark chocolate and let them set on parchment paper. The chocolate adds a decadent layer that’s perfect for a special occasion.
Savory Beignets
Replace the confectioners' sugar with a blend of grated Parmesan and dried herbs. Serve with a side of marinara sauce for a savory twist that’s surprisingly delicious.
Lemon‑Zest Beignets
Add a tablespoon of lemon zest to the dough and a drizzle of lemon glaze after frying. The citrus brightens the flavor profile and adds a refreshing bite.
Gluten‑Free Beignets
Swap the self‑rising flour for a gluten‑free blend and add a tablespoon of xanthan gum to maintain structure. The result is a fluffy, gluten‑free pastry that still holds its shape during frying.
Storing and Bringing It Back to Life
Fridge Storage
Store leftover beignets in an airtight container at room temperature for up to two days. The dough’s moisture will keep them from drying out, and the sugar coating will remain crisp if you add a paper towel to absorb excess moisture.
Freezer Friendly
For longer storage, place the beignets on a parchment paper‑lined tray and freeze until solid. Once frozen, transfer them to a resealable freezer bag. They’ll keep for up to three months without losing flavor.
Best Reheating Method
To revive frozen or chilled beignets, preheat a skillet over medium heat and add a splash of oil. Warm each side for 1–2 minutes until the sugar coating is slightly melted and the interior is soft. Add a tiny splash of water before reheating to create a gentle steam that restores the dough’s fluffiness.