I still remember the night I accidentally created these pizza pockets that would change my life forever. It was one of those chaotic evenings where the fridge held nothing but questionable leftovers and a tube of pizza dough that was about to expire. My kids were circling like hungry vultures, my phone was blowing up with work emails, and I had exactly thirty minutes before total household meltdown. In desperation, I started throwing ingredients together like some kind of culinary mad scientist, muttering about how this would either be a masterpiece or require an emergency pizza delivery.
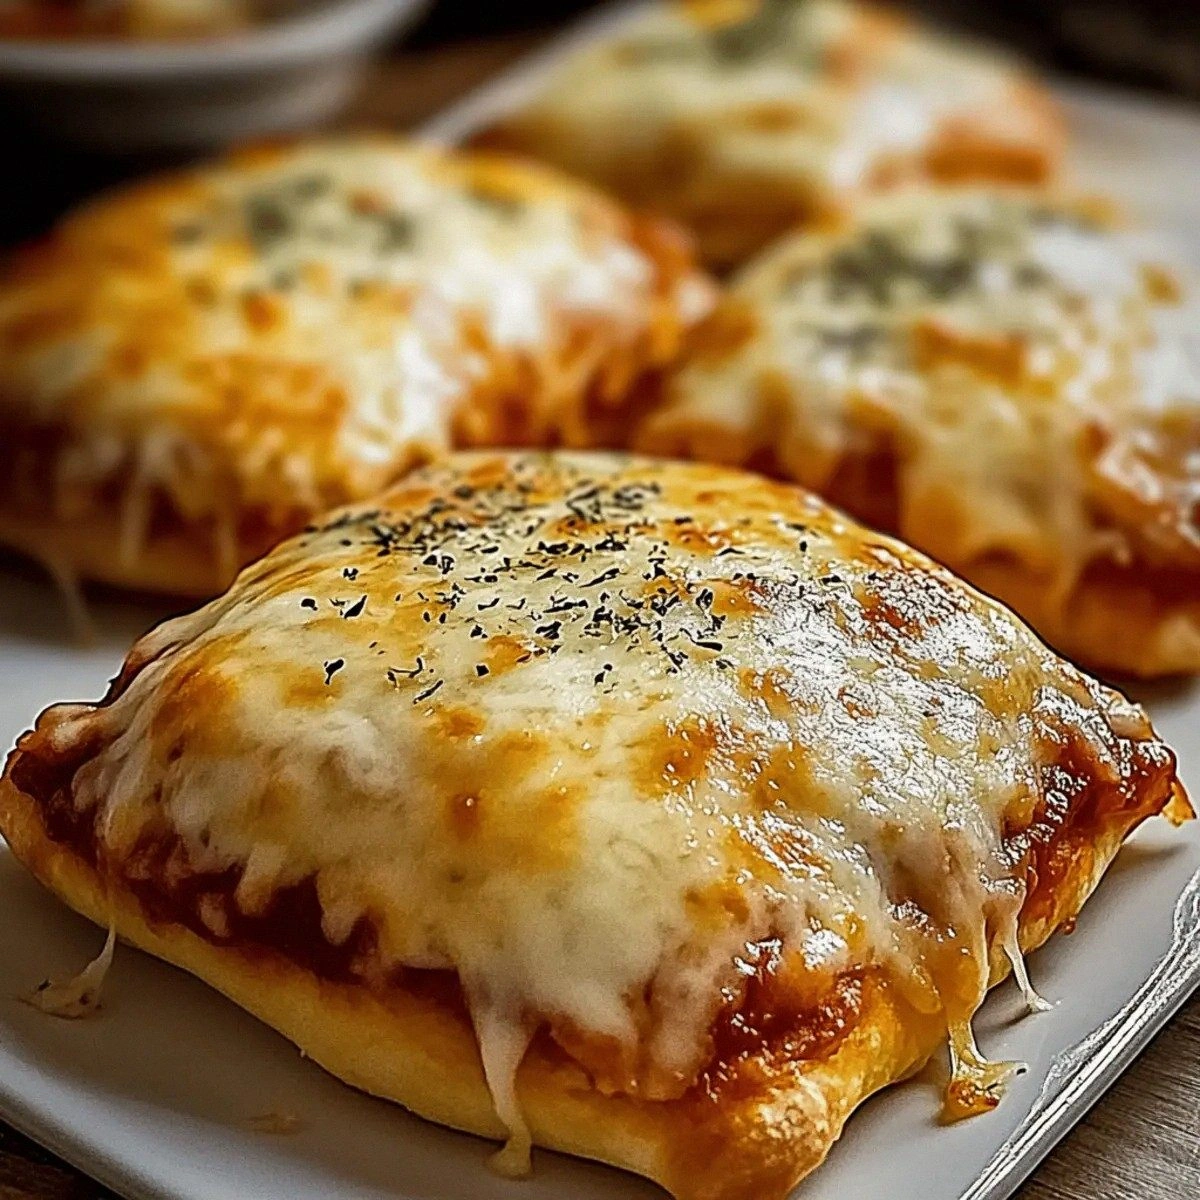
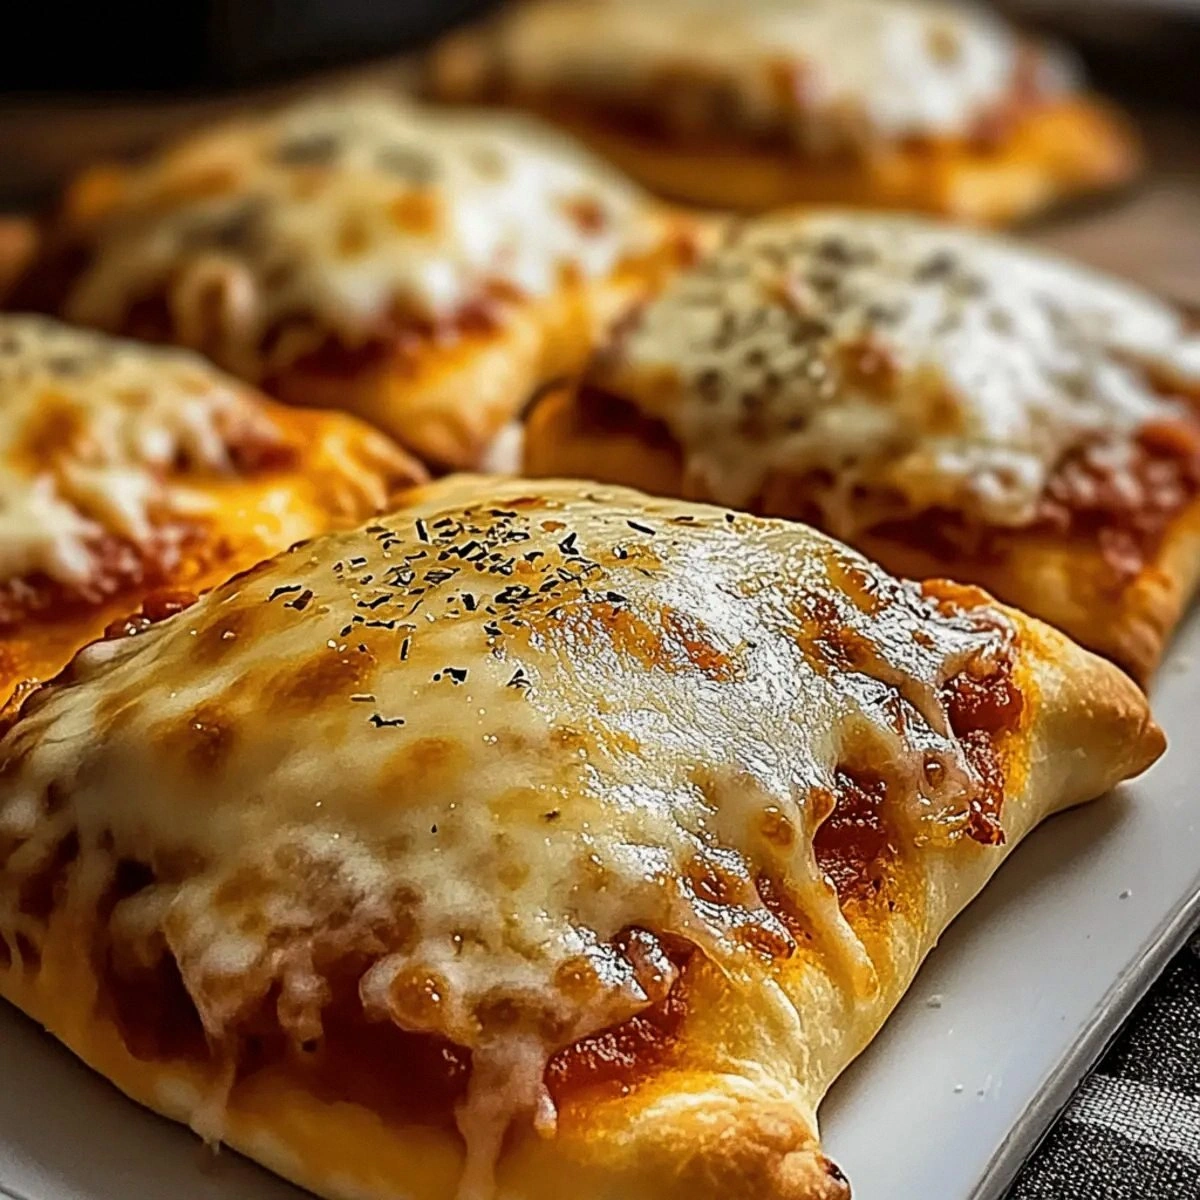
The moment those golden parcels emerged from the oven, something magical happened. The kitchen filled with that intoxicating aroma of melted cheese, herbs, and perfectly crisp dough that makes your stomach growl like an angry bear. My kids stopped their whining mid-sentence, drawn by the siren call of bubbling cheese. When we bit into those first pockets, the cheese stretched like we were in some kind of food commercial, and the flavor explosion was so intense that my usually picky eight-year-old declared me "the best cook in the whole universe." That sizzle when the hot cheese hits your tongue? Absolute perfection.
Here's the thing about most pizza pocket recipes floating around the internet — they're either dry as the Sahara or they explode like cheese grenades in your oven, leaving you with a burnt mess that even the dog won't touch. They skimp on the good stuff, overcomplicate the process, or taste like cardboard with ketchup. If you've ever struggled with soggy bottoms, cheese blowouts, or pockets that taste like they came from a middle school cafeteria circa 1998, you're not alone — and I've got the fix that'll make you swear off those sad frozen versions forever.
What started as a desperate kitchen experiment has become my most-requested recipe, the thing my kids' friends beg for, the midnight snack that my husband dreams about. Picture yourself pulling these out of the oven, the whole kitchen smelling incredible, watching your family fight over the last one like it's the last slice of pizza at a Super Bowl party. This next part? Pure magic. Let me walk you through every single step — by the end, you'll wonder how you ever made it any other way.
What Makes This Version Stand Out
Cheese Avalanche: We're not playing around with a measly sprinkle of mozzarella. These pockets pack a serious cheese punch with both mozzarella AND parmesan, creating that perfect stretchy-meets-sharp flavor combo that makes your taste buds do a happy dance. The ratio is scientifically perfect — enough cheese to create those Instagram-worthy cheese pulls without becoming a greasy mess.
Freezer Warrior: Most homemade pizza pockets turn into hockey pucks after freezing, but these bad boys emerge from the freezer tasting fresher than the day you made them. The secret lies in how we seal and partially bake them, creating a protective barrier that locks in moisture and flavor. I dare you to taste these after freezing and not go back for seconds.
Speed Demon: From prep to plate in under 45 minutes, these pockets are faster than ordering delivery and infinitely more satisfying. The genius shortcut of using refrigerated dough means you can go from craving to devouring faster than you can decide what to order on your pizza app.
Customizable Canvas: Think of this recipe as your edible playground. Swap in your favorite toppings, adjust the spice level, make them vegetarian or load them up with all the meats. Each pocket becomes a personal pizza experience tailored to whoever's lucky enough to eat it.
Texture Symphony: The exterior achieves that impossible balance of crispy and tender, while the interior stays molten and gooey. It's like having a perfectly crisp pizza crust that somehow stays soft enough to bite through without tearing apart your mouth — a culinary paradox that'll make you question everything you thought you knew about dough.
Crowd Control: This recipe doubles, triples, or quadruples without any drama. Whether you're feeding a family of four or hosting a gameday party, you'll never run out. I'll be honest — I ate half the batch before anyone else got to try it, and nobody even noticed because the recipe is that generous.
Kid-Approved Magic: If you can get a child to eat vegetables hidden inside a cheese pocket, you've basically won at parenting. The bell peppers, mushrooms, or olives get chopped small enough that even the pickiest eaters won't detect them, making this a covert operation in nutrition disguised as fun food.
Inside the Ingredient List
The Foundation Builders
The refrigerated pizza dough is your golden ticket to success here, and I'm not going to judge you for not making it from scratch. I've tried both ways, and honestly, the refrigerated version saves you an hour and tastes just as good when you treat it right. The key is letting it come to room temperature for exactly ten minutes — any longer and it gets sticky like that kid in your third-grade class who never washed his hands. This dough creates the perfect pocket that puffs up beautifully in the oven, creating those gorgeous golden bubbles that make you look like a professional baker.
Your marinara sauce isn't just any old tomato sauce — it's the flavor foundation that seeps into every bite. I learned the hard way that watery sauce creates soggy pockets that explode like Vesuvius in your oven. Now I always doctor up store-bought sauce with a splash of balsamic and a pinch of sugar to balance acidity. The sauce should coat the back of a spoon like velvet, not run off like water from a tap.
The Cheese Dream Team
Mozzarella gets all the glory, but it's the parmesan that brings the umami punch that makes people ask what your secret ingredient is. The mozzarella provides that Instagram-worthy stretch that can span the gap between two people like a delicious bridge. Freshly shredded mozzarella melts infinitely better than the pre-shredded stuff coated in anti-caking powder. I buy mine in blocks and shred it myself while watching TV — it's therapeutic and ensures maximum meltiness.
The parmesan adds that nutty, salty complexity that elevates these from "good" to "why can't I stop eating these?" Don't you dare use the powdered stuff in the green can — we're making magic here, not desperation pizza. Aged parmesan creates little crispy cheese bits around the edges that provide textural contrast to the gooey interior.
The Flavor Enhancers
Italian seasoning seems basic, but it's the difference between tasting authentically Italian and like someone just threw random herbs at dough. I make my own blend with extra oregano because that's where the magic lives. The red pepper flakes aren't just for heat — they awaken your taste buds so every other flavor tastes more intense. It's like turning up the volume on your favorite song.
Mini pepperoni creates perfect little grease pockets that distribute flavor throughout the entire pocket. If you're using sausage, cook it until it's just barely done — it'll finish cooking inside the pocket and stay juicy instead of turning into dry crumbles. The fat from the meat bastes the interior dough as it cooks, creating layers of flavor you didn't know were possible.
The Veggie Ninjas
Bell peppers bring sweetness and crunch, but only if you dice them smaller than your pinky nail. Mushrooms add that earthy depth that makes people wonder if you've been cooking all day. Olives provide those salty pops of briny flavor that cut through all the richness. The vegetables steam inside the pocket, becoming tender without releasing too much moisture that would sog out your creation.
The Binding Agent
The beaten egg is your secret weapon for creating pockets that don't explode like overfilled balloons. It acts as glue for the edges, creates a beautiful shine, and adds richness to the dough. Brush it on like you're painting a masterpiece — because in a way, you are. The egg wash also helps any seasonings stick to the top, creating flavor bombs in every bite.
Everything's prepped? Good. Let's get into the real action...
The Method — Step by Step
- Preheat your oven to 425°F and position the rack in the center. This temperature is crucial — too low and your pockets will be pale and doughy, too high and they'll burn before the inside heats through. While it's heating, line a baking sheet with parchment paper or a silicone mat. Trust me on this — I've had pizza pockets permanently welded to my pan like they were trying to become one with the metal.
- Roll out your pizza dough on a lightly floured surface until it's about 1/8 inch thick. You want it thin enough to fold easily but thick enough to hold all that molten cheese without tearing. Think of it like you're making ravioli on steroids. Use a sharp knife or pizza cutter to divide the dough into 6 rectangles — they should be roughly 4x6 inches each. Don't stress about perfection here; rustic is charming and tastes exactly the same.
- In a medium bowl, combine the mozzarella and parmesan cheeses like you're creating a friendship between two people who were born to be together. The mixture should look like a snowy mountain of dairy perfection. Add the Italian seasoning and red pepper flakes, tossing gently to distribute everything evenly. This ensures every bite has that perfect flavor balance instead of one pocket being a spice bomb while another tastes like plain bread.
- Working with one rectangle at a time, place about 2 tablespoons of marinara sauce on the lower third of the dough. Leave a 1/2-inch border around the edges — this is your no-filling zone where the magic seal will happen. The sauce should be thick enough that it doesn't run when you tilt the dough. If it's watery, your pockets will steam instead of crisp, creating that sad, soggy bottom that haunts pizza dreams.
- Sprinkle a generous amount of the cheese mixture over the sauce, about 3-4 tablespoons. Add your chosen toppings — mini pepperoni, diced vegetables, or cooked sausage. Remember that less is more here; overfilling is the enemy of successful pizza pockets. The filling should mound slightly but not look like a small mountain threatening to avalanche all over your counter.
- Fold the top half of the dough over the filling to create a pocket, pressing the edges gently to seal. Use a fork to crimp the edges, creating those classic decorative lines while ensuring your pockets won't burst open like overexcited piñatas. Place each finished pocket on your prepared baking sheet, leaving at least 2 inches between them because they puff up like proud little balloons.
- Beat the egg in a small bowl until it's smooth and brush it over each pocket like you're giving them a golden tan. This is the moment of truth where they transform from humble dough parcels into glossy, professional-looking masterpieces. Make sure to get the edges well-coated — this creates both the beautiful color and the protective seal that keeps everything inside where it belongs.
- Bake for 15-18 minutes until they're golden brown and puffed up like they're showing off for a food photoshoot. Don't walk away from the oven here — the difference between perfect and burnt can be exactly 90 seconds. They're done when the bottoms are deep golden and you can hear a gentle sizzle as cheese bubbles out of the steam vents. The smell should make you question why you ever bothered with delivery pizza.
- Let them rest for 5 minutes before serving. I know you're tempted to bite in immediately, but molten cheese burns are no joke and will ruin your pizza pocket experience forever. During this time, the cheese settles to the perfect temperature and the exterior crisps up even more. Use this waiting period to hide a few for yourself because they disappear faster than free samples at Costco.
- Serve hot with extra marinara on the side for dipping. The contrast between the crispy pocket and the cool sauce creates a temperature and texture dance that makes each bite more interesting than the last. These are best fresh, but they'll keep you happy for days if you store them right. That's it — you did it. But hold on, I've got a few more tricks that'll take this to another level...
Insider Tricks for Flawless Results
The Temperature Rule Nobody Follows
Here's what separates the pizza pocket pros from the amateurs: ingredient temperature matters more than your grandmother's secret ingredient. Keep your dough cold until the last second, but let your sauce and fillings come to room temperature. Cold fillings take longer to heat, meaning your dough might burn before the center gets properly molten. Room temperature fillings heat evenly, creating that perfect gooey center without sacrificing your beautifully golden exterior. This is the difference between pockets that taste like they came from a gourmet bakery versus ones that remind you of gas station food.
Why Your Nose Knows Best
Your sense of smell is your built-in kitchen timer that never needs batteries. When these pockets are perfectly done, your kitchen will fill with the aroma of toasted cheese and herbs that makes your mouth water involuntarily. If you smell burning, you've gone too far — trust your nose and pull them out immediately. That nutty, slightly caramelized scent means the cheese is developing those complex flavors that separate good pockets from legendary ones. A friend tried skipping this step once — let's just say it didn't end well, and her smoke alarm still holds a grudge.
The 5-Minute Rest That Changes Everything
Those five minutes of resting aren't just about avoiding burns — they're when the magic happens. The cheese redistributes throughout the pocket, creating perfect melty pockets in every bite. The exterior crisps up even more as steam escapes, giving you that shatteringly crisp shell. During this time, the flavors meld together like they've been friends for years instead of minutes. If you cut into them immediately, you'll lose all that molten cheese to your plate instead of your mouth where it belongs.
The Double Cheese Seal
Here's a pro move that'll make you look like you've been doing this for decades: sprinkle a tiny amount of cheese directly on the dough before adding your sauce. This creates a moisture barrier that prevents the sauce from making the bottom soggy. The cheese melts into the dough, creating almost a cheesy crust that adds another dimension of flavor. It's like having a built-in insurance policy against the dreaded soggy bottom that plagues so many pizza pocket attempts.
The Freezer Game-Changer
If you're planning to freeze these beauties, there's a secret step that prevents freezer burn and texture destruction. After cooling completely, wrap each pocket individually in plastic wrap before placing them in a freezer bag. This double protection prevents ice crystals from forming and turning your perfect pockets into soggy messes. When reheating, skip the microwave — it creates rubbery dough and sad, separated cheese. Instead, bake from frozen at 375°F for 12-15 minutes, and you'll swear they were made fresh that day.
Creative Twists and Variations
This recipe is a playground. Here are some of my favorite ways to switch things up:
The Breakfast Champion
Swap the marinara for a thin layer of sausage gravy, add scrambled eggs, breakfast sausage, and cheddar cheese. These morning pockets will make you actually excited to wake up early. Add a touch of hot sauce inside for that morning kick that makes coffee seem optional. They're like having a complete breakfast you can eat with one hand while driving to work — not that I'm advocating eating and driving, but we've all been there.
The Mediterranean Dream
Replace the marinara with pesto, use a blend of mozzarella and feta, and add chopped sun-dried tomatoes, olives, and spinach. These taste like summer vacation in the Greek islands, even when you're eating them in your kitchen during a snowstorm. The salty feta and briny olives create flavor explosions that make regular pizza seem boring by comparison. Add a touch of lemon zest to brighten everything up and transport you straight to Santorini.
The Buffalo Soldier
Mix buffalo sauce with a touch of ranch for your base, add shredded chicken tossed in more buffalo sauce, and use a blend of mozzarella and blue cheese crumbles. These pack heat that builds slowly instead of attacking your taste buds immediately. The blue cheese adds that funky complexity that buffalo wings dream about. Serve with celery sticks and extra ranch for dipping to complete the wing joint experience without the mess.
The Veggie Supreme
Roast your vegetables first to concentrate their flavors — zucchini, eggplant, and cherry tomatoes work magic here. Add goat cheese along with mozzarella for creamy tang that makes vegetables exciting even to die-hard carnivores. The key is dicing everything small so you get a variety of vegetables in every bite without any single flavor dominating. Even my meat-loving neighbor devours these, claiming they're better than any meat version he's tried.
The Hawaiian Controversy
Yes, pineapple on pizza divides families, but hear me out — when paired with Canadian bacon and a touch of jalapeño, the sweet-heat-salty combo creates something greater than the sum of its parts. Use fresh pineapple for better texture and less moisture than canned. The jalapeño adds just enough heat to make the pineapple taste sweeter without overwhelming the other flavors. These convert even the most anti-pineapple people I've served them to.
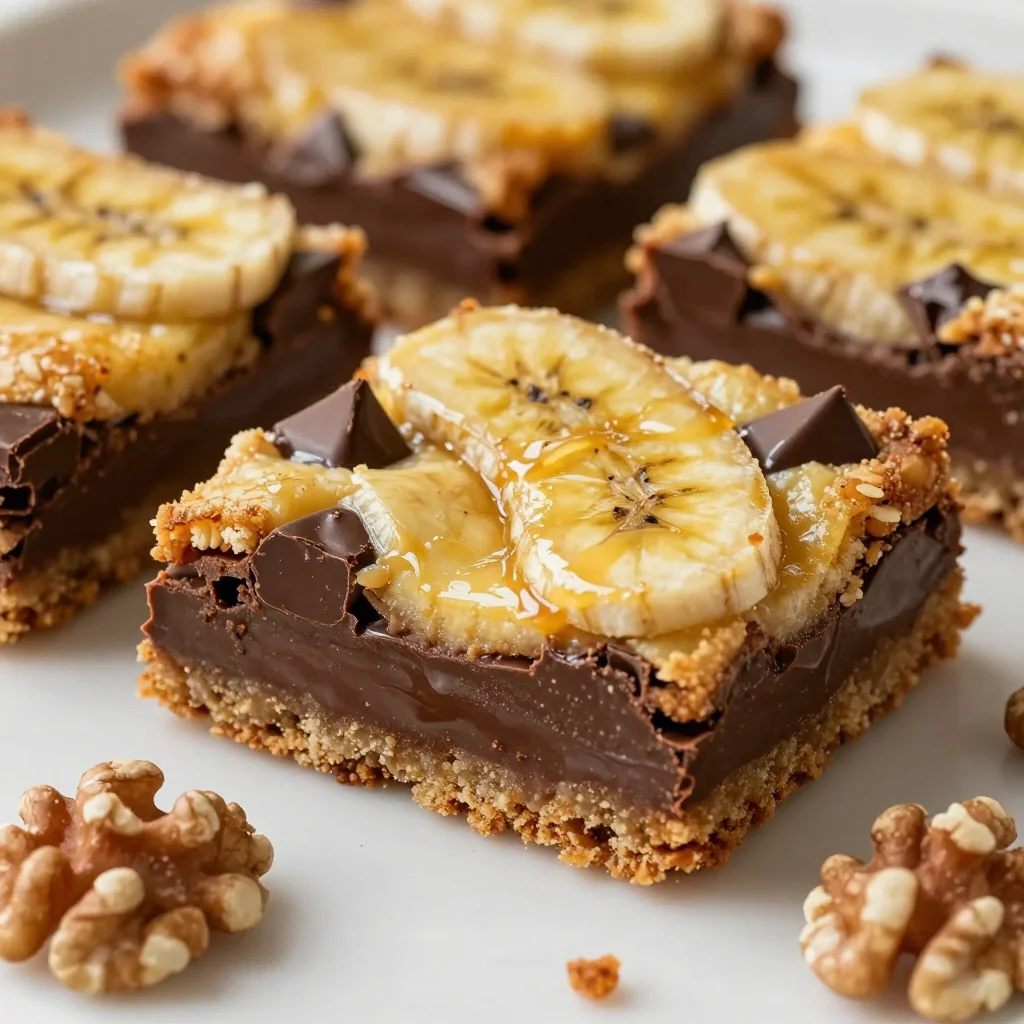
The Dessert Plot Twist
Skip the savory entirely and create dessert pockets with Nutella, sliced bananas, and a sprinkle of sea salt. The salt intensifies the chocolate and prevents the sweetness from becoming cloying. Add a few mini marshmallows for that s'mores vibe that makes everyone feel like a kid again. Dust with powdered sugar right before serving for that bakery-style presentation that makes people think you went to culinary school.
Storing and Bringing It Back to Life
Fridge Storage
Store cooled pockets in an airtight container in the refrigerator for up to 4 days. The key is letting them cool completely before storage — any residual heat creates condensation that leads to soggy, sad pockets. Layer them between sheets of parchment paper to prevent them from sticking together like best friends who won't separate. They'll taste best if you reheat them within the first 2 days, but they're still delicious on day 4 if stored properly.
Freezer Friendly
These pockets are freezer superstars that maintain their quality for up to 3 months when properly stored. After completely cooling, flash-freeze them on a baking sheet for 2 hours before wrapping individually in plastic wrap and storing in freezer bags. This prevents them from freezing into one solid block that requires a chisel to separate. Label with the date and contents because three months from now, you'll thank yourself for this organizational moment of clarity.
Best Reheating Method
The oven is your friend for reheating — 375°F for 8-10 minutes from the fridge, or 12-15 minutes from frozen. The microwave is the enemy of good pizza pockets, turning dough rubbery and cheese into strange, separated clumps. If you must microwave, wrap the pocket in a damp paper towel and heat for 30-45 seconds, then finish in a hot skillet to crisp the bottom. Add a tiny splash of water before reheating — it steams back to perfection and prevents the dreaded dry pocket syndrome that makes you question all your life choices.