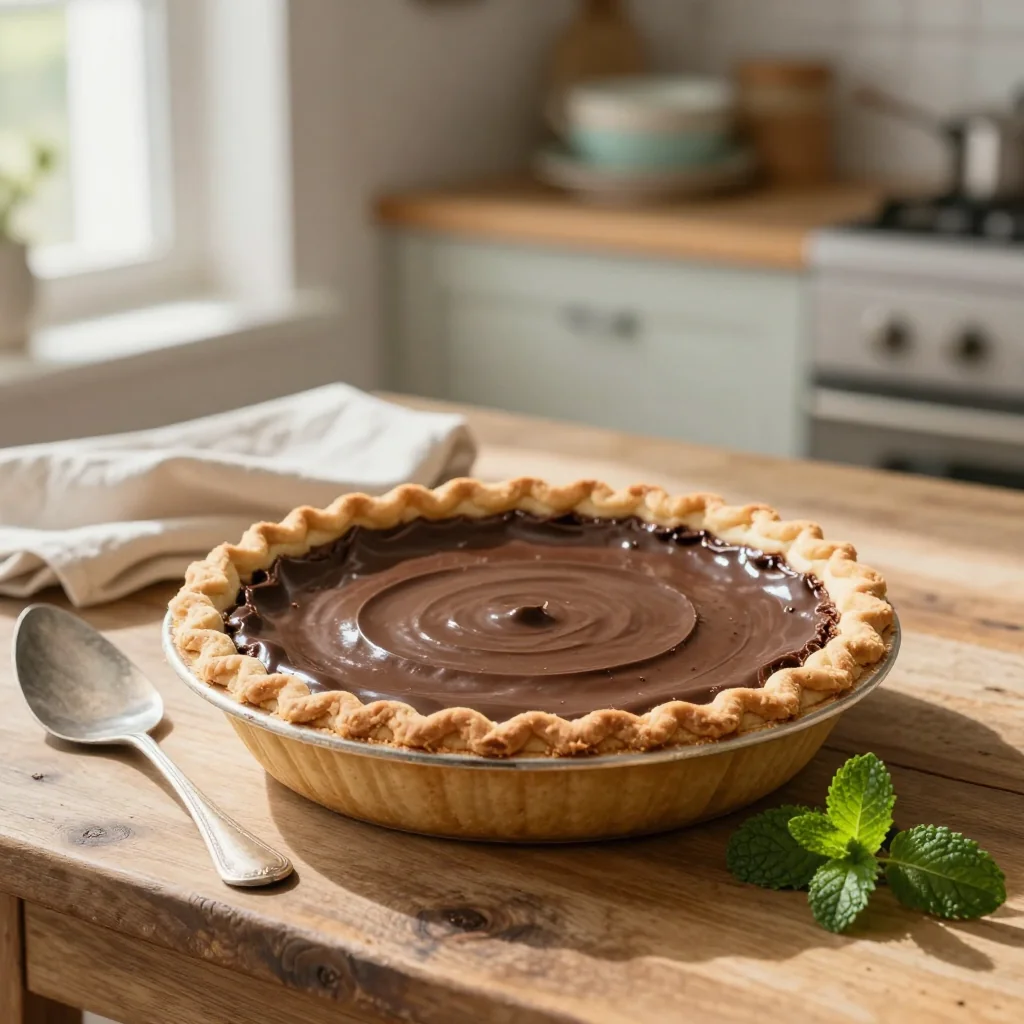
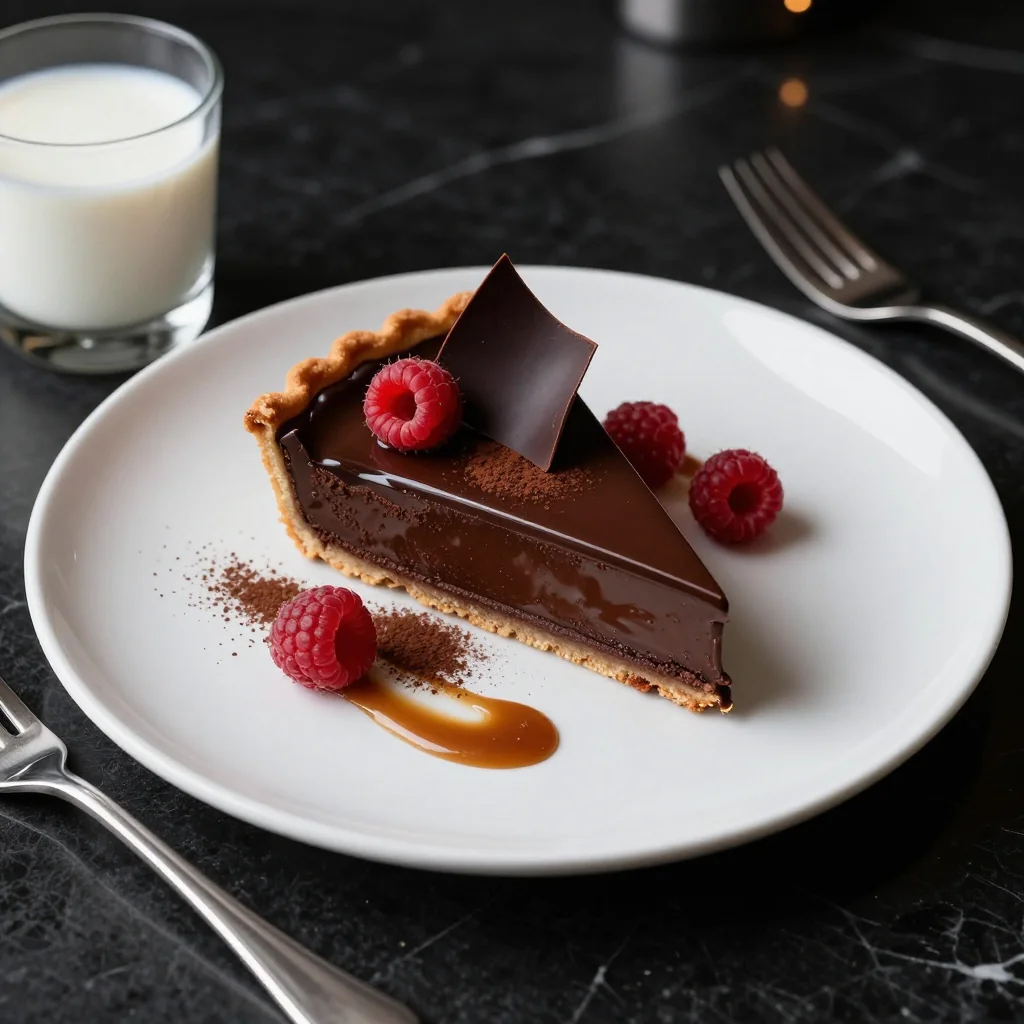
A silky‑smooth chocolate pudding nestled in a buttery crust, crowned with a cloud of whipped cream – pure comfort in every bite.
I still remember the first time I tasted a truly decadent chocolate dessert – it was a velvety chocolate mousse at a tiny Parisian café, and the memory has lingered ever since. Years later, while experimenting in my own kitchen, I wanted to capture that same luxurious texture but with a comforting, handheld format. The result? This Chocolate Pudding Pie, a marriage of a crisp, buttery graham‑cracker crust and a rich, glossy chocolate custard that sets just enough to slice cleanly yet melts on the tongue.
Though the concept feels classic, its roots trace back to the early 20th‑century American pudding pies, where home cooks would blend simple pantry staples into elegant desserts for holiday tables. Today, the recipe has been refined with high‑quality dark chocolate and a touch of espresso to deepen the flavor, making it perfect for any occasion—from a cozy family dinner to an impressive finish at a dinner party.
In this guide, you’ll learn how to balance the sweet and bitter notes, achieve the perfect glossy sheen, and master the art of a crust that stays crisp even after the filling sets. I’ll also share tips for scaling the recipe, troubleshooting common pitfalls, and customizing the pie for dietary preferences.
I’m thrilled to share this beloved dessert with you, and I can’t wait to see how it becomes a staple in your own kitchen. Let’s dive in and create a chocolate masterpiece together!
🌟 Why This Recipe Will Captivate You
From the first aromatic whiff of melted chocolate to the final dusting of whipped cream, this pie delivers layers of pleasure that keep you coming back for more.
- ✨ Unmatched Creaminess: The custard base uses a blend of egg yolks and cornstarch, creating a silk‑smooth texture that rivals professional pastry kitchens.
- ✨ Balanced Sweet‑Bitter Profile: Dark chocolate (70% cacao) pairs with a modest amount of sugar, letting the natural bitterness shine through for a sophisticated taste.
- ✨ Versatile Presentation: Serve it warm for a molten center or chilled for a firm slice—both are equally delightful and visually stunning.
- ✨ Crowd‑Pleasing Simplicity: Despite its elegant appearance, the recipe uses everyday ingredients you likely already have on hand.
- ✨ Easy to Scale: The built‑in portion adjuster lets you double or halve the recipe without compromising texture or flavor.
- ✨ Perfect for Any Season: Whether it’s a summer garden party or a winter holiday feast, the rich chocolate notes complement any setting.
🥗 Ingredients
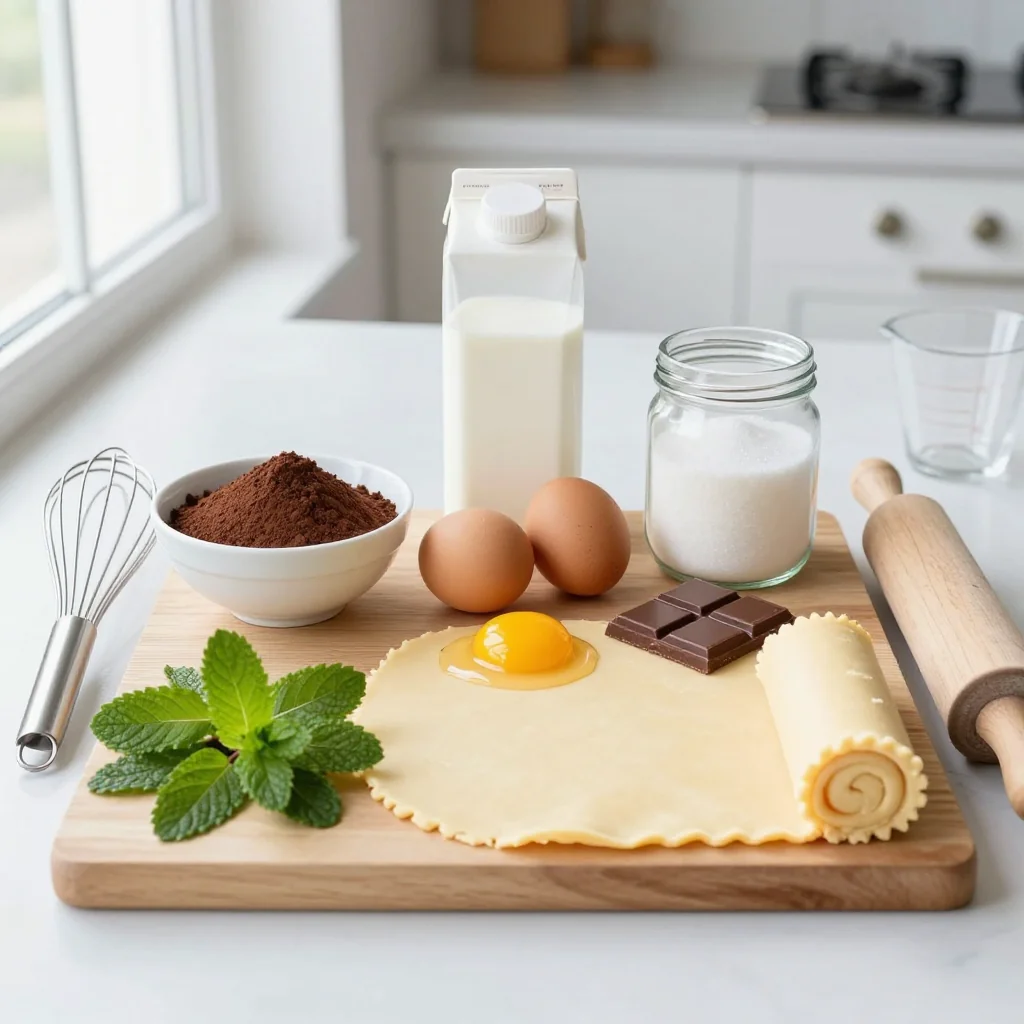
📝 Complete Ingredient List
For the Crust:
For the Filling:
For the Topping:
🔍 Focus on Key Ingredients
Dark Chocolate (70% cacao)
Dark chocolate provides the backbone of flavor, delivering a deep cocoa richness without overwhelming sweetness. Choose a bar with at least 70% cacao to ensure a balanced bitterness that pairs beautifully with the sweetened milk base. When chopped finely, it melts evenly, preventing grainy pockets in the custard.
Cornstarch
Cornstarch acts as the primary thickening agent, creating a glossy, velvety custard that holds its shape after cooling. It activates at around 80 °C, so whisk it into the milk before adding the eggs to avoid lumps. Using too much can make the filling gummy, while too little results in a runny pudding.
Heavy Cream
The heavy cream on top adds a light, airy contrast to the dense chocolate filling. Its high fat content stabilizes the whipped peaks, allowing the topping to sit elegantly on the pie without sinking. For a lighter version, you can substitute with chilled coconut cream, but the texture will be slightly different.
🔄 Quick Substitutions
| If you don’t have... | Use instead... |
|---|---|
| Graham crackers | Digestive biscuits (crushed) |
| Unsalted butter | Salted butter (reduce added salt) |
| Dark chocolate (70% cacao) | Semi‑sweet chocolate (60% cacao) |
👨🍳 Step‑by‑Step Instructions
Follow these detailed steps to assemble a flawless chocolate pudding pie. Each phase is broken down to keep you confident from crust to garnish.
📋 Phase 1 – Preparation & Mise en Place
Gather all components, pre‑heat the oven, and create a buttery crust that will support the silky filling.
Prepare the crust
In a medium bowl, combine the graham cracker crumbs, melted butter, and sugar. Stir until the mixture resembles wet sand. Press the crumb mixture firmly into the bottom and up the sides of a 9‑inch (23 cm) springform pan, creating an even layer about ½ cm thick. Use the bottom of a measuring cup to compact the crust without over‑pressing, which could make it too dense.
Bake the crust
Preheat your oven to 175 °C (350 °F). Place the pan on a parchment‑lined baking sheet and bake for 10‑12 minutes, or until the crust turns a light golden hue. Remove from the oven and let it cool completely on a wire rack while you prepare the filling.
🔥 Phase 2 – Cooking the Chocolate Custard
Create a luscious custard that sets perfectly without curdling.
Heat milk and cocoa
In a saucepan, whisk together the whole milk, cocoa powder, and half of the sugar (50 g). Place over medium heat, stirring constantly, until the mixture just begins to steam and the cocoa is fully dissolved. Do not let it boil, as this can scorch the milk.
Mix cornstarch and egg yolks
In a separate bowl, whisk the cornstarch with the remaining sugar (50 g) until smooth. Add the egg yolks one at a time, whisking vigorously to create a thick, pale mixture. The cornstarch will help prevent the eggs from scrambling when added to the hot milk.
Temper the egg mixture
Slowly pour about a third of the hot milk mixture into the egg‑cornstarch bowl, whisking constantly. This gradual temperature increase, known as tempering, safeguards the yolks from curdling. Once combined, pour the tempered mixture back into the saucepan with the remaining milk, whisking continuously.
Cook to thicken
Return the saucepan to medium heat. Keep whisking until the custard thickens and begins to bubble gently—about 4‑5 minutes. When it reaches a ribbon‑like consistency that coats the back of a spoon, remove from heat.
Incorporate chocolate and vanilla
Immediately add the chopped dark chocolate and vanilla extract to the hot custard. Stir until the chocolate is completely melted and the mixture is glossy. Taste and add a pinch of salt to enhance the chocolate flavor.
✨ Phase 3 – Finishing Touches and Presentation
Cool, garnish, and serve your masterpiece.
Fill the crust
Pour the warm chocolate custard into the pre‑baked crust, smoothing the top with an offset spatula. Tap the pan gently on the countertop to release any air bubbles.
Chill the pie
Refrigerate the pie for at least 3 hours, preferably overnight. The cooling process allows the custard to set firmly while the crust remains crisp.
Whip the topping & garnish
In a chilled bowl, whip the heavy cream with powdered sugar and vanilla until soft peaks form. Spread a generous layer over the chilled chocolate pie. Finish with a shower of chocolate shavings for visual appeal and an extra burst of flavor.
💡 Expert Tips & Tricks
🛒 Choosing the Right Ingredients
When shopping, look for chocolate that lists cocoa solids as the first ingredient and has minimal added sugars. The higher the cocoa percentage, the richer the flavor and the less you’ll need to sweeten. For the crust, opt for graham crackers that are lightly sweetened; overly sweet varieties can dominate the palate. Butter should be unsalted to give you full control over seasoning, and always use fresh eggs—older eggs can affect custard texture.
🔪 Preparation Techniques
Use a food processor to crush graham crackers; this ensures a uniform texture and eliminates clumps. When melting chocolate, a double‑boiler method offers gentle heat, preventing scorching. If you prefer a stovetop, keep the heat low and stir constantly. For the custard, whisk continuously to avoid lumps and to create that glossy sheen that signals a perfectly cooked mixture.
🌡️ Mastering the Cooking Process
Temperature is critical for custard. Use an instant‑read thermometer: aim for 82 °C (180 °F) when the custard thickens. This ensures the starch is fully gelatinized without over‑cooking the eggs. If you don’t have a thermometer, the spoon‑test works—dip a spoon into the custard, run your finger across the back; the line should stay distinct.
🍽️ Presentation & Service
For a polished look, run a warm knife (dip in hot water, wipe dry) around the edge before releasing the springform pan. This gives a clean slice. Serve each portion with a drizzle of espresso‑infused caramel or a scoop of vanilla bean ice cream for contrast. A dusting of cocoa powder just before serving adds a professional finishing touch.
🏆 Pro Tips
Elevate your pie from home‑cooked to restaurant‑quality with these insider techniques.
- 🎯 Use a Water Bath for the Custard: Placing the custard pan in a simmering water bath (bain‑marie) provides gentle, even heat, reducing the risk of scorching and ensuring a silky texture.
- 🎯 Add a Touch of Espresso Powder: Dissolve ½ tsp espresso powder in the milk for a subtle depth that amplifies the chocolate without tasting like coffee.
- 🎯 Chill the Crust Before Filling: After baking, refrigerate the crust for 15 minutes. This firms the butter, creating a barrier that prevents the custard from soaking in.
- 🎯 Use a Silicone Spatula for Folding: When incorporating whipped cream, fold gently with a silicone spatula to preserve air, ensuring a light topping.
- 🎯 Finish with a Salted Caramel Drizzle: Drizzle a thin line of homemade salted caramel over the whipped cream just before serving for a sweet‑salty contrast that excites the palate.
- 🎯 Serve Slightly Warm for a Molten Center: If you love a runny interior, let the pie sit at room temperature for 10‑15 minutes before slicing; the center will soften while the edges stay firm.
"Good food is the foundation of genuine happiness." — Thomas Keller
🔄 Variations & Adaptations
This chocolate pudding pie is a versatile canvas. Below are ideas to tailor it to dietary needs, flavor cravings, or family-friendly twists.
🥬 Vegetarian/Vegan Version
Replace the butter with coconut oil, use almond milk instead of dairy milk, and swap the eggs for a blend of silken tofu (¼ cup) plus 1 tbsp cornstarch per egg. Choose dairy‑free dark chocolate and whip coconut cream with powdered sugar for the topping. The result is a creamy, plant‑based delight that still delivers that classic chocolate richness.
- Use coconut oil (100 g) for the crust.
- Swap heavy cream with chilled coconut cream (200 ml).
- Replace egg yolks with silken tofu (4 oz) blended smooth.
🌶️ Flavor Variations
Play with global flavor profiles to keep the pie exciting throughout the year.
Spicy Version
Add ¼ tsp cayenne pepper to the custard and a dash of smoked paprika to the crust for a subtle heat that complements the chocolate.
Mediterranean Version
Incorporate orange zest (1 tsp) into the custard and garnish with toasted pistachios for a bright, nutty contrast.
Asian Fusion Version
Infuse the milk with a piece of fresh ginger (2 cm) and a splash of soy sauce (½ tsp) for umami depth; finish with toasted sesame seeds.
⚠️ Dietary Adaptations
Gluten‑Free
Substitute graham cracker crumbs with gluten‑free oat or almond flour crumbs. Ensure the chocolate and other processed ingredients are certified gluten‑free.
Lactose‑Free
Use lactose‑free milk (such as soy or oat) and coconut cream for the topping. Choose dairy‑free chocolate that lists “non‑dairy” on the label.
Low‑Calorie
Reduce sugar by half, use low‑fat milk, and replace heavy cream with a mixture of low‑fat Greek yogurt and a splash of vanilla‑flavored almond milk. The texture will be slightly lighter but still satisfying.
👶 Family/Children Friendly Version
Kids love a sweeter profile, so increase the sugar to 150 g and add a swirl of marshmallow fluff on top. Use colorful sprinkles instead of chocolate shavings for a fun, festive look. Serve with a side of fresh berries to add natural sweetness and a pop of color.
📦 Storage & Reheating
🧊 Conservation
Refrigerator:
- Duration: 3 days
- Recommended container: airtight glass or plastic cake tin
- Tip: Cover the pie loosely with parchment to prevent the whipped topping from absorbing fridge odors.
Freezer:
- Duration: 2 months
- Method: Freeze the pie (without whipped topping) wrapped tightly in plastic wrap, then a layer of aluminum foil.
- Defrosting: Transfer to the refrigerator overnight, then add fresh whipped cream before serving.
💡 For best texture, avoid refreezing once the pie has been thawed.
♨️ Reheating
🔥 Oven (Recommended):
- Preheat to 160 °C (325 °F).
- Cover the pie loosely with aluminum foil.
- Heat for 12‑15 minutes until the center is just warmed through.
- Remove the foil and bake an additional 3‑4 minutes to restore a slight crust crispness.
⚡ Microwave (Quick):
- Place a slice on a microwave‑safe plate.
- Cover with a microwave‑safe lid or parchment.
- Heat on medium power for 30‑45 seconds, then check; repeat in 15‑second bursts if needed.
- Stir gently if the slice seems unevenly heated.
🍳 Stovetop:
For a single slice, warm it in a non‑stick skillet over low heat, covered, for 2‑3 minutes. This method revives the crust’s crispness while gently warming the custard.
🍷 Perfect Pairings
🥗 Side Accompaniments
- Fresh Berry Salad: A mix of strawberries, raspberries, and mint provides acidity that cuts through the richness.
- Light Citrus Sorbet: A scoop of lemon or orange sorbet refreshes the palate between bites.
- Roasted Almonds: Their buttery crunch adds texture contrast.
🍷 Wine & Beverage Matches
- Ruby Port: Its sweet, fortified character mirrors the chocolate’s depth.
- Late Harvest Riesling: Offers a honeyed acidity that balances the custard.
- Non‑Alcoholic Option: A chilled hibiscus iced tea with a hint of orange blossom.
🍰 Completing the Meal
Begin with a light arugula and pear salad dressed in a citrus vinaigrette, follow with the chocolate pudding pie, and finish with a simple vanilla bean panna cotta topped with caramel drizzle. This progression moves from fresh to rich, ending on a delicate, airy note.
❓ Frequently Asked Questions
Q: Can I use milk chocolate instead of dark chocolate?
Yes, you can substitute milk chocolate, but expect a sweeter, less intense flavor. To maintain balance, reduce the added sugar by about 20 g. The custard may also be slightly softer because milk chocolate contains more cocoa butter.
Q: How do I prevent the crust from becoming soggy?
The key is to bake the crust first and let it cool completely before adding the custard. Additionally, chilling the crust after baking creates a solid barrier that resists moisture absorption. If you notice sogginess, place a thin layer of melted chocolate on the crust before pouring the custard.
Q: My custard turned grainy – what went wrong?
Graininess usually results from overheating or insufficient whisking. Ensure the milk mixture never reaches a rolling boil, and whisk continuously while cooking. Using a double‑boiler or a water bath can help maintain a gentle temperature, preventing the proteins from coagulating.
Q: Can I make this pie ahead of time for a party?
Absolutely. Prepare the crust and custard a day in advance, chill the pie overnight, and add the whipped topping just before serving. This keeps the topping fresh and prevents it from weeping into the custard.
Q: What are the best gluten‑free alternatives for the crust?
Gluten‑free oat flour, almond meal, or a blend of rice flour and tapioca starch work well. Combine with melted butter and a touch of honey to bind the crumbs. Press firmly into the pan and bake as directed.
Q: How can I store leftovers without losing texture?
Keep the pie in an airtight container in the refrigerator. If the whipped topping begins to soften, re‑whip a fresh batch and spread it over the chilled pie. For longer storage, freeze the pie (without topping) and add fresh whipped cream after thawing.
🎉 Let’s Get Baking!
This Chocolate Pudding Pie combines the comfort of a classic dessert with the elegance of a fine‑dining treat. From the buttery, golden crust to the glossy, chocolatey custard and the airy whipped topping, every bite offers a harmonious blend of textures and flavors. Whether you’re preparing it for a holiday gathering, a cozy family night, or simply to satisfy a chocolate craving, the recipe is designed to be approachable yet impressive.
I hope you enjoy making and sharing this pie as much as I do. Remember, the joy of cooking lies not only in the final dish but also in the process—taste, adjust, and have fun along the way. If you experiment with any of the variations, I’d love to hear about your creations!
Have you tried this recipe?
Leave a comment and rating below! Share your photos on Instagram with #ChocolatePuddingPie to be featured.
Chocolate Pudding Pie
A silky chocolate custard in a buttery crust, topped with fluffy whipped cream.
📝 Ingredients
Crust
Filling
Topping
👨🍳 Instructions
- 1 Prepare the crust by mixing crumbs, butter, and sugar; press into a 9‑inch springform pan and bake 10‑12 min at 175 °C.
- 2 While the crust cools, whisk milk, cocoa powder, and half the sugar; heat until steaming.
- 3 Combine cornstarch, remaining sugar, and egg yolks; temper with hot milk mixture.
- 4 Return the mixture to the stove; cook, stirring, until thickened and bubbling.
- 5 Remove from heat; stir in chopped dark chocolate, vanilla, and a pinch of salt until smooth.
- 6 Pour custard into the cooled crust; smooth surface and chill for at least 3 hours.
- 7 Whip heavy cream with powdered sugar and vanilla until soft peaks form.
- 8 Spread whipped cream over chilled pie; garnish with chocolate shavings.
- 9 Slice with a warm knife for clean edges; serve immediately or at room temperature.
- 10 Enjoy with suggested pairings and share your experience!