Picture this: a rainy Saturday afternoon, the kitchen lights dimming to a soft glow, and the scent of garlic and thyme already drifting from a pot that’s about to transform your dinner routine. I was in a culinary crisis—my usual chicken recipe had turned dry, and my pantry was a lonely list of forgotten staples. That’s when I decided to give the Instant Pot a chance, armed with nothing but a few bold ingredients and an unshakable belief that this could be the best version of a classic. The result? A dish that practically leans against the counter, dripping with savory juices and the promise of a crowd‑pleasing meal that’s both effortless and unforgettable.
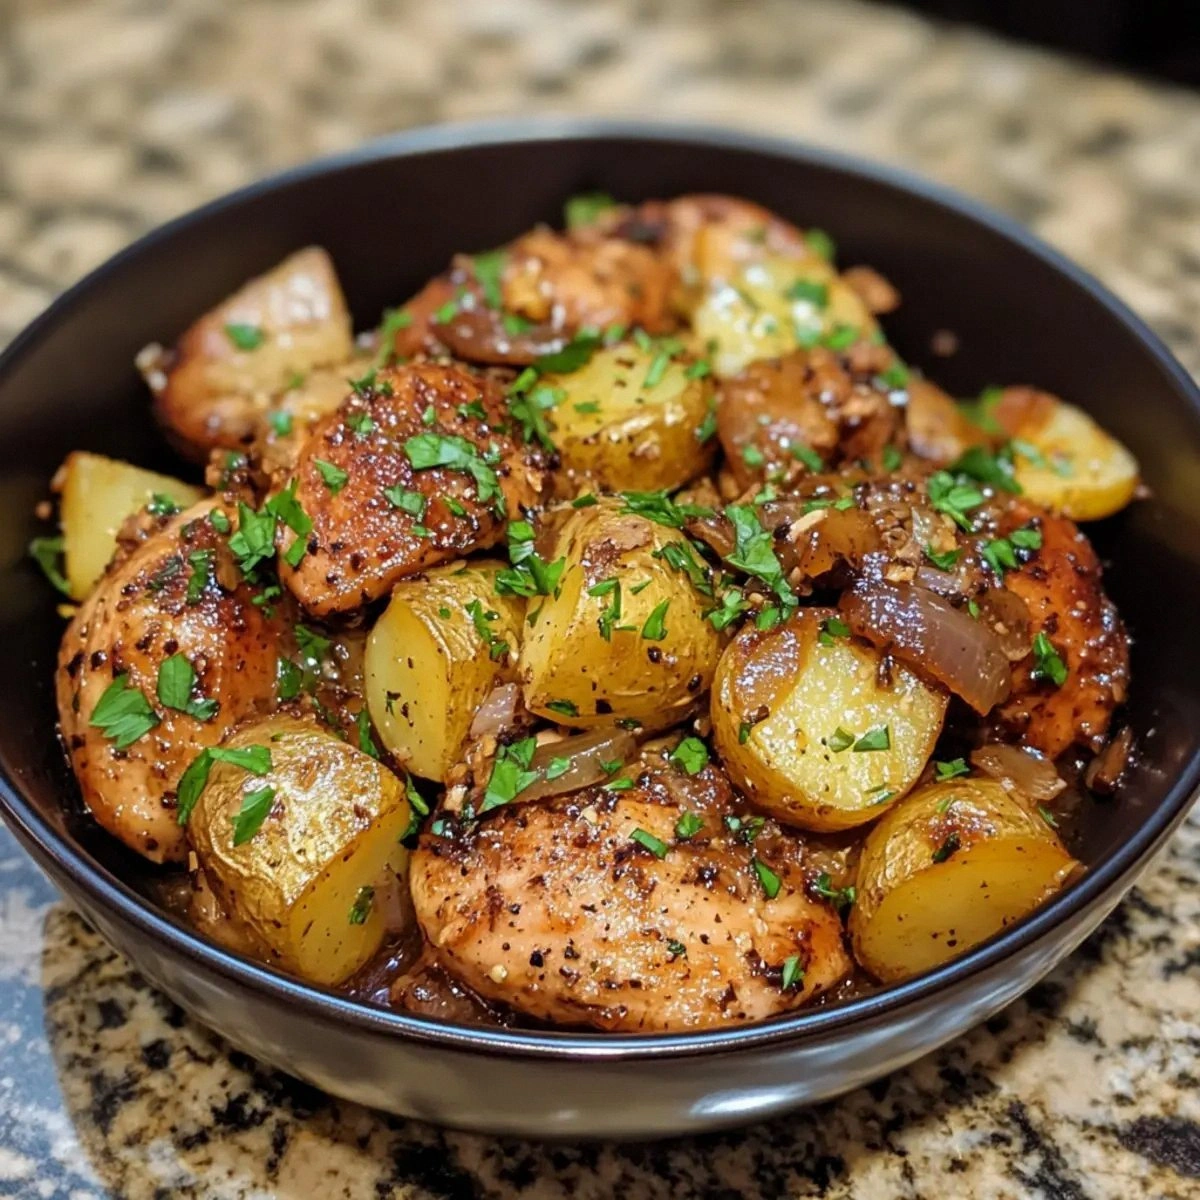
Let’s walk through the sensory journey: the first bite is a burst of roasted garlic that coats the palate like velvet, followed by the tender, bone‑in, skin‑on thighs that crackle when you bite into them, releasing a savory, almost buttery aroma. The baby potatoes are a buttery, caramelized canvas that soak up every drop of the sauce, while the fresh parsley adds a bright, almost citrusy lift that keeps the dish from feeling heavy. The lemon wedges at the end are the final flourish, a splash of acidity that cuts through the richness and leaves the tongue tingling. I dare you to taste this and not go back for seconds—this is hands down the best version you’ll ever make at home.
What makes this recipe stand out isn’t just the flavor—it’s the method. The Instant Pot does the heavy lifting, but the technique we’ll use ensures the chicken remains juicy, the potatoes stay whole, and the sauce thickens into a silky, glossy coating. Most recipes get this completely wrong, either overcooking the chicken or under‑seasoning the broth. Here’s what actually works: a quick sear, a measured broth, and a final sauté to caramelize the garlic. Picture yourself pulling this out of the pot, the whole kitchen smelling incredible, and the table already filled with eager faces. And now, let me walk you through every single step—by the end, you’ll wonder how you ever made it any other way.
I’ll be honest—when I first tried this, I ate half the batch before anyone else got a chance to try a bite. The flavors were so addictive that I found myself reaching for the next spoonful even after the timer dinged. That’s why I’m here to share the exact process, the hidden tricks, and the little hacks that elevate this dish from simple to spectacular. If you’ve ever struggled with chicken that turns out dry or potatoes that fall apart in the pot, you’re not alone—and I’ve got the fix. Let’s dive in.
What Makes This Version Stand Out
- Taste: The combination of garlic, thyme, and paprika creates a depth of flavor that feels both familiar and adventurous. The garlic is caramelized to a golden brown, giving it a sweet, nutty undertone that balances the savory chicken.
- Texture: The Instant Pot locks in moisture, leaving the chicken thighs tender and the potatoes perfectly crisp on the outside, yet soft inside. The sauce coats the ingredients like a glossy, silky glaze.
- Ease: With minimal prep and a single pot, you can have a restaurant‑quality meal ready in under an hour. No need for a stovetop sauté or a separate baking sheet.
- Uniqueness: The addition of fresh parsley and lemon wedges gives the dish a bright, almost citrusy finish that sets it apart from ordinary garlicky chicken recipes.
- Crowd‑pleaser: This recipe is perfect for family dinners, date nights, or feeding a small crowd. The flavors are bold yet balanced, ensuring everyone leaves satisfied.
- Ingredient Quality: Using bone‑in, skin‑on thighs adds flavor and keeps the meat juicy. The baby potatoes are small, so they cook evenly and absorb the sauce beautifully.
- Make‑ahead Potential: The dish can be made ahead, refrigerated, or frozen, and reheats beautifully without losing flavor or texture.
- Versatility: Swap the chicken for turkey, add a splash of white wine, or throw in a handful of spinach for an extra green boost.
Alright, let’s break down exactly what goes into this masterpiece…
Inside the Ingredient List
The Flavor Base
The olive oil isn’t just a cooking medium; it’s a flavor carrier that helps the garlic and spices bloom. Drizzle it over the chicken before searing, and watch how the oil lifts the aromas. Skipping the oil will result in a dry surface, and the garlic will stick to the pot. If you’re watching calories, a tablespoon of olive oil still provides the same flavor boost without the extra fat.
The Texture Crew
Baby potatoes are the unsung heroes of this dish. Their small size allows them to cook quickly and absorb the savory broth, becoming tender yet retaining a slight bite. If you can’t find baby potatoes, quartered Yukon Golds work fine, but they’ll take a minute longer to soften. Don’t pre‑boil them—this keeps the Instant Pot’s pressure cooking power intact.
The Unexpected Star
Fresh parsley isn’t just a garnish; it’s a burst of freshness that cuts through the richness. It also adds a subtle herbal note that complements the thyme. If parsley isn’t available, a handful of chopped cilantro or basil will give a different but equally delightful twist.
The Final Flourish
The lemon wedges are the finishing touch that brings brightness and a hint of acidity, balancing the savory flavors. Squeeze the juice into the pot after the pressure release, and let the zest mingle with the sauce. If you’re not a fan of lemon, a splash of white wine or a squeeze of lime can work as a substitute.
Everything's prepped? Good. Let's get into the real action…
The Method — Step by Step
- Prep the Pot: Turn the Instant Pot on to the “Sauté” function and let it heat up. Add the olive oil and swirl to coat the bottom. This step is crucial; if the oil doesn’t coat the surface, the chicken will stick and burn. When the oil shimmers, the pot is ready for the next step.
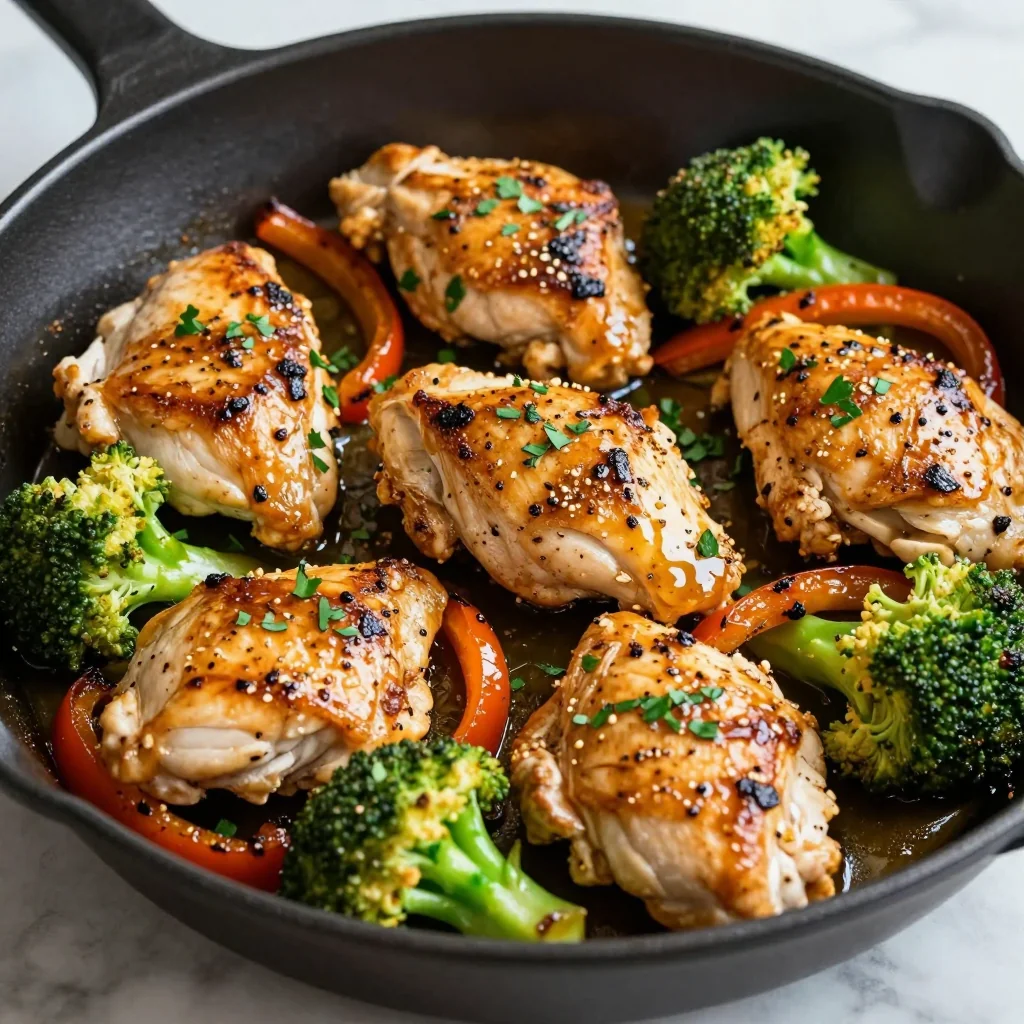
- Season & Sear: Pat the chicken thighs dry with paper towels—this helps the skin crisp up. Sprinkle salt, pepper, paprika, and dried thyme over both sides. Place the thighs skin‑side down in the pot, leaving a little space between each piece. Sear for 3–4 minutes until the skin turns a deep golden brown. Flip and sear the other side for 2 minutes. The searing step locks in juices and builds flavor.
- Garlic Infusion: Add the minced garlic to the pot and stir quickly to coat it with oil. Cook for 30 seconds until fragrant—watch the color change, but don’t let it burn. The garlic’s bitterness will mellow into a sweet, nutty aroma that permeates the dish.
- Layer the Pot: Push the chicken thighs back into the pot, skin side up. Scatter the baby potatoes around the chicken, making sure they’re not buried in liquid. Pour in the chicken broth, ensuring the liquid covers about half the height of the potatoes. The broth will become the flavorful sauce that coats everything.
- Seal & Cook: Close the lid, set the valve to “Sealing,” and select the “Manual” or “Pressure Cook” setting at high pressure for 10 minutes. The timer will count down once the pot reaches pressure. After the cycle ends, let the pressure release naturally for 5 minutes, then quick‑release any remaining pressure.
- Finish the Sauce: Once the pressure is fully released, open the lid and switch the Instant Pot back to “Sauté.” Turn the heat to medium and let the liquid reduce for about 5–7 minutes, stirring occasionally. The sauce should thicken into a glossy, velvety coating. If it’s too thin, let it simmer a bit longer; if it’s too thick, add a splash of broth or water.
- Final Touches: Sprinkle fresh parsley over the dish and squeeze the lemon wedges, letting the juice mingle with the sauce. Toss gently to distribute the bright citrus notes. The dish should look glossy, the potatoes should be tender with a slight crisp, and the chicken skin should be golden and slightly caramelized.
- Serve: Plate the chicken thighs on a warm platter, nestle the potatoes around them, and drizzle the remaining sauce over the top. Garnish with extra parsley or lemon wedges if desired. The aroma alone will have your guests begging for seconds.
That’s it—you did it. But hold on, I've got a few more tricks that'll take this to another level…
Insider Tricks for Flawless Results
The Temperature Rule Nobody Follows
Many people think any high pressure works, but the Instant Pot’s “High” setting is actually 11.6 psi. This level is perfect for chicken thighs, ensuring they stay moist without overcooking the potatoes. If you’re using a different pressure cooker, aim for a pressure between 10–12 psi for similar results.
Why Your Nose Knows Best
During the sauté step, pay close attention to the aroma. When the garlic turns a deep amber and the chicken skin starts to crackle, it’s a clear sign that the flavors are developing. If the scent is faint, give it a minute longer; if it’s burning, lower the heat immediately.
The 5‑Minute Rest That Changes Everything
After the pressure cycle, let the pot sit for 5 minutes before quick‑releasing. This allows the steam to settle, preventing a sudden rush of liquid that can splash and create a mess. It also gives the chicken juices a chance to redistribute, ensuring each bite is succulent.
Don’t Skip the Sealing Seal
A loose sealing ring can cause the broth to escape, resulting in a dry dish. Make sure the ring is snug and the valve is properly set. If you notice any gurgling before the cycle starts, adjust the seal immediately.
Keep the Pot Clean
After cooking, rinse the inner pot with warm water and a gentle sponge. The garlic and oil residue can clog the pressure release valve if not cleaned promptly. A clean pot ensures consistent pressure in future batches.
Creative Twists and Variations
This recipe is a playground. Here are some of my favorite ways to switch things up:
Smoky Chipotle Version
Add a tablespoon of chipotle powder to the seasoning mix for a smoky kick. The chipotle pairs beautifully with the garlic and paprika, giving the dish a bold, slightly spicy profile that’s perfect for adventurous palates.
Herb‑Infused Rosemary
Replace the dried thyme with fresh rosemary leaves. The rosemary’s piney aroma complements the lemon zest, creating a Mediterranean vibe that feels fresh and bright.
Sweet & Savory Maple Glaze
Stir in a tablespoon of pure maple syrup during the sauce reduction. The natural sweetness caramelizes with the garlic, producing a glossy glaze that’s irresistibly sweet.
Crispy Parmesan Crust
Sprinkle grated Parmesan over the chicken before the final sauté. The cheese melts into a golden crust that adds a savory crunch and a subtle nutty flavor.
Vegetarian Potatoes Only
Omit the chicken and double the potatoes, adding a cup of vegetable broth instead of chicken broth. Toss with the same spices, and you’ll have a hearty, savory potato dish that’s satisfying on its own.
Thai Twist with Coconut
Swap the chicken broth for coconut milk and add a teaspoon of curry paste during the sauté. The coconut milk adds creaminess, while the curry paste introduces a fragrant, aromatic depth that transports you to Thailand.
Storing and Bringing It Back to Life
Fridge Storage
Cool the dish completely before placing it in an airtight container. Store in the refrigerator for up to 3 days. The flavors continue to meld, making it even more delicious the next day.
Freezer Friendly
For longer storage, divide the dish into portioned containers and freeze for up to 2 months. When ready to eat, thaw overnight in the fridge and reheat gently.
Best Reheating Method
Reheat in the microwave for 2–3 minutes, then finish on the stovetop with a splash of water or broth. Adding a tiny splash of water before reheating steams the dish back to perfection, keeping the chicken juicy and the sauce silky.